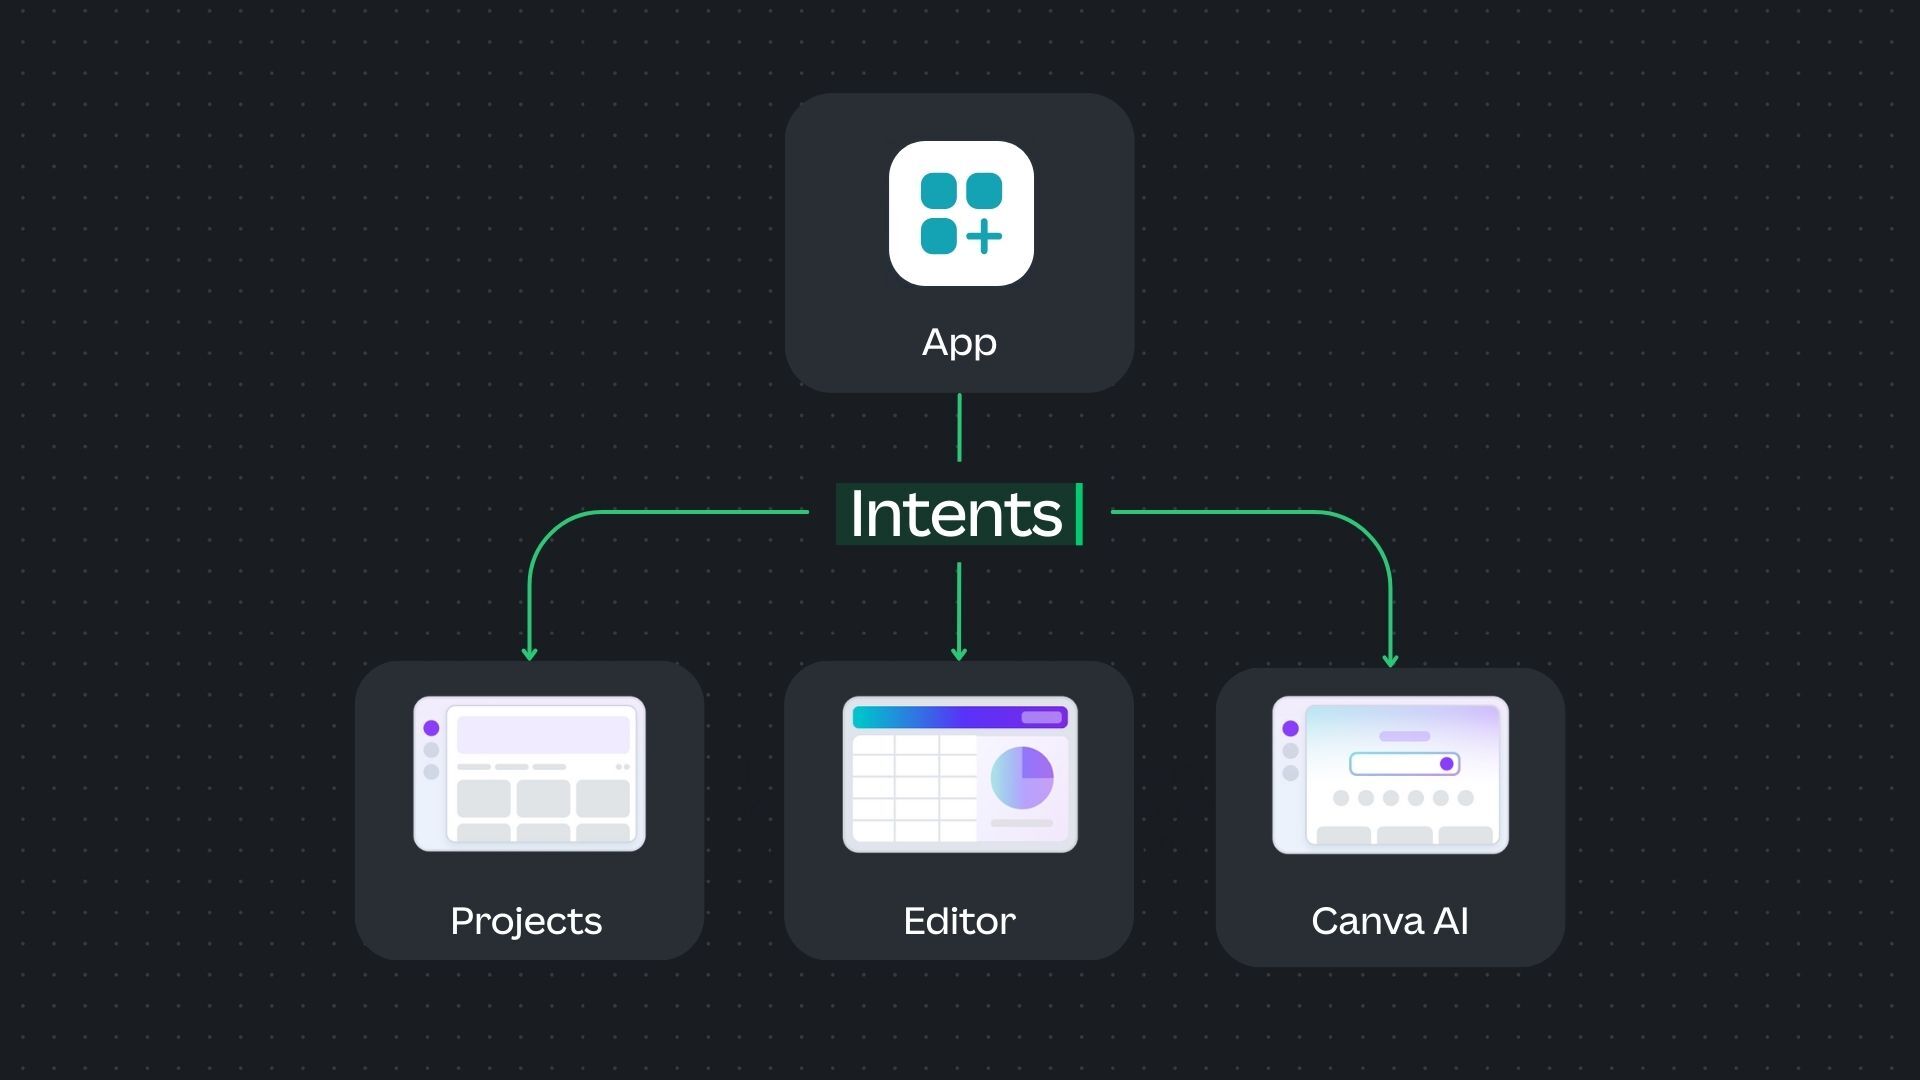
Intents
The next generation of Canva Apps are based on intents. In the Apps SDK, an intent represents a contract that enables your app to be discovered and used throughout Canva. Each intent defines a specific set of actions your app must implement to integrate with Canva's workflows. An app can implement one or multiple intents to provide different capabilities.
All new apps must implement at least one intent. For existing apps that were created before the introduction of intents, we recommend migrating to use an intent.
Think of intents like plug-and-play capabilities:
- The app implements the required actions for an intent.
- Canva handles when and where to present the app's functionality to users.
For example, with the Data Connector intent, your app implements two actions: a UI for selecting data and a function to fetch that data. Canva then automatically handles presenting your app in data-related contexts.
Unlike traditional apps that only appear in the side panel of the Canva editor, intent-based apps are surfaced contextually across Canva, wherever your app's capability is relevant to what the user is doing.
Supported intents
The Apps SDK supports various types of intents, each of which hooks into different parts of the Canva experience. To support deep integration with Canva, apps can implement any combination of these intents.
The available intents include:
Additional intents are planned for the future.
Migrating existing apps to use intents
New apps must implement at least one intent. For backwards compatibility, apps that were created before the introduction of intents (and haven't explicitly opted into an intent) default to the Design Editor intent. This means that existing apps don't require any changes to their code or configuration.
For apps that were created before the introduction of intents, we recommend migrating your app to explicitly use the Design Editor intent. The Design Editor intent provides a standardized way to render apps within the Canva editor and ensures better compatibility with future Canva features. For more information, see the Design Editor intent migration guide.
Implementing multiple intents
Apps can implement multiple intents to provide a richer experience and be discoverable in more contexts within Canva. Each intent operates independently, allowing users to interact with your app in different ways based on the context. Things like authentication, settings, and data management can be common across multiple intents to provide a seamless user experience.
When implementing multiple intents, ensure that each intent's logic is clearly separated to avoid unintended side effects. See the Code organization section below for recommended practices on structuring your code when working with multiple intents, as well as the multiple intents example app for a practical demonstration.
Technical requirements
When an app supports intents, the following requirements apply:
- Intents must be registered immediately when the app loads.
- Intents must be registered synchronously.
- The app must not immediately render UI.
- The app must not create global state.
Code organization
When building apps with intents, it's important to organize your code in a way that clearly separates each intent's logic to avoid unintended side effects.
Recommended file structure
When implementing intents, you should organize your code with a dedicated folder for each intent.
src/├── intents/│ ├── design_editor/│ │ ├── index.tsx│ │ └── editor_app.tsx│ └── content_publisher/│ ├── index.tsx│ ├── preview_ui.tsx│ └── setting_ui.tsx└── index.tsx
Each intent folder contains:
- A
index.tsxfile that implements the contract for that intent. - Intent-specific components and logic.
The Canva CLI and other tools (including migration tools) assume your app has this file structure, even for a single intent. If your app implements only a single intent, we still recommend following this structure for compatibility and future scalability.
Root index file
The root src/index.tsx file is the application entrypoint that calls the prepare function for each enabled intent.
import { prepareContentPublisher } from "@canva/intents/content";import { prepareDesignEditor } from "@canva/intents/design";import contentPublisher from "./intents/content_publisher";import designEditor from "./intents/design_editor";prepareContentPublisher(contentPublisher);prepareDesignEditor(designEditor);
This approach:
- Keeps the entrypoint clean and focused
- Makes it easy to add or remove intents
- Clearly separates each intent's implementation
Intent-specific files
Each intent's index.tsx file should:
- Import dependencies, including the App UI kit CSS.
- Implement the full contract for the intent and use this as the default export from the file.
Example: Design Editor intent
// src/intents/design_editor/index.tsximport "@canva/app-ui-kit/styles.css";import type { DesignEditorIntent } from "@canva/intents/design";import { prepareDesignEditor } from "@canva/intents/design";import { AppI18nProvider } from "@canva/app-i18n-kit";import { AppUiProvider } from "@canva/app-ui-kit";import { createRoot } from "react-dom/client";import { App } from "./app";async function render() {const root = createRoot(document.getElementById("root") as Element);root.render(<AppI18nProvider><AppUiProvider><App /></AppUiProvider></AppI18nProvider>,);}const designEditor: DesignEditorIntent = { render };export default designEditor;if (module.hot) {module.hot.accept("./app", render);}
Example: Content Publisher intent
// src/intents/content_publisher/index.tsximport type { ContentPublisherIntent } from "@canva/intents/content";import { prepareContentPublisher } from "@canva/intents/content";import { createRoot } from "react-dom/client";import { AppUiProvider } from "@canva/app-ui-kit";import { PreviewUi } from "./preview_ui";import { SettingUi } from "./setting_ui";const contentPublisher: ContentPublisherIntent = {renderSettingsUi: ({ updatePublishSettings, registerOnSettingsUiContextChange }) => {const root = createRoot(document.getElementById("root") as Element);root.render(<AppUiProvider><SettingUiupdatePublishSettings={updatePublishSettings}registerOnSettingsUiContextChange={registerOnSettingsUiContextChange}/></AppUiProvider>);},renderPreviewUi: ({ registerOnPreviewChange }) => {const root = createRoot(document.getElementById("root") as Element);root.render(<AppUiProvider><PreviewUi registerOnPreviewChange={registerOnPreviewChange} /></AppUiProvider>);},getPublishConfiguration: async () => {return {status: "completed",outputTypes: [{id: "post",displayName: "Feed Post",mediaSlots: [{id: "media",displayName: "Media",required: true,fileCount: { exact: 1 },accepts: {image: {format: "png",aspectRatio: { min: 4 / 5, max: 1.91 / 1 },},},},],},],};},publishContent: async (params) => {return {status: "completed",externalId: "1234567890",externalUrl: "https://example.com/posts/1234567890",};},};export default contentPublisher;
Avoiding side effects
Code at the module level (outside of intent actions) should only import intent implementations and call the prepare function. It shouldn't execute API calls, state initialization, or other async operations.
Side effects should only occur within intent actions (such as render, getDataTable, and so on).
import { auth } from "@canva/user";// Don't do this - side effects execute immediately on importconst oauth = auth.initOauth();const queryParams = new Map([['custom_param', 'custom_value']]);const response = await oauth.requestAuthorization({ queryParams });prepareDesignEditor({render() {// ...}});
import { auth } from "@canva/user";prepareDesignEditor({async render() {// Side effects safely contained within the actionconst oauth = auth.initOauth();const queryParams = new Map([['custom_param', 'custom_value']]);const response = await oauth.requestAuthorization({ queryParams });// ...}});
import { auth } from "@canva/user";prepareDesignEditor({async render() {const oauth = auth.initOauth();const queryParams = new Map([['custom_param', 'custom_value']]);const App = () => {const login = async () => {const response = await oauth.requestAuthorization({ queryParams });};return (<div>Here's a preview of the features this amazing app provides<button onClick={login}>Login</button></div>);};reactRoot.render(<App />);}});
This ensures that:
- Intents can be loaded and registered quickly.
- Side effects only execute when Canva invokes the intent actions.
- Your app remains responsive and doesn't block initialization.