On September 25th, 2024, we released v2 of the Apps SDK. To learn what’s new and how to upgrade, see Migration FAQ and Migration guide.

Data Connector

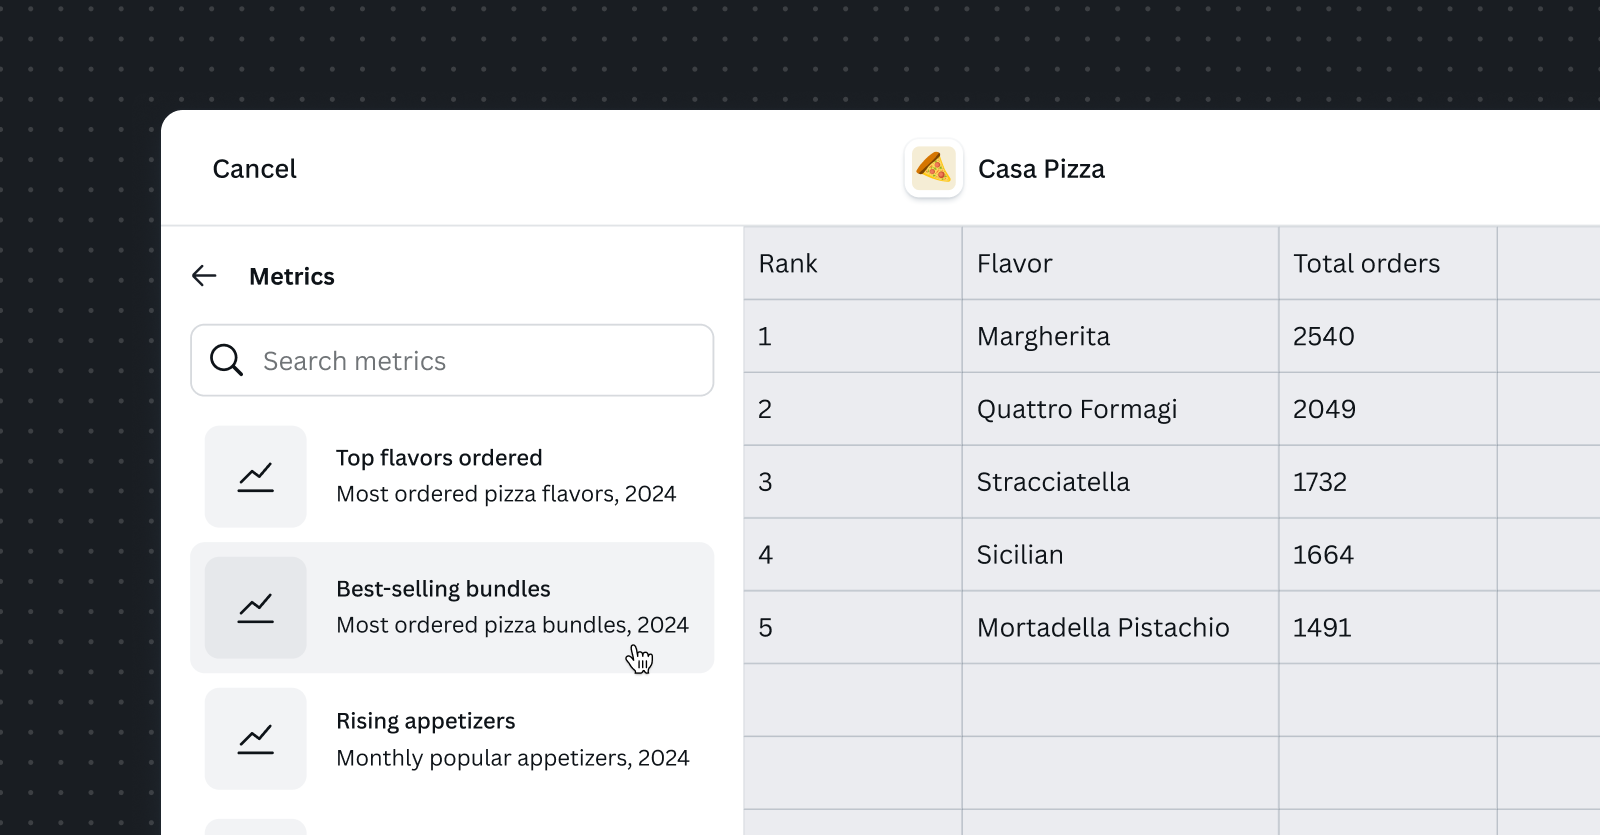
Create apps that import data from external sources.

This API is in preview mode and may experience breaking changes. Apps that use this API will not pass the review process and can't be made available on the Apps Marketplace.

The Data Connector intent enables users to:

  1. Import data from external sources into Canva.
  2. Use that data within design workflows, such as within sheets.
  3. Refresh previously imported data to keep it updated.

Developing a Data Connector intent

The following steps outline how to implement the Data Connector intent.

Step 1: Enable the Data Connector intent

  1. Navigate to an app via the Your apps(opens in a new tab or window) page
  2. On the Configuration page, find the Intents section
  3. Toggle Data Connector to the On position

Step 2: Enable the required permissions

In the Developer Portal, enable the following permissions:

  • canva:design:content:read
  • canva:design:content:write

The Apps SDK will throw an error if the required permissions are not enabled.

To learn more, see Configuring permissions.

Step 3: Register the Data Connector intent

Before an intent can be implemented, it needs to be registered. For Data Connectors, registration establishes how data is fetched and what UI to display for selecting and filtering data.

To register the intent, call the prepareDataConnector method as soon as the app loads:

import { prepareDataConnector } from "@canva/intents/data";
prepareDataConnector({
fetchDataTable: async (params) => {
// Implement the logic to fetch the data table
},
renderSelectionUi: (params) => {
// Implement the UI for the data table selection
},
});
TS

Intents must only be registered once. To learn more, see Technical requirements.

Step 4: Render the data selection UI

When a user initiates a data import flow, the intent must use the renderSelectionUi method to render a UI that allows the user to select and filter the data that will be imported. This method receives a params object that contains properties for rendering the UI and implementing the data import flow.

import { useState } from "react";
import { createRoot } from "react-dom/client";
import {
prepareDataConnector,
type RenderSelectionUiParams,
} from "@canva/intents/data";
import {
AppUiProvider,
Rows,
FormField,
CheckboxGroup,
Button,
} from "@canva/app-ui-kit";
prepareDataConnector({
fetchDataTable: async (params) => {
// Implementation will be covered in Step 7
return { status: "completed", dataTable: { rows: [] } };
},
renderSelectionUi: (params) => {
const root = createRoot(document.getElementById("root") as Element);
root.render(
<AppUiProvider>
<SelectionUI {...params} />
</AppUiProvider>
);
},
});
const regions = [
{ label: "North America", value: "na" },
{ label: "Europe", value: "eu" },
{ label: "Asia Pacific", value: "apac" },
{ label: "Latin America", value: "latam" },
];
function SelectionUI(props: RenderSelectionUiParams) {
const [selectedRegions, setSelectedRegions] = useState<string[]>([]);
async function importData() {
// We'll implement this in Step 6
}
return (
<Rows spacing="2u">
<FormField
label="Select regions to include"
control={(props) => (
<CheckboxGroup
options={regions}
value={selectedRegions}
onChange={setSelectedRegions}
{...props}
/>
)}
/>
<Button variant="primary" onClick={importData}>
Import sales data
</Button>
</Rows>
);
}
TSX

Step 5: Create a data reference

When a user selects the data they want to import, the app must create a data source reference.

A data source reference consists of:

  • A source string containing all the information needed to identify and retrieve the data
  • An optional user-friendly title to display in Canva

The source is flexible to accommodate different ways an app may need to fetch data, but these are some examples of what the property could contain:

  • A stringified JSON object of query parameters
  • A unique identifier that points to a record in a database
  • A list of comma-separated values

The following example demonstrates how to create a data source reference from a stringified JSON object:

function SelectionUI(props: RenderSelectionUiParams) {
const [selectedRegions, setSelectedRegions] = useState<string[]>([]);
async function importData() {
const dataSourceRef = {
source: JSON.stringify({ regions: selectedRegions }),
title: "Sales by Region",
};
// We'll implement this next
}
// ... rest of component
}
TSX

Step 6: Store the data reference

To initiate the data import flow, call the updateDataRef callback provided in the params:

async function importData() {
const dataSourceRef = {
source: JSON.stringify({ regions: selectedRegions }),
title: "Sales by Region",
};
try {
const result = await props.updateDataRef(dataSourceRef);
if (result.status === "completed") {
console.log("Data reference updated successfully");
} else {
console.error("Error updating data reference:", result.status);
}
} catch (error) {
console.error("An unexpected error occurred:", error);
}
}
TSX

This method:

  • Stores the data source reference on Canva's servers, enabling the data to be refreshed later
  • Triggers the fetchDataTable method to fetch and preview the data
  • Returns a result indicating success or the specific error that occurred

Step 7: Fetch the requested data

When a data reference is updated, the fetchDataTable method is called. This method is responsible for fetching the requested data and returning it as a data table.

A data table represents tabular data in Canva. Similar to spreadsheets, they're made up of rows, columns, and cells of different types. Before data can be imported into Canva, it must be converted into this structure.

The following example demonstrates how to return a data table with hard-coded data:

fetchDataTable: async (params) => {
const { dataSourceRef, limit } = params;
// Parse the data reference
const queryParams = JSON.parse(dataSourceRef.source);
const selectedRegions = queryParams.regions || [];
// Sample data - in a real app, this would come from an API
const sampleData = [
{ region: "na", name: "North America", sales: 12500 },
{ region: "eu", name: "Europe", sales: 18200 },
{ region: "apac", name: "Asia Pacific", sales: 9800 },
{ region: "latam", name: "Latin America", sales: 6400 },
];
// Filter data based on selected regions
const filteredData =
selectedRegions.length > 0
? sampleData.filter((item) => selectedRegions.includes(item.region))
: sampleData;
// Ensure we don't exceed the row limit
const limitedData = filteredData.slice(0, limit.row);
// Convert to DataTable format
const dataTable = {
columnConfigs: [
{ name: "Region", type: "string" },
{ name: "Sales", type: "number" },
],
rows: limitedData.map((item) => ({
cells: [
{ type: "string", value: item.name },
{
type: "number",
value: item.sales,
metadata: { formatting: "[$$]#,##0.00" },
},
],
})),
};
return {
status: "completed",
dataTable,
metadata: {
description: "Regional sales data",
providerInfo: { name: "Demo Sales API" },
},
};
};
TSX

Handling limits

The params object passed to the fetchDataTable method contains a limit property that specifies the maximum number of rows and columns that can be imported into Canva.

To ensure your data respects these limits, you should limit the number of rows and columns to fit within the allowed constraints:

// Ensure we don't exceed the row limit
const limitedData = filteredData.slice(0, limit.row);
TSX

This approach ensures that your data table stays within Canva's limits while still providing as much data as possible.

Handling errors

If something goes wrong while attempting to fetch data, the app should return an appropriate error object:

  • "outdated_source_ref": The data source reference is no longer valid
  • "remote_request_failed": Network issues or API failures prevented data retrieval
  • "app_error": A custom error occurred in your app

For example:

// When a data source has been deleted
if (isDataSourceDeleted(dataSourceRef)) {
return { status: "outdated_source_ref" };
}
// When network or API failures occur
if (!response.ok) {
return { status: "remote_request_failed" };
}
// For app-specific errors with useful messages
if (!isValidCredentials(apiKey)) {
return {
status: "app_error",
message: "Invalid API credentials. Please reconnect your account.",
};
}
TSX

Step 8: Handle invocation contexts

The invocationContext property that's passed to the renderSelectionUI method provides information about why the data selection UI is being rendered. The possible values include:

  • "data_selection": The user is selecting data for the first time or editing an existing selection
  • "outdated_source_ref": The previously selected data source is no longer valid
  • "app_error": An error occurred during data fetching

Your app must adapt its UI based on these contexts:

function SelectionUI(props: RenderSelectionUiParams) {
const [selectedRegions, setSelectedRegions] = useState<string[]>([]);
const [error, setError] = useState<string | null>(null);
const [loading, setLoading] = useState(false);
// Handle different invocation contexts
useEffect(() => {
const { reason } = props.invocationContext;
switch (reason) {
case "data_selection":
// If there's an existing selection, pre-populate the UI
if (props.invocationContext.dataSourceRef) {
try {
const savedParams = JSON.parse(
props.invocationContext.dataSourceRef.source
);
setSelectedRegions(savedParams.regions || []);
} catch (e) {
setError("Failed to load saved selection");
}
}
break;
case "outdated_source_ref":
setError(
"Your previously selected data is no longer available. Please make a new selection."
);
break;
case "app_error":
setError(
props.invocationContext.message || "An error occurred with your data"
);
break;
}
}, [props.invocationContext]);
async function importData() {
setLoading(true);
setError(null);
const dataRef = {
source: JSON.stringify({ regions: selectedRegions }),
title:
selectedRegions.length > 0
? `Sales for ${selectedRegions.map((r) => regions.find((reg) => reg.value === r)?.label).join(", ")}`
: "All Regional Sales",
};
try {
const result = await props.updateDataRef(dataRef);
if (result.status !== "completed") {
setError(
result.status === "app_error" && "message" in result
? result.message || "An error occurred"
: `Error: ${result.status}`
);
}
} catch (e) {
setError("Failed to update data");
} finally {
setLoading(false);
}
}
return (
<Rows spacing="2u">
{error && <Alert tone="critical" title={error} />}
<FormField
label="Select regions to include"
control={(props) => (
<CheckboxGroup
options={regions}
value={selectedRegions}
onChange={setSelectedRegions}
{...props}
/>
)}
/>
<Button variant="primary" onClick={importData} loading={loading}>
Import sales data
</Button>
</Rows>
);
}
TSX

Security requirements

When developing a Data Connector intent, be mindful of the following security considerations:

  • Implement robust validation and access controls to prevent bypassing of security measures.
  • Validate all data thoroughly to prevent malformed data that could compromise system integrity.
  • Sanitize input data to prevent SQL, script, or command injection that could compromise security.
  • When handling spreadsheet data, implement controls to prevent malicious formulas from executing.
  • Request only necessary permissions to minimize risk from malicious actors impersonating legitimate apps.
  • Exercise caution when your connector accesses sensitive information.
  • Avoid logging sensitive information.
  • Users may have different privacy settings in their data source than in Canva. Help the user understand that their data could become accessible to more users via the Canva design and to maintain appropriate access controls.

Code sample

import { useState, useEffect } from "react";
import { createRoot } from "react-dom/client";
import {
prepareDataConnector,
type RenderSelectionUiParams,
type FetchDataTableParams,
type FetchDataTableResult,
type DataTable,
} from "@canva/intents/data";
import {
AppUiProvider,
Rows,
FormField,
CheckboxGroup,
Button,
Alert,
} from "@canva/app-ui-kit";
const regions = [
{ label: "North America", value: "na" },
{ label: "Europe", value: "eu" },
{ label: "Asia Pacific", value: "apac" },
{ label: "Latin America", value: "latam" },
];
// Sample data that would normally come from an API
const salesData = [
{ region: "na", name: "North America", sales: 12500 },
{ region: "eu", name: "Europe", sales: 18200 },
{ region: "apac", name: "Asia Pacific", sales: 9800 },
{ region: "latam", name: "Latin America", sales: 6400 },
];
prepareDataConnector({
fetchDataTable: async (
params: FetchDataTableParams
): Promise<FetchDataTableResult> => {
const { dataSourceRef, limit } = params;
try {
// Parse the data reference
const queryParams = JSON.parse(dataSourceRef.source);
const selectedRegions = queryParams.regions || [];
// Filter data based on selected regions
const filteredData =
selectedRegions.length > 0
? salesData.filter((item) => selectedRegions.includes(item.region))
: salesData;
// Ensure we don't exceed the row limit
const limitedData = filteredData.slice(0, limit.row);
// Convert to DataTable format
const dataTable: DataTable = {
columnConfigs: [
{ name: "Region", type: "string" },
{ name: "Sales", type: "number" },
],
rows: limitedData.map((item) => ({
cells: [
{ type: "string", value: item.name },
{
type: "number",
value: item.sales,
metadata: { formatting: "[$$]#,##0.00" },
},
],
})),
};
return {
status: "completed",
dataTable,
metadata: {
description: "Regional sales data",
providerInfo: { name: "Demo Sales API" },
},
};
} catch (error) {
return {
status: "app_error",
message: "Failed to process data request",
};
}
},
renderSelectionUi: (params: RenderSelectionUiParams) => {
const rootElement = document.getElementById("root");
const rootElementExists = rootElement instanceof Element;
if (!rootElementExists) {
throw new Error("Unable to find element with id of 'root'");
}
const root = createRoot(rootElement);
root.render(
<AppUiProvider>
<SelectionUI {...params} />
</AppUiProvider>
);
},
});
function SelectionUI(props: RenderSelectionUiParams) {
const [selectedRegions, setSelectedRegions] = useState<string[]>([]);
const [error, setError] = useState<string | null>(null);
const [loading, setLoading] = useState(false);
const [success, setSuccess] = useState(false);
useEffect(() => {
const { reason } = props.invocationContext;
switch (reason) {
case "data_selection":
if (props.invocationContext.dataSourceRef) {
try {
const savedParams = JSON.parse(
props.invocationContext.dataSourceRef.source
);
setSelectedRegions(savedParams.regions || []);
} catch (e) {
setError("Failed to load saved selection");
}
}
break;
case "outdated_source_ref":
setError(
"Your previously selected data is no longer available. Please make a new selection."
);
break;
case "app_error":
setError(
props.invocationContext.message || "An error occurred with your data"
);
break;
}
}, [props.invocationContext]);
async function importData() {
setLoading(true);
setError(null);
setSuccess(false);
const dataRef = {
source: JSON.stringify({ regions: selectedRegions }),
title:
selectedRegions.length > 0
? `Sales for ${selectedRegions.map((r) => regions.find((reg) => reg.value === r)?.label).join(", ")}`
: "All Regional Sales",
};
try {
const result = await props.updateDataRef(dataRef);
if (result.status === "completed") {
setSuccess(true);
} else {
setError(
result.status === "app_error" && "message" in result
? result.message || "An error occurred"
: `Error: ${result.status}`
);
}
} catch (e) {
setError("Failed to update data");
} finally {
setLoading(false);
}
}
return (
<Rows spacing="2u">
{error && <Alert tone="critical" title={error} />}
{success && (
<Alert tone="positive" title="Data preview loaded successfully!" />
)}
<FormField
label="Select regions to include"
control={(props) => (
<CheckboxGroup
options={regions}
value={selectedRegions}
onChange={setSelectedRegions}
{...props}
/>
)}
/>
<Button variant="primary" onClick={importData} loading={loading}>
Import sales data
</Button>
</Rows>
);
}
TSX