Return users to your platform
You can use the Canva REST APIs to send users from your platform to the Canva editor, and return them to your platform when they've finished editing a design.
Workflow
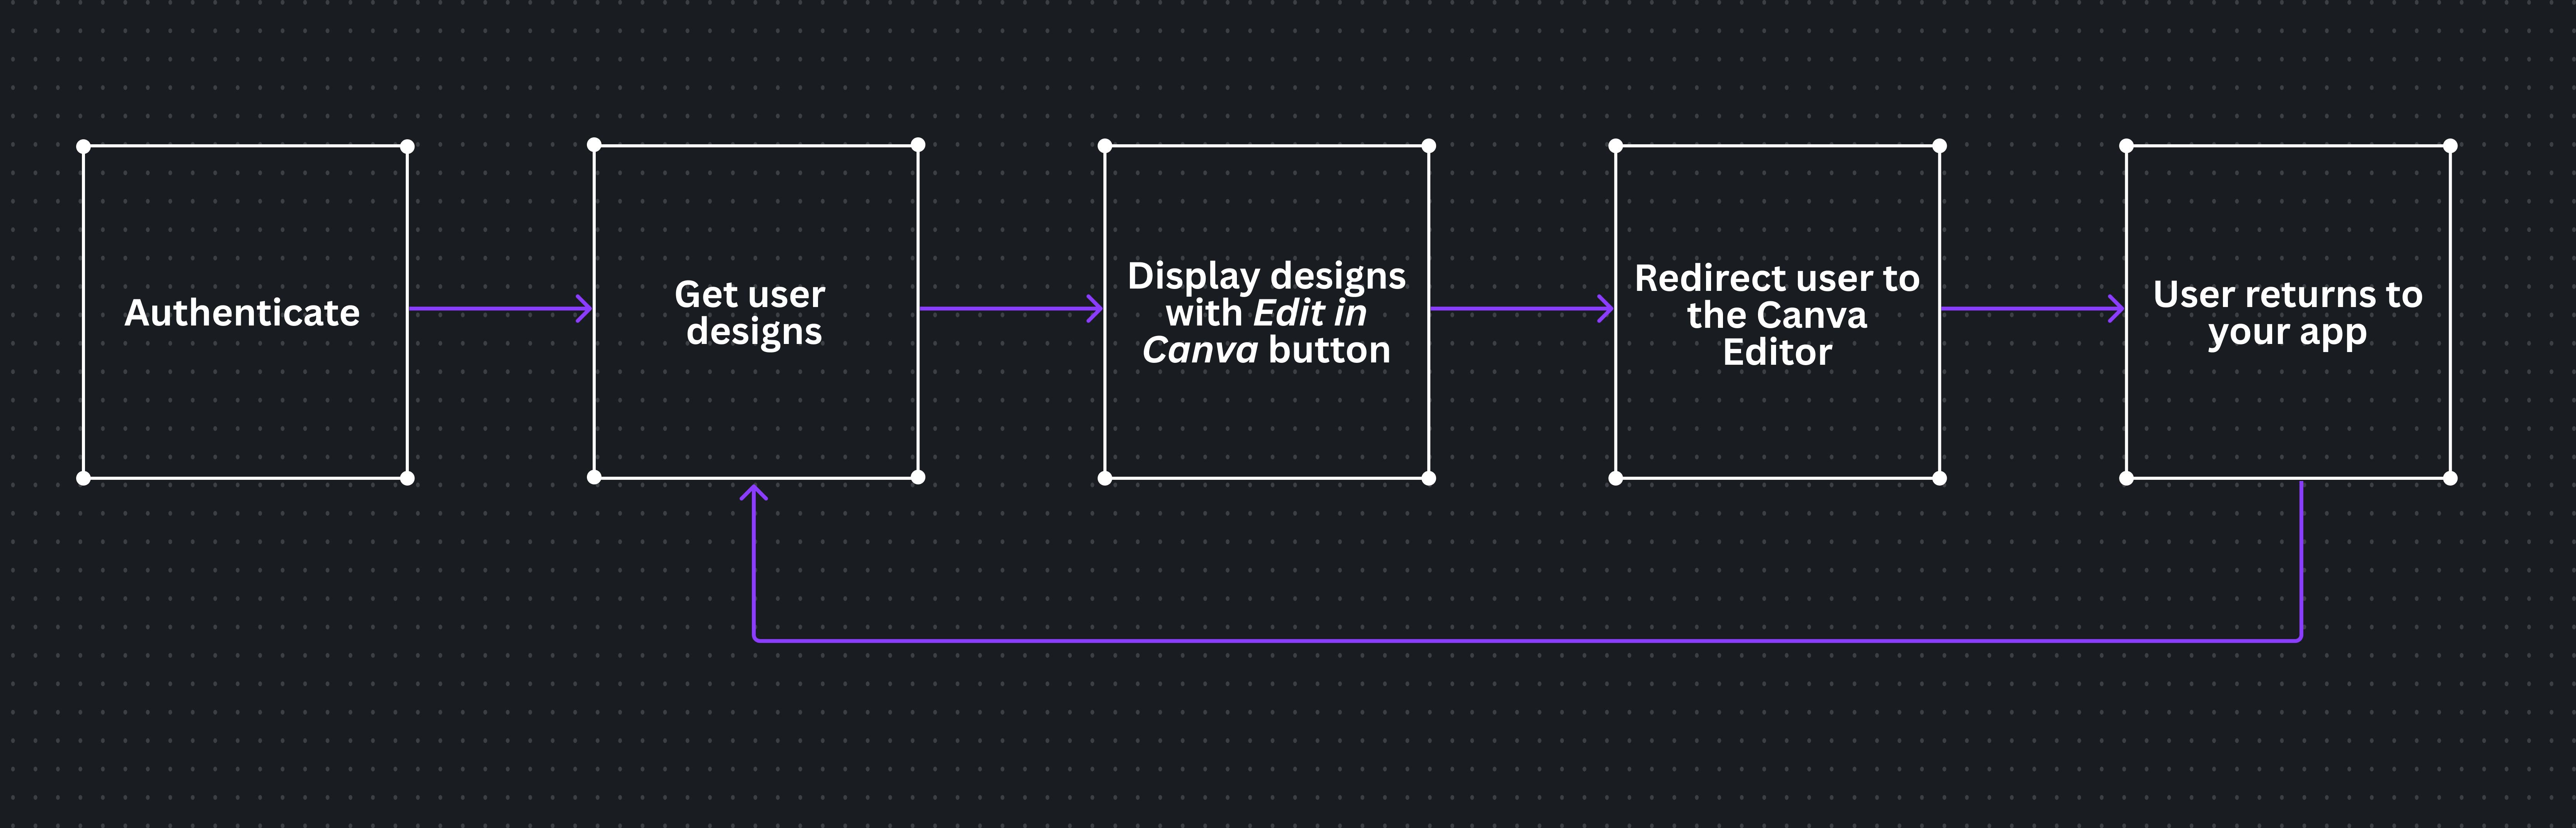
This guide demonstrates how you can direct a user from your platform to edit a design in Canva, and when they've finished editing the design, they can click a button in the Canva UI redirecting them back to your platform.
Your workflow needs to do the following:
- Authenticate and authorize the user with Canva's OAuth flow.
- Query the REST APIs on the user's behalf to get a list of their designs.
- Display the designs with an Edit in Canva button that uses the design's edit URL.
- Redirect the user to the Canva editor.
- Decode Canva's return URL when the user is ready to return to your platform.
- Refresh the displayed designs when the user returns to your platform.
Starter kit
To illustrate how your platform might look, this guide uses screenshots from the e-commerce demo app included in the starter kit for the Canva REST APIs(opens in a new tab or window). We recommend downloading and using this kit as a reference when building your app. The kit requires a working app and includes:
- A React-based e-commerce web app
- An Express.js backend with a mock product database
- A working REST API client
- A working authentication flow
Prerequisites
To complete this guide, you need an account on https://www.canva.com/developers(opens in a new tab or window).
Configure your app
The following steps walk you through creating an app and authenticating a user with OAuth. Skip to Build your workflow if you have an app already and are familiar with the authentication flow.
Step 1. Create an app
- Create an app, and enable the REST APIs on it, using the steps described in Quickstart.
- Your app requires at least one redirect URL, and at least the
design:readanddesign:meta:readscopes. - In the Developer Portal, open your app and go to Outside Canva, then select Configuration. Turn on Return navigation and fill in the required Return URL field.
Step 2. Authenticate with OAuth
-
Follow the Authentication guide to get an authorization code, then generate an access token for your requests. For this process you need:
- Your Client ID.
- Your Client secret.
- A URL-encoded list of your app's scopes.
- One of your nominated redirect URLs.
-
(Optional) If you've already authenticated but your token has expired, you can skip step 1 and request a new token using your refresh token.
When you've successfully authenticated and obtained a bearer token, you can build your workflow.
Build your workflow
The following steps walk you through the process of building your return navigation workflow.
Step 1. Get designs
-
Get a list of the user's designs with a call to the List designs API.
curl --request GET \--url https://api.canva.com/rest/v1/designs \--header 'Authorization: Bearer {TOKEN}'SHELL -
The endpoint's response includes a list of designs in the
itemsarray.{"continuation": "MjU:Kg:UkVMRVZBTkNF:QU5Z","items": [{"id": "{DESIGN_ID}","title": "Beetroot and Spinach Salad","owner": {"user_id": "{USER_ID}","team_id": "{TEAM_ID}"},"doctype_name": "1920px x 1920px","thumbnail": {"width": 447,"height": 447,"url": "{DESIGN_THUMBNAIL_URL}"},"urls": {"edit_url": "https://www.canva.com/api/design/{token}/edit","view_url": "https://www.canva.com/api/design/{token}/view"}}]}JSON
Each design item contains a urls object with edit_url and view_url properties. The URLs are temporary URLs which use the structure https://www.canva.com/api/design/{token}/{edit|view}. The {token} is a unique time-limited token for accessing the design.
The URLs contain everything needed to open the design in the Canva editor.
The urls object is also returned in the response of the Create design API. Instead of directing users to edit an existing design, you could also create a new one then direct them to edit the new design.
Step 2. Build your UI
-
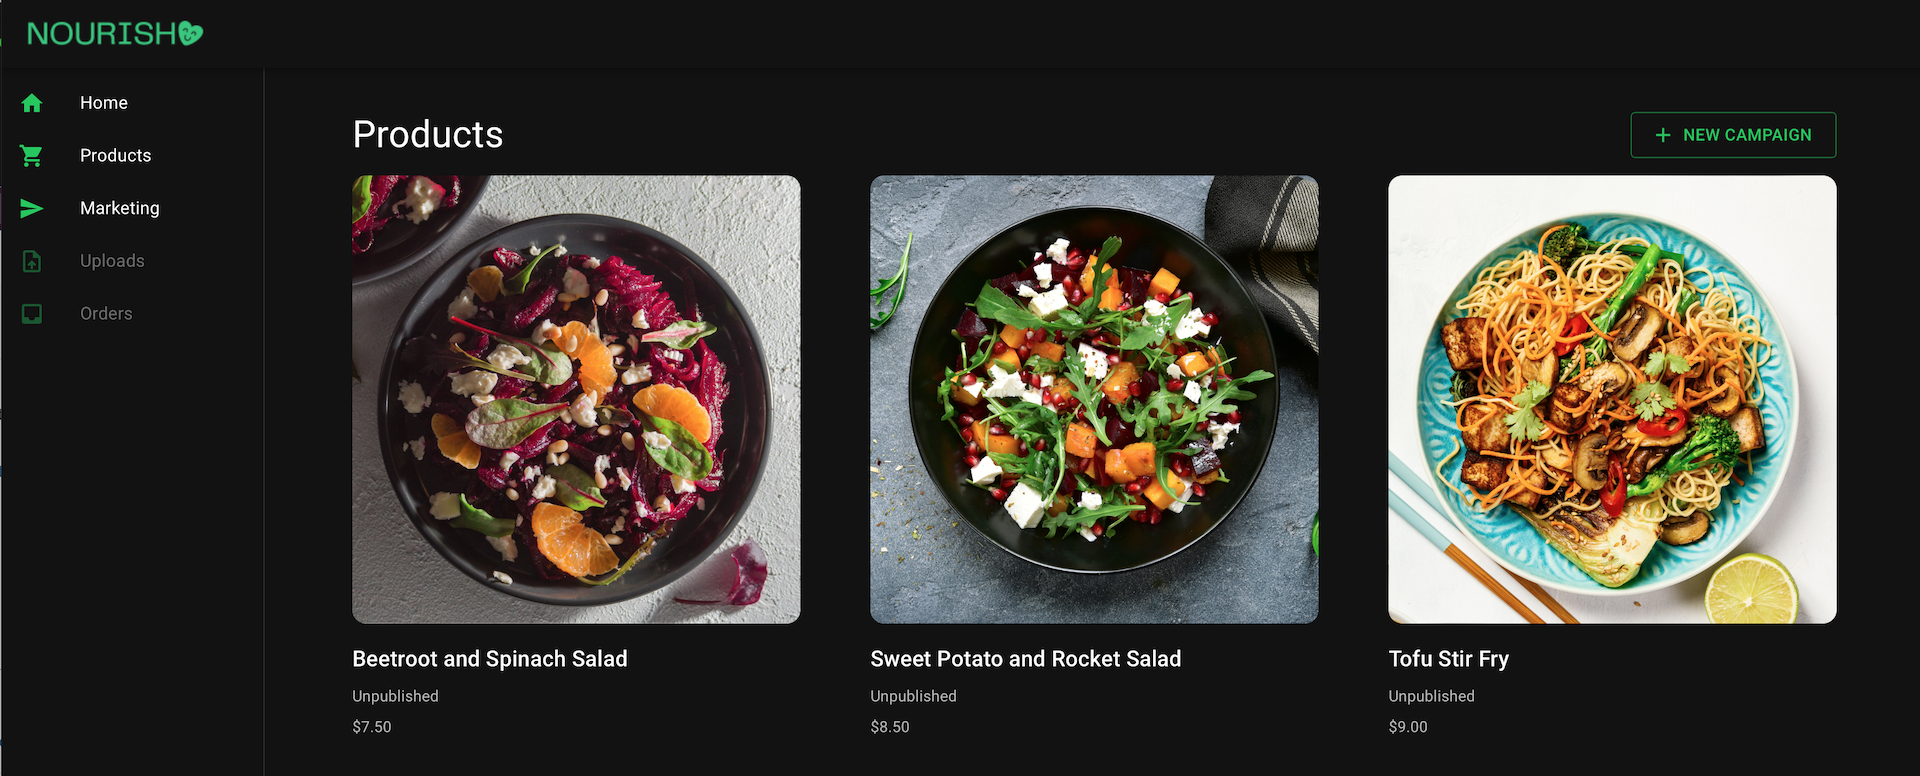
Display your designs.
Each design item's object includes all the data required to display it in your platform. For example, the starter kit uses the item's title and thumbnail URL to display the design in the demo e-commerce web app.
-
Prepare your edit URL.
For each design, create a unique
correlation_statestring that identifies your product or UI state, and append it to the design'sedit_urlas a query parameter. Thecorrelation_statevalue is returned when the user is redirected from Canva back to your platform.The
correlation_statestring has the following requirements:- Must be 50 characters or less.
- Must be URL safe.
- Should include everything you need to redirect your user or update your platform's state.
- Can contain stringified JSON.
https://www.canva.com/api/design/{token}/edit?correlation_state={YOUR-CORRELATION-STATE-STRING}You can optionally add another parameter,
app_id, to open a particular app inside Canva when the design is opened. App IDs are listed in the Developer Portal(opens in a new tab or window).https://www.canva.com/api/design/{token}/edit?correlation_state={YOUR-CORRELATION-STATE-STRING}&app_id={YOUR-APP-ID}If you would like to open an app developed by someone else, or by Canva, app IDs for these apps can be extracted from the app URL:
- Navigate to the Canva Apps Page(opens in a new tab or window).
- Find the app you want to open.
- Click the app. The modal containing app information opens, and the page URL changes.
- Extract the App ID from the URL, which appears after the
/your-apps/segment. For example, if you click the app Acquia DAM (Widen), the URL ishttps://www.canva.com/your-apps/AAFcE5stzlQ/acquia-dam-(widen). The App ID isAAFcE5stzlQ.
Because of the 50 character limit, it might not always be practical to directly store all of the required state information in the
correlation_statestring.In this situation, we recommend that you instead store the state information in a database, and create a unique key (encoded in base64url(opens in a new tab or window)) which identifies the information. You can then pass the key as the
correlation_statevalue, and when the user is redirected from Canva back to your platform, use the key incorrelation_stateto retrieve the state information needed to process the return. -
Add an Edit in Canva button or link using the design's edit URL created in the previous step. When clicked, the button or link navigates your user to the Canva editor and opens their design.
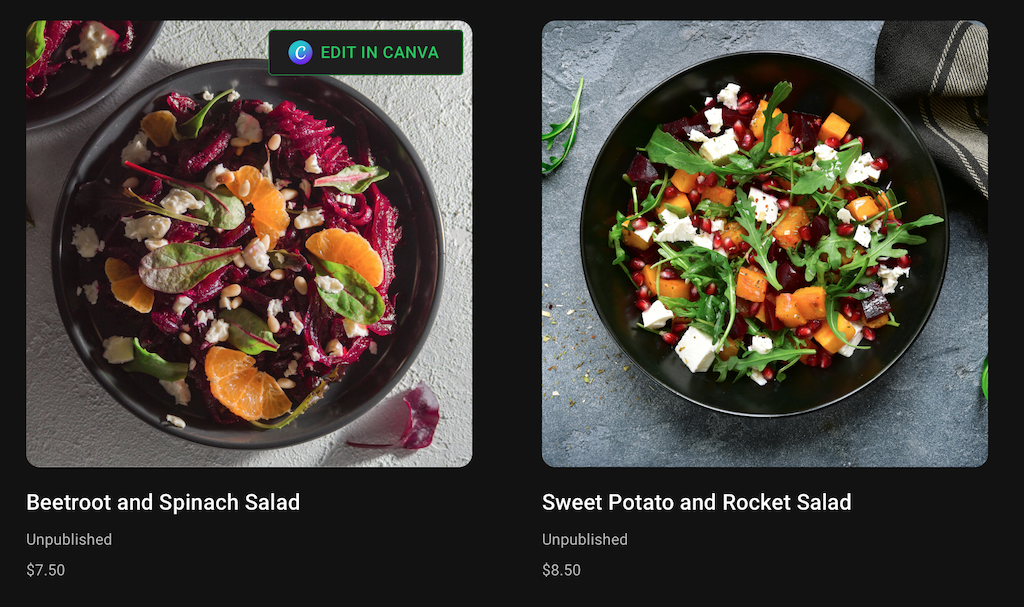
If you use Canva's logo when creating your button or link, make sure you follow Canva's brand guidelines.
-
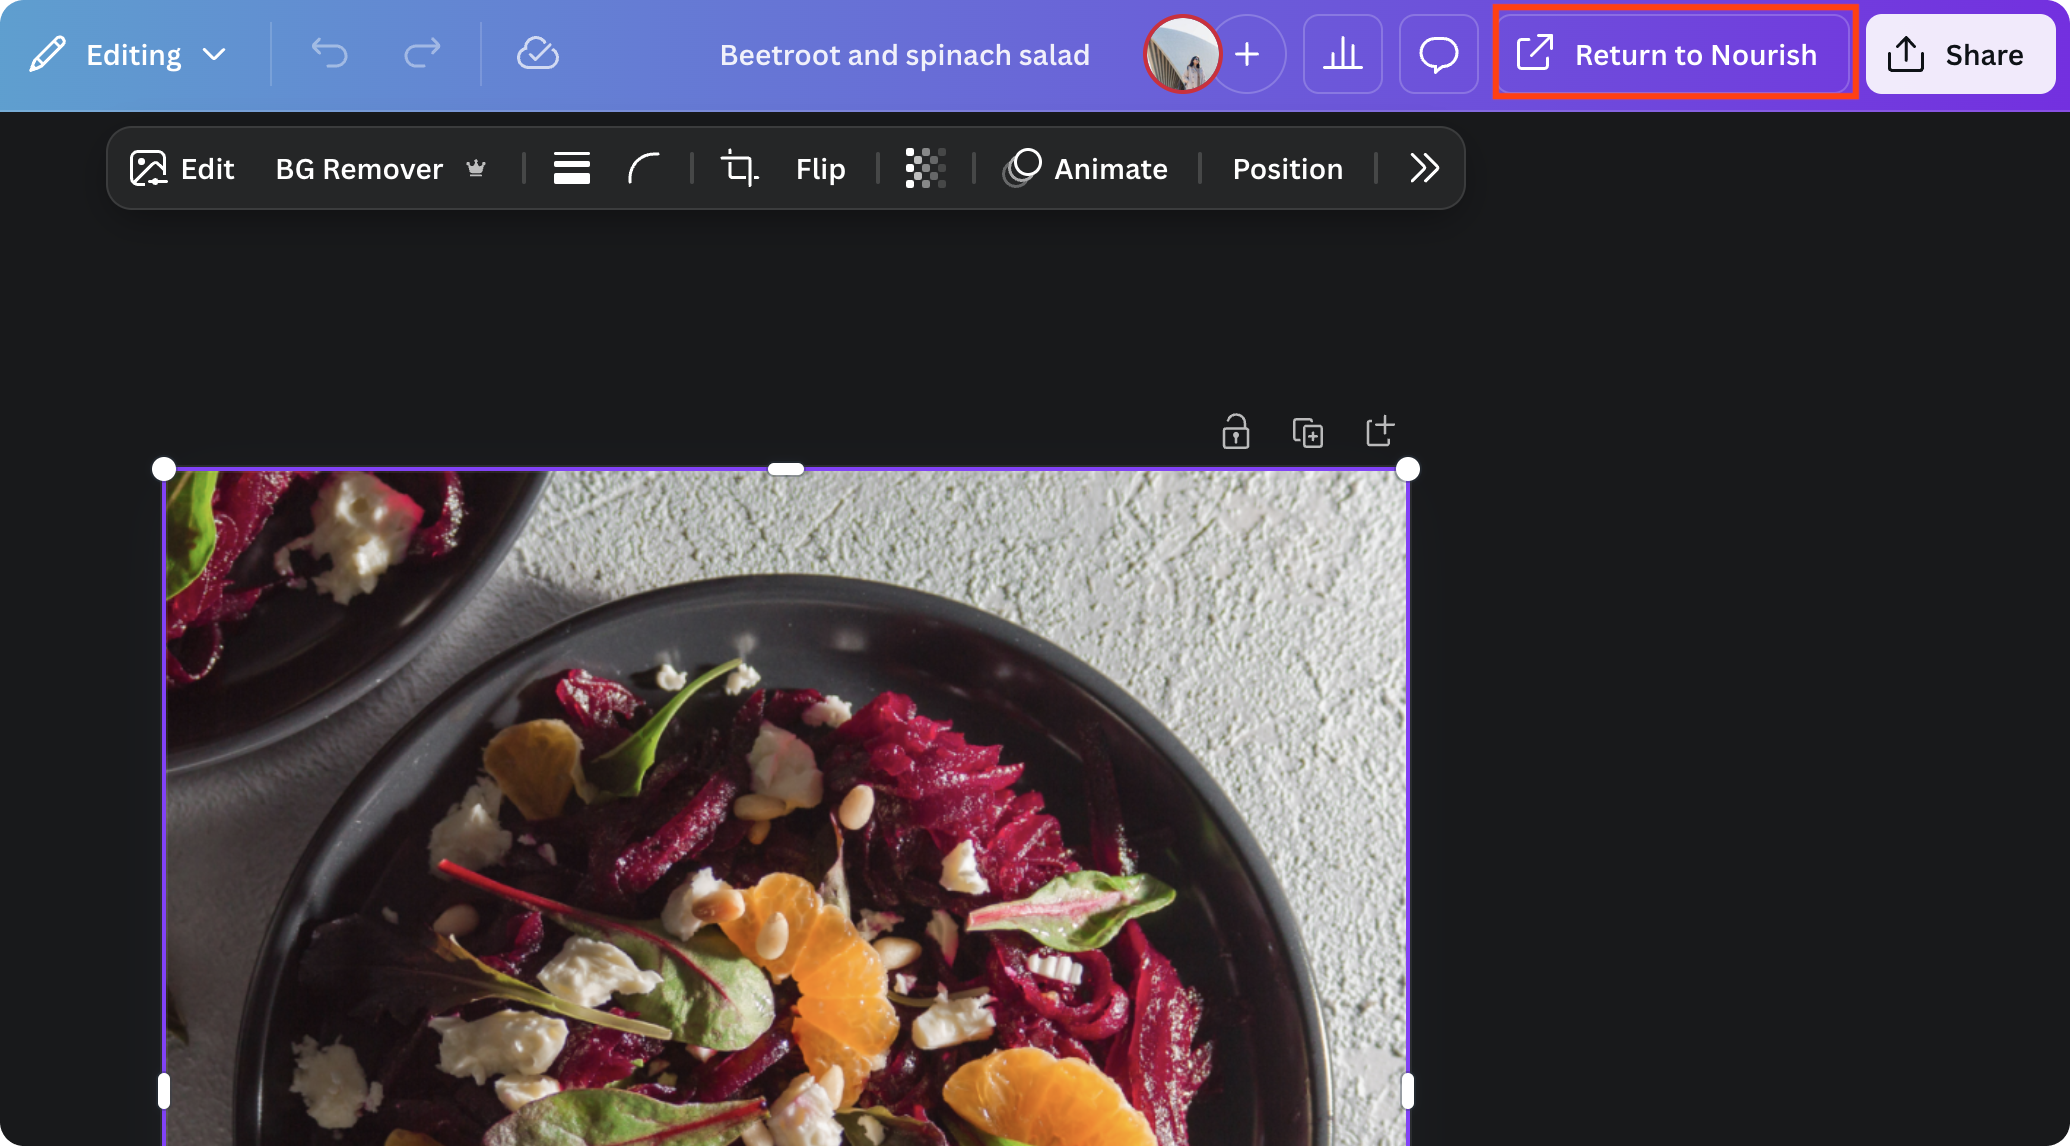
When the user has finished editing their design, they can return to your platform using the Canva editor's Return button.
Step 3. Parse the return URL
When the user has finished editing their design, they can return to your platform using the Canva editor's Return button. To power the button, Canva generates a URL that is your app's return URL appended with a unique correlation_jwt parameter.
-
Intercept the return URL, which is structured as follows.
https://{YOUR_RETURN_URL}?correlation_jwt={CORRELATION_JWT} -
Parse the URL and validate the
correlation_jwtparameter.The
correlation_jwtparameter is a URL-safe, Base64-encoded JSON Web Token (JWT). The JWT contains the following claims:aud: Your app's Client ID.exp: The token expiry. This is 1 day after the design is opened in the Canva editor.sub: The User ID of the user who initiated the return navigation workflow.team_id: The Team ID of the user who initiated the return navigation workflow.type: Set asrti.jti: The token's unique identifier (JWT ID).design_id: The design's ID.correlation_state: Your originalcorrelation_statestring passed to Canva in your prepared edit or view URL.
The JWT is signed using the REST API keys. You should always check the validity of the signature against the public keys provided by the keys API, and check the JWT payload.
You can use your preferred method or library to decode the JWT and verify the JWT payload. The following JavaScript example shows how to fetch Canva's public JSON Web Key Set (JWKS), validate and decode the JWT using
jose(opens in a new tab or window), and return thesub,team_id, andtypefrom the payload:const jose = require('jose');const correlationJwt = '{CORRELATION_JWT}';const canvaKeysUrl = 'https://api.canva.com/rest/v1/connect/keys';async function verifyToken(token) {const JWKS = jose.createRemoteJWKSet(new URL(canvaKeysUrl));const { payload, protectedHeader } = await jose.jwtVerify(token, JWKS, {audience: '{CLIENT_ID}',});return !!protectedHeader&& payload.sub === '{USER_ID}'&& payload.team_id === '{TEAM_ID}'&& payload.type === 'rti'};const isValid = await verifyToken(correlationJwt);console.log(isValid);JAVASCRIPT -
Use the returned
correlation_statevalue to update your platform, or redirect the user as needed.