Autofill designs with data
This guide demonstrates how you can autofill brand templates with your own data to generate dynamic designs in Canva, using the Canva REST APIs.
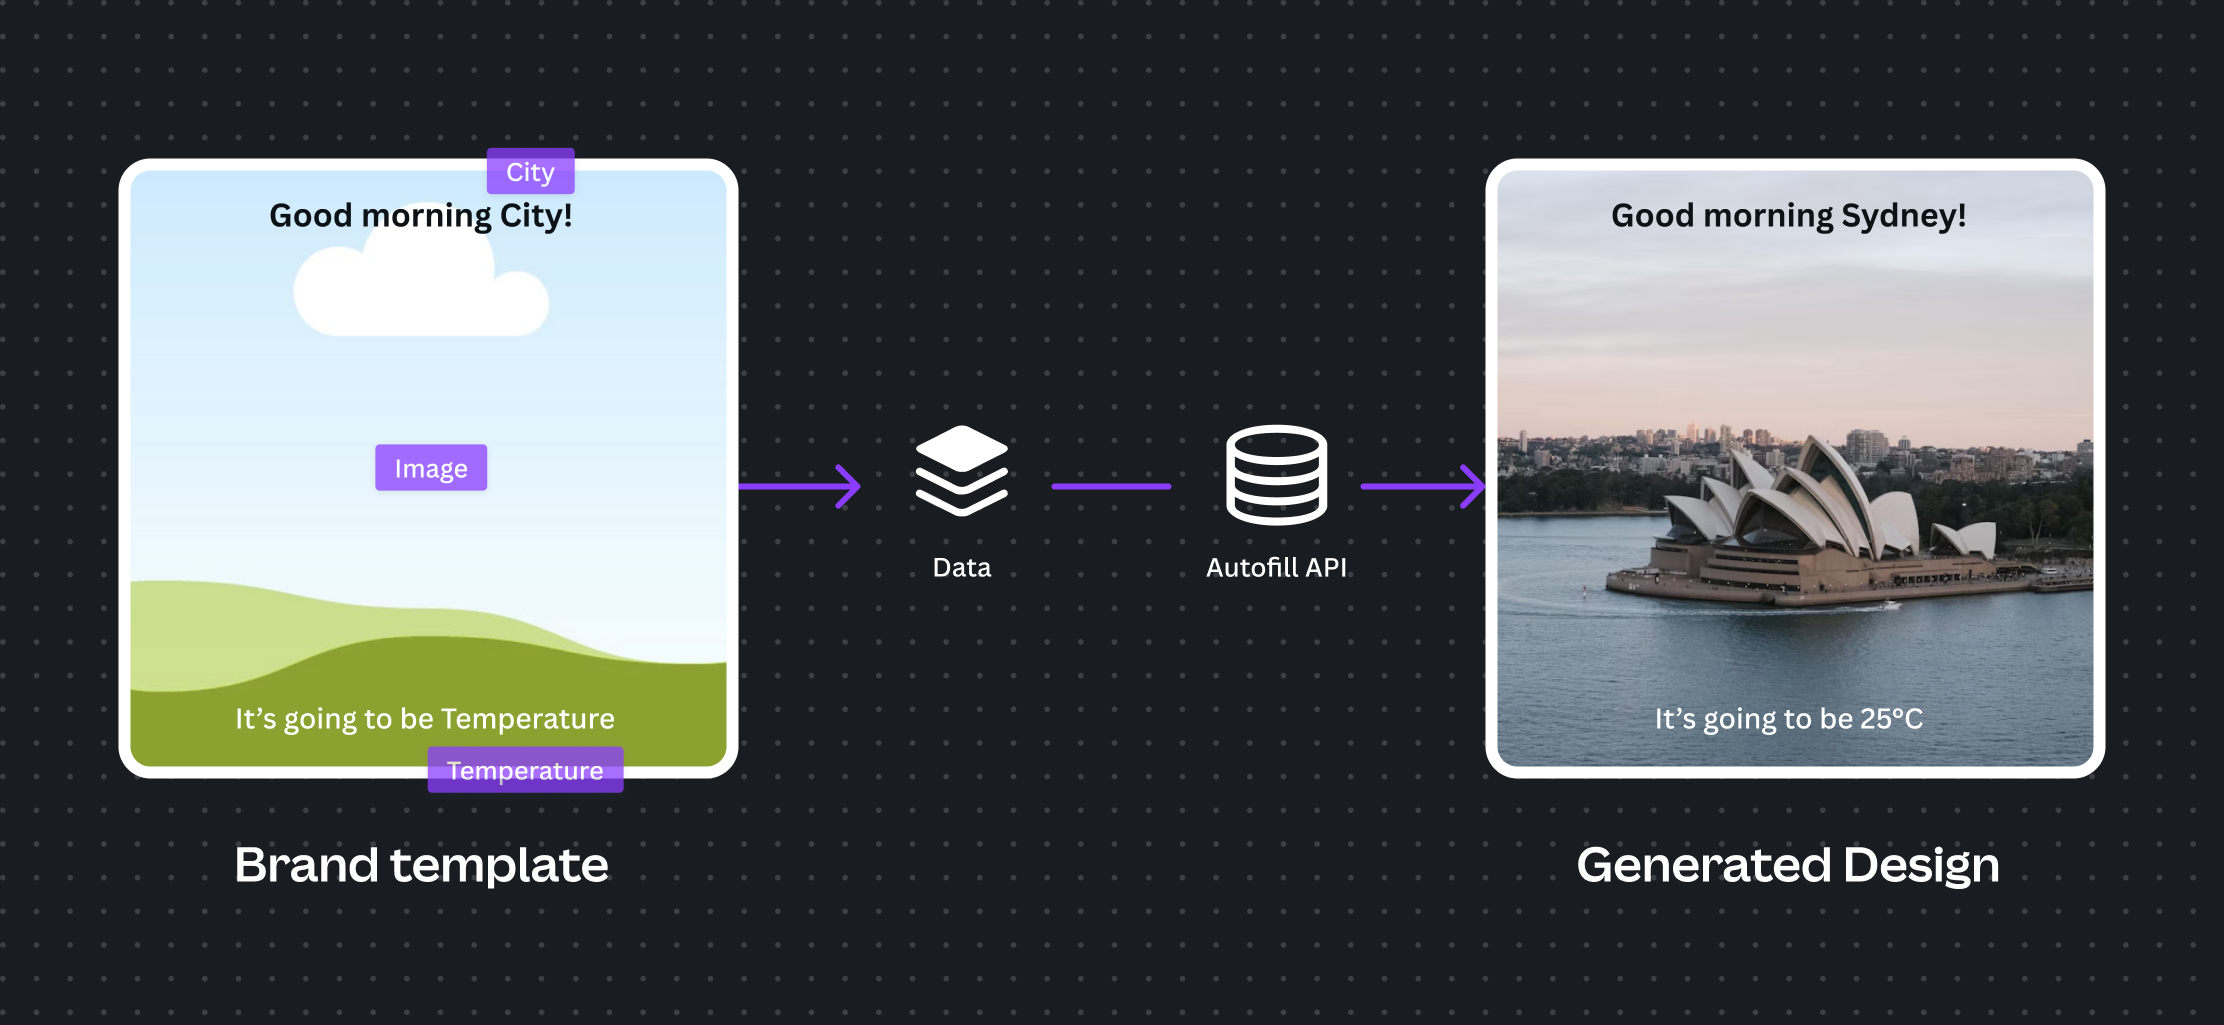
The following example generates a design based on variables from a custom data source. A city name and weather information from a dataset is sent to the API in a request, and then the supplied information is applied to a template to create a new design.
To use the Brand template and Autofill APIs, your app must act on behalf of a user that's a member of a Canva Enterprise(opens in a new tab or window) organization.
Prerequisites
Create a Canva account
To start building your app you'll need to create a Canva account. Your account must:
- Have Multi-factor Authentication (MFA)(opens in a new tab or window) enabled.
- Be a member of a Canva Enterprise(opens in a new tab or window) organization.
If you don't have a Canva Enterprise subscription but have a genuine development use case, you can request access when setting up your app in the Developer Portal. To apply, explain which data source you want to connect to Canva. If approved, your access is granted for development purposes only.
Create an app
-
If you haven't already created an app, follow the steps in Quickstart to create an app and enable the REST APIs on it.
-
In the Developer Portal, go to Outside Canva > Configuration, then under Scopes enable the following:
- design:content: Read and Write
- design:meta: Read
- brandtemplate:meta: Read
- brandtemplate:content: Read
- asset: Read and Write
After creating your app, you should have the following details for your app:
- Your Client ID.
- Your Client secret.
- A list of your app's scopes.
- At least one authorization redirect URL.
Understanding autofill permissions
When building your app, it's important to distinguish between two roles:
- App developers
- App users
As the app developer, you must be a member of a Canva Enterprise organization to include the Brand template and Autofill APIs in your app.
App users are the Canva users on whose behalf your app makes API calls. Each user of your autofill app must also be a member of a Canva Enterprise organization.
The Canva Enterprise subscription belonging to the app developer doesn't extend to the app users.
Create an autofillable template
For this guide, we'll use a pre-built template. If you would like to create your own, read the Canva Help Center articles for using brand templates(opens in a new tab or window) and setting up data autofill(opens in a new tab or window).
-
Open the pre-built template below.
Open template in Canva(opens in a new tab or window)The pre-built template contains three data fields:
- Two text fields named
CITYandTEMPERATURE. - One image field named
BACKGROUND.
- Two text fields named
-
Publish your design as a brand template(opens in a new tab or window) and note the brand template ID. Locate the brand template ID by examining the URL of your published brand template. For example, in the URL
https://www.canva.com/brand/brand-templates/AEN3TrQftXothe brand template ID is theAEN3TrQftXostring at the end of the URL.You can save this ID now for use in the next steps, or retrieve it later using the List brand templates API.
Authenticate with OAuth
-
Follow the Authentication guide to get an authorization code, then generate an access token for your requests. For this process you need:
- Your Client ID.
- Your Client secret.
- A URL-encoded list of your app's scopes.
- One of your nominated redirect URLs.
-
(Optional) If you've already authenticated but your token has expired, you can skip step 1 and request a new token using your refresh token.
When you've successfully authenticated and obtained a bearer token, you're ready to upload your assets and generate your autofilled design.
Preparing assets for autofill
All media used in autofill must first be uploaded to the asset library. We'll upload an asset for the BACKGROUND field before creating the autofill job.
Step 1. Upload your asset
We'll use the Create asset upload job API to create an asynchronous asset upload job.
-
Upload your image with a call to
POST /asset-uploads.curl --request POST 'https://api.canva.com/rest/v1/asset-uploads' \--header 'Authorization: Bearer {TOKEN}' \--header 'Content-Type: application/octet-stream' \--header 'Asset-Upload-Metadata: { "name_base64": "YmFja2dyb3VuZC5qcGc=" }' \--data-binary '@/path/to/your/image.jpg'SHELLThe
Asset-Upload-Metadataheader requires the asset name encoded in Base64. For example, "background.jpg" encoded in Base64 isYmFja2dyb3VuZC5qcGc=. -
The endpoint returns an upload job with its ID and status.
{"job": {"id": "e08861ae-3b29-45db-8dc1-1fe0bf7f1cc8","status": "in_progress"}}JSONSave the job ID so you can retrieve your asset ID when the job is complete.
Step 2. Get your asset upload job
With the job ID from the previous step, use the Get asset upload job API to periodically poll the status of the job until the asset is ready.
-
Call
GET /asset-uploads/{JOB-ID}.curl --request GET \--url https://api.canva.com/rest/v1/asset-uploads/{JOB-ID} \--header 'Authorization: Bearer {TOKEN}'SHELL -
The endpoint returns the job's status. A successfully completed job has the status
successand includes the asset details in the response.{"job": {"id": "e08861ae-3b29-45db-8dc1-1fe0bf7f1cc8","status": "success","asset": {"id": "Msd59349ff","type": "image","name": "background.jpg"}}}JSONSave the
asset.idvalue so you can include it in your autofill job request.
Limitations
There are some limitations to what assets can be used for autofill:
-
Only image assets can be used for autofill. Video assets are currently not supported.
-
External image URLs are currently not supported for autofill.
External image URLs can be uploaded as assets using the Create asset upload job via URL.
Generate an autofilled design
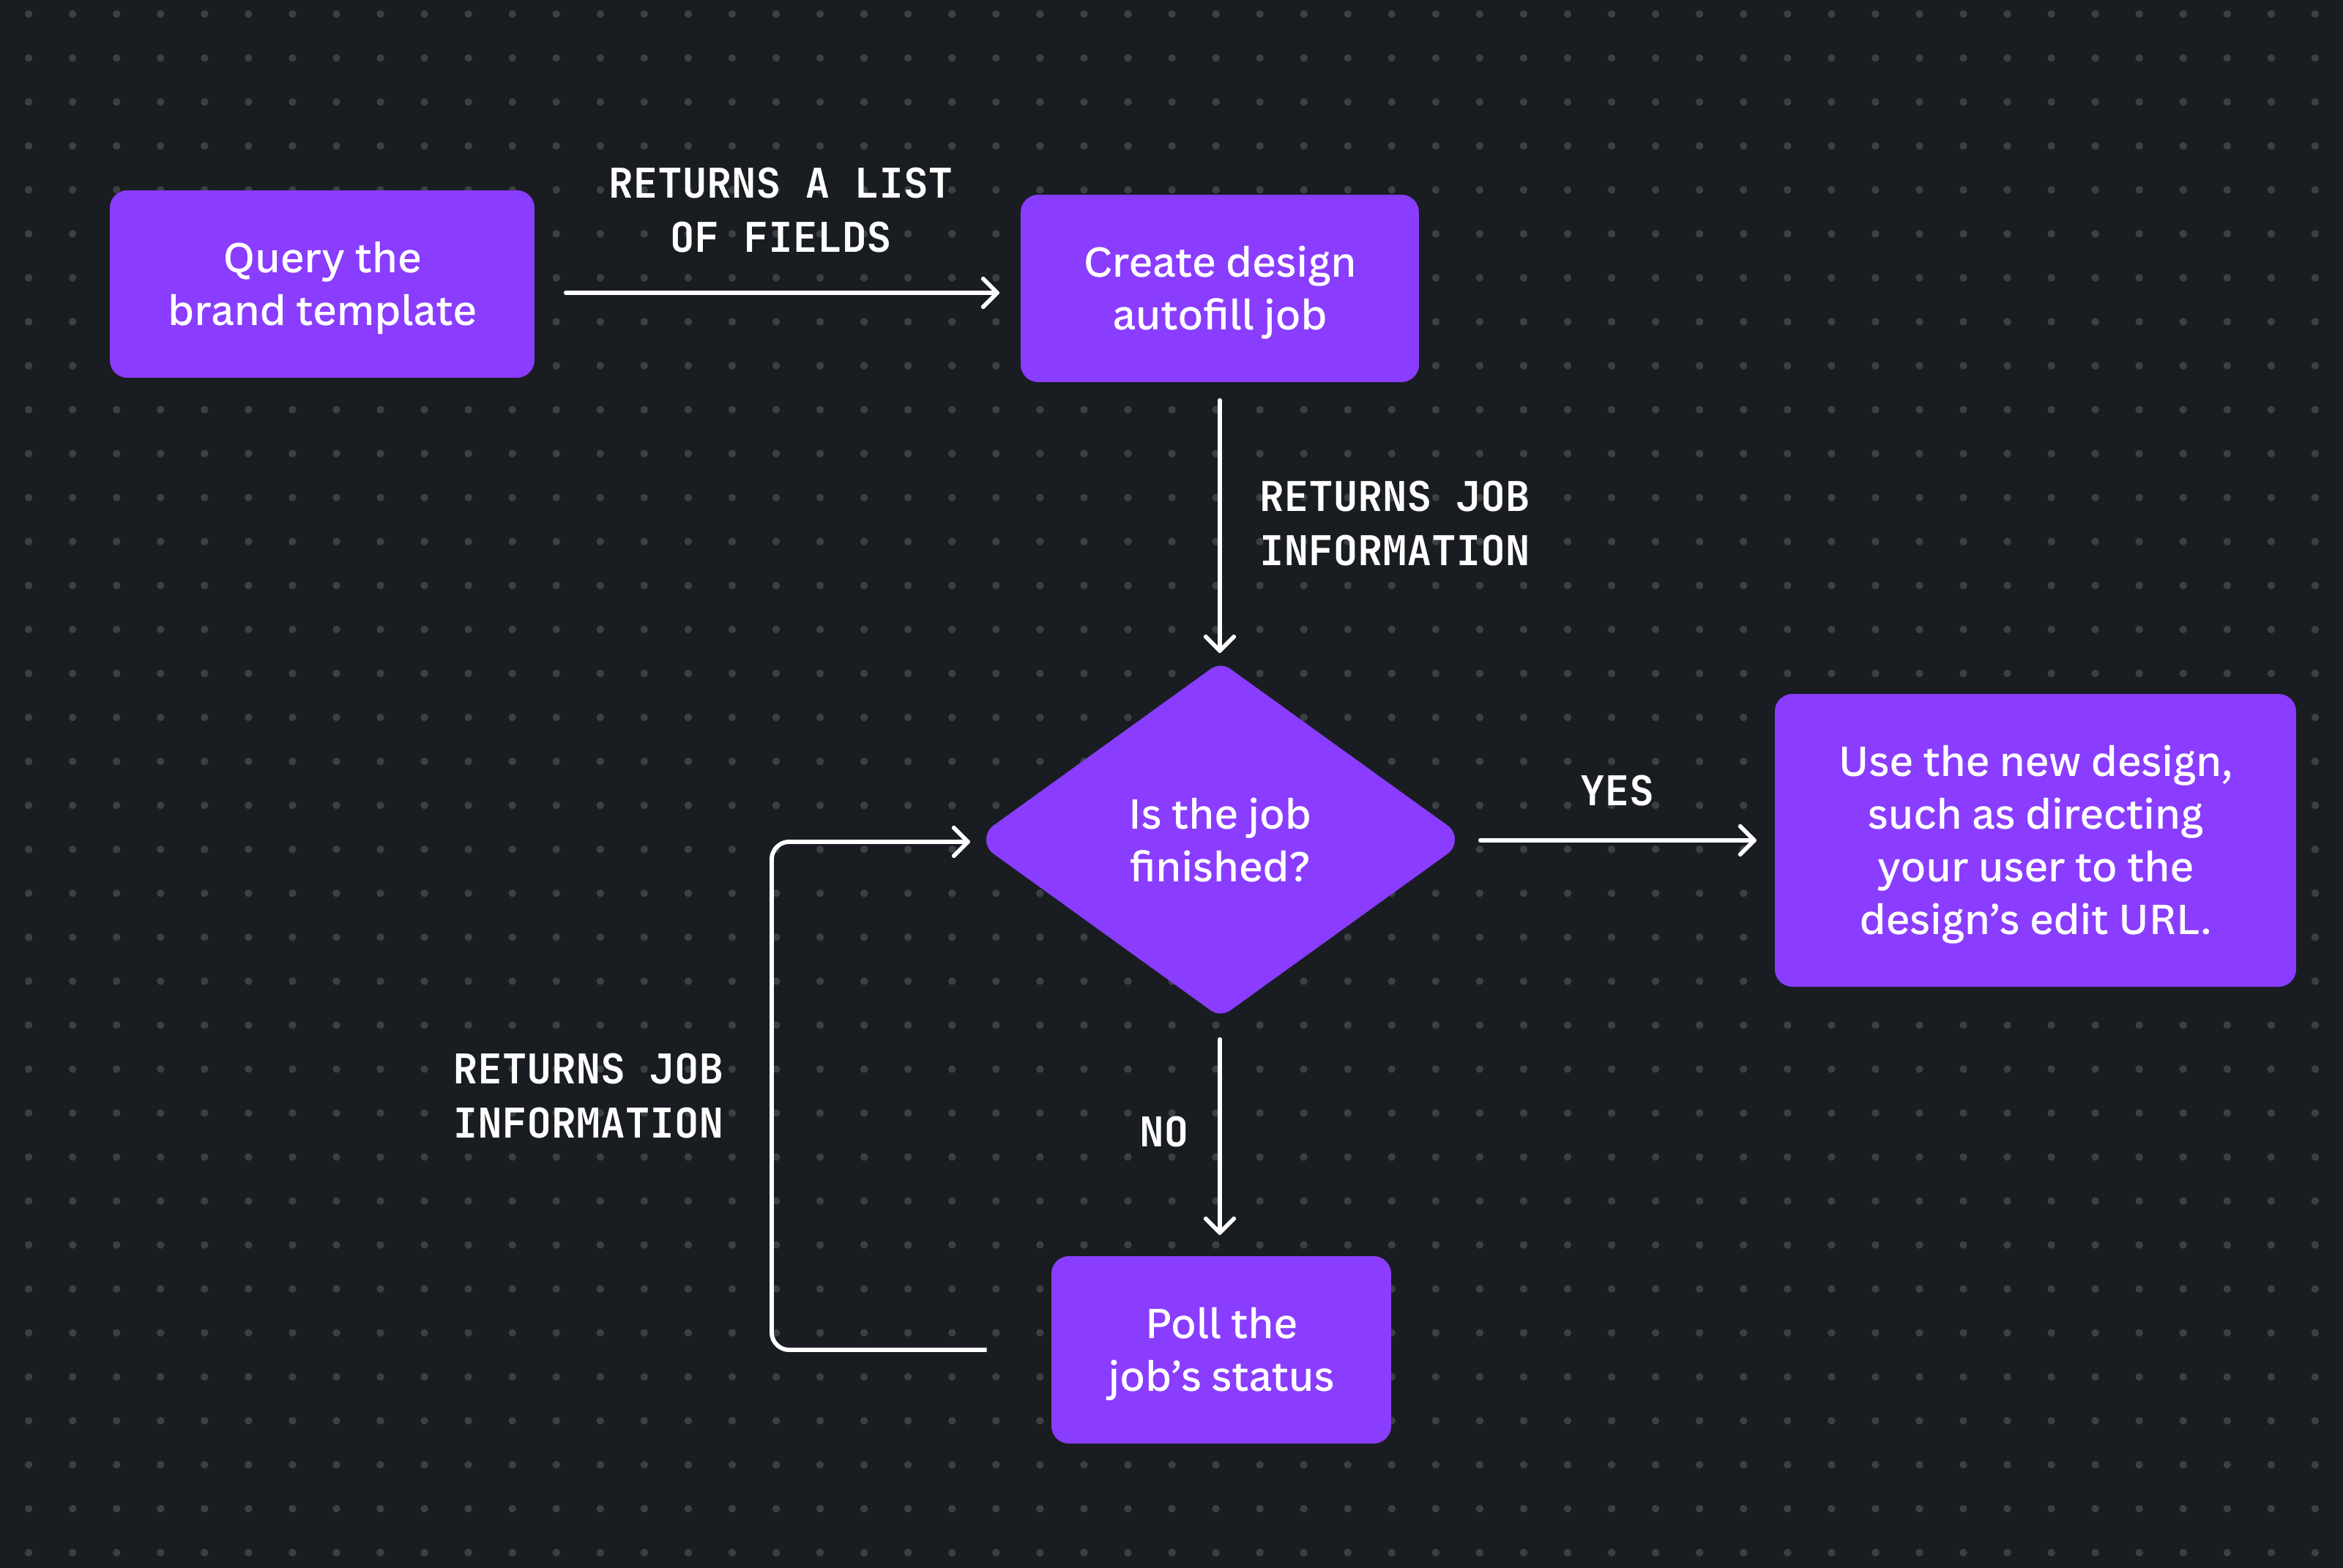
The process of generating an autofilled design involves querying your brand template's dataset, creating an autofill job with your data, and retrieving the generated design.
This guide uses the create_from_brand_template API mode, where we start from a brand template with tagged fields and create a new design by filling the tagged fields with provided content. The API also supports the following modes:
create_from_design: Starts with an existing design with tagged fields. Pass indesign_id(instead ofbrand_template_idlike in the example) to create a new design, filling the tagged fields with provided content.update_design: Starts with an existing design with tagged fields. Pass indesign_id(instead ofbrand_template_idlike in the example), filling the tagged fields with provided content without creating a new design.
Step 0. (Optional) Get a list of all brand templates
If you don't know your brand template's ID, you can get a list of all brand templates.
Step 1. Query your brand template
Use the Get brand template dataset API to query your brand template's dataset and get a list of autofillable fields.
-
Request your template's dataset with a call to
GET /brand-templates/{TEMPLATE-ID}/dataset.curl --request GET \--url https://api.canva.com/rest/v1/brand-templates/{TEMPLATE-ID}/dataset \--header 'Authorization: Bearer {TOKEN}'SHELL -
The endpoint returns the available fields and their data type in the
datasetobject.{"dataset": {"CITY": {"type": "text"},"TEMPERATURE": {"type": "text"},"BACKGROUND": {"type": "image"}}}JSON
Step 2. Create a design autofill job
Use the Create design autofill job API to create your new design, with your autofill data in the body of the request. This API creates an asynchronous job to generate the design.
You don't have to fill every available field. If you omit a field, Canva uses the default value from your template when generating your final design.
-
Initiate your job with a call to
POST /autofills.curl --request POST \--url https://api.canva.com/rest/v1/autofills \--header 'Authorization: Bearer {TOKEN}' \--header 'Content-Type: application/json' \--data '{"brand_template_id": "{TEMPLATE-ID}","data": {"CITY": {"type": "text","text": "Sydney"},"TEMPERATURE": {"type": "text","text": "25C"},"BACKGROUND": {"type": "image","asset_id": "{ASSET-ID}"}}}'SHELL -
The endpoint returns an autofill job with its ID and status.
{"job": {"id": "a71ef223-571c-48a2-9572-e6cf85e3b943","status": "in_progress"}}JSONSave the ID so you can retrieve your design when the job is complete.
Step 3. Get your design autofill job
Asynchronous jobs might take some time to complete. With the job ID from the previous step, use the Get design autofill job API to periodically poll the status of the job until the design is ready.
-
Call
GET /autofills/{JOB-ID}.curl --request GET \--url https://api.canva.com/rest/v1/autofills/a71ef223-571c-48a2-9572-e6cf85e3b943 \--header 'Authorization: Bearer {TOKEN}'SHELL -
The endpoint returns the job's status. A successfully completed job has the status
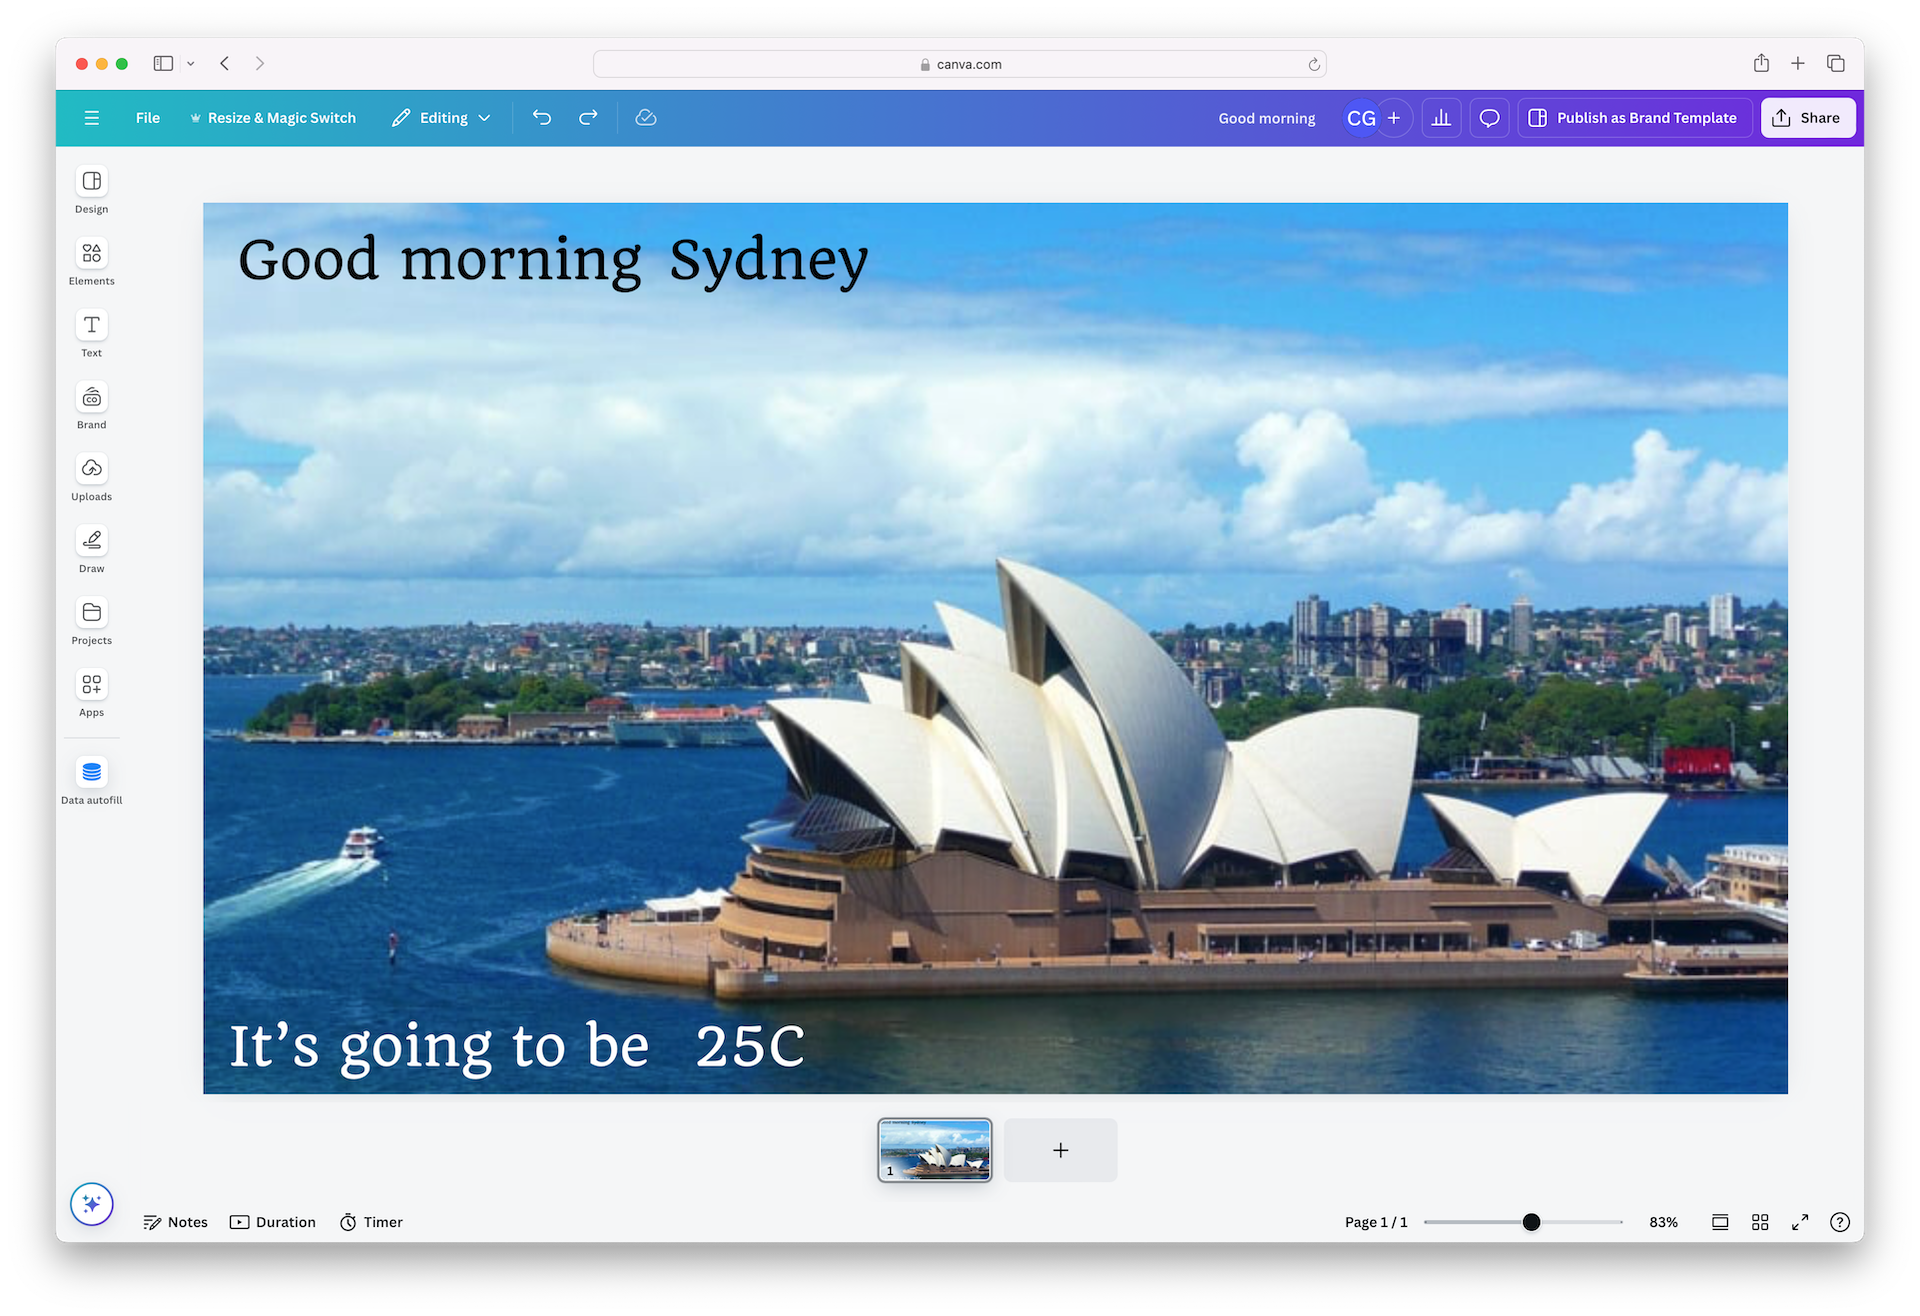
successand includes the design details in the response.{"job": {"id": "{ID}","status": "success","result": {"type": "create_design","design": {"url": "https://www.canva.com/design/{DESIGN-ID}/edit","thumbnail": {"url": "https://export-download.canva.com/{THUMBNAIL-RESOURCE}"}}}}}JSONDirect your user to the design's URL so they can open it in the Canva editor and adjust or export it as required.
Next steps
Once the autofill job is complete and you have the final design, you can use the REST APIs to automate further steps in your workflow:
- Export the design in your preferred format using Create design export job.
- Move the design to a designated folder using Move folder item.