Computer Vision
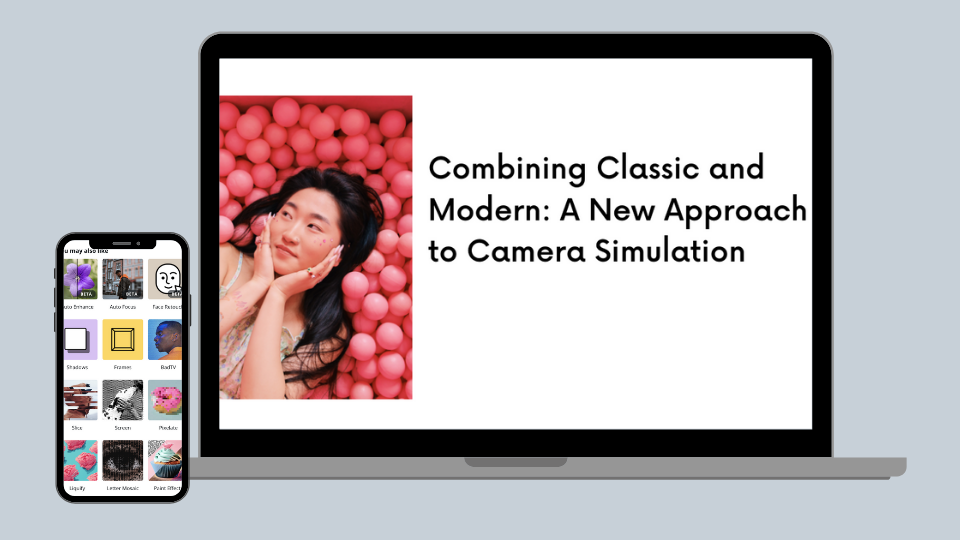
Combining Classic and Modern: A New Approach to Camera Simulation
Applying classic principles from physics and optics to build the best possible camera effects at Canva.
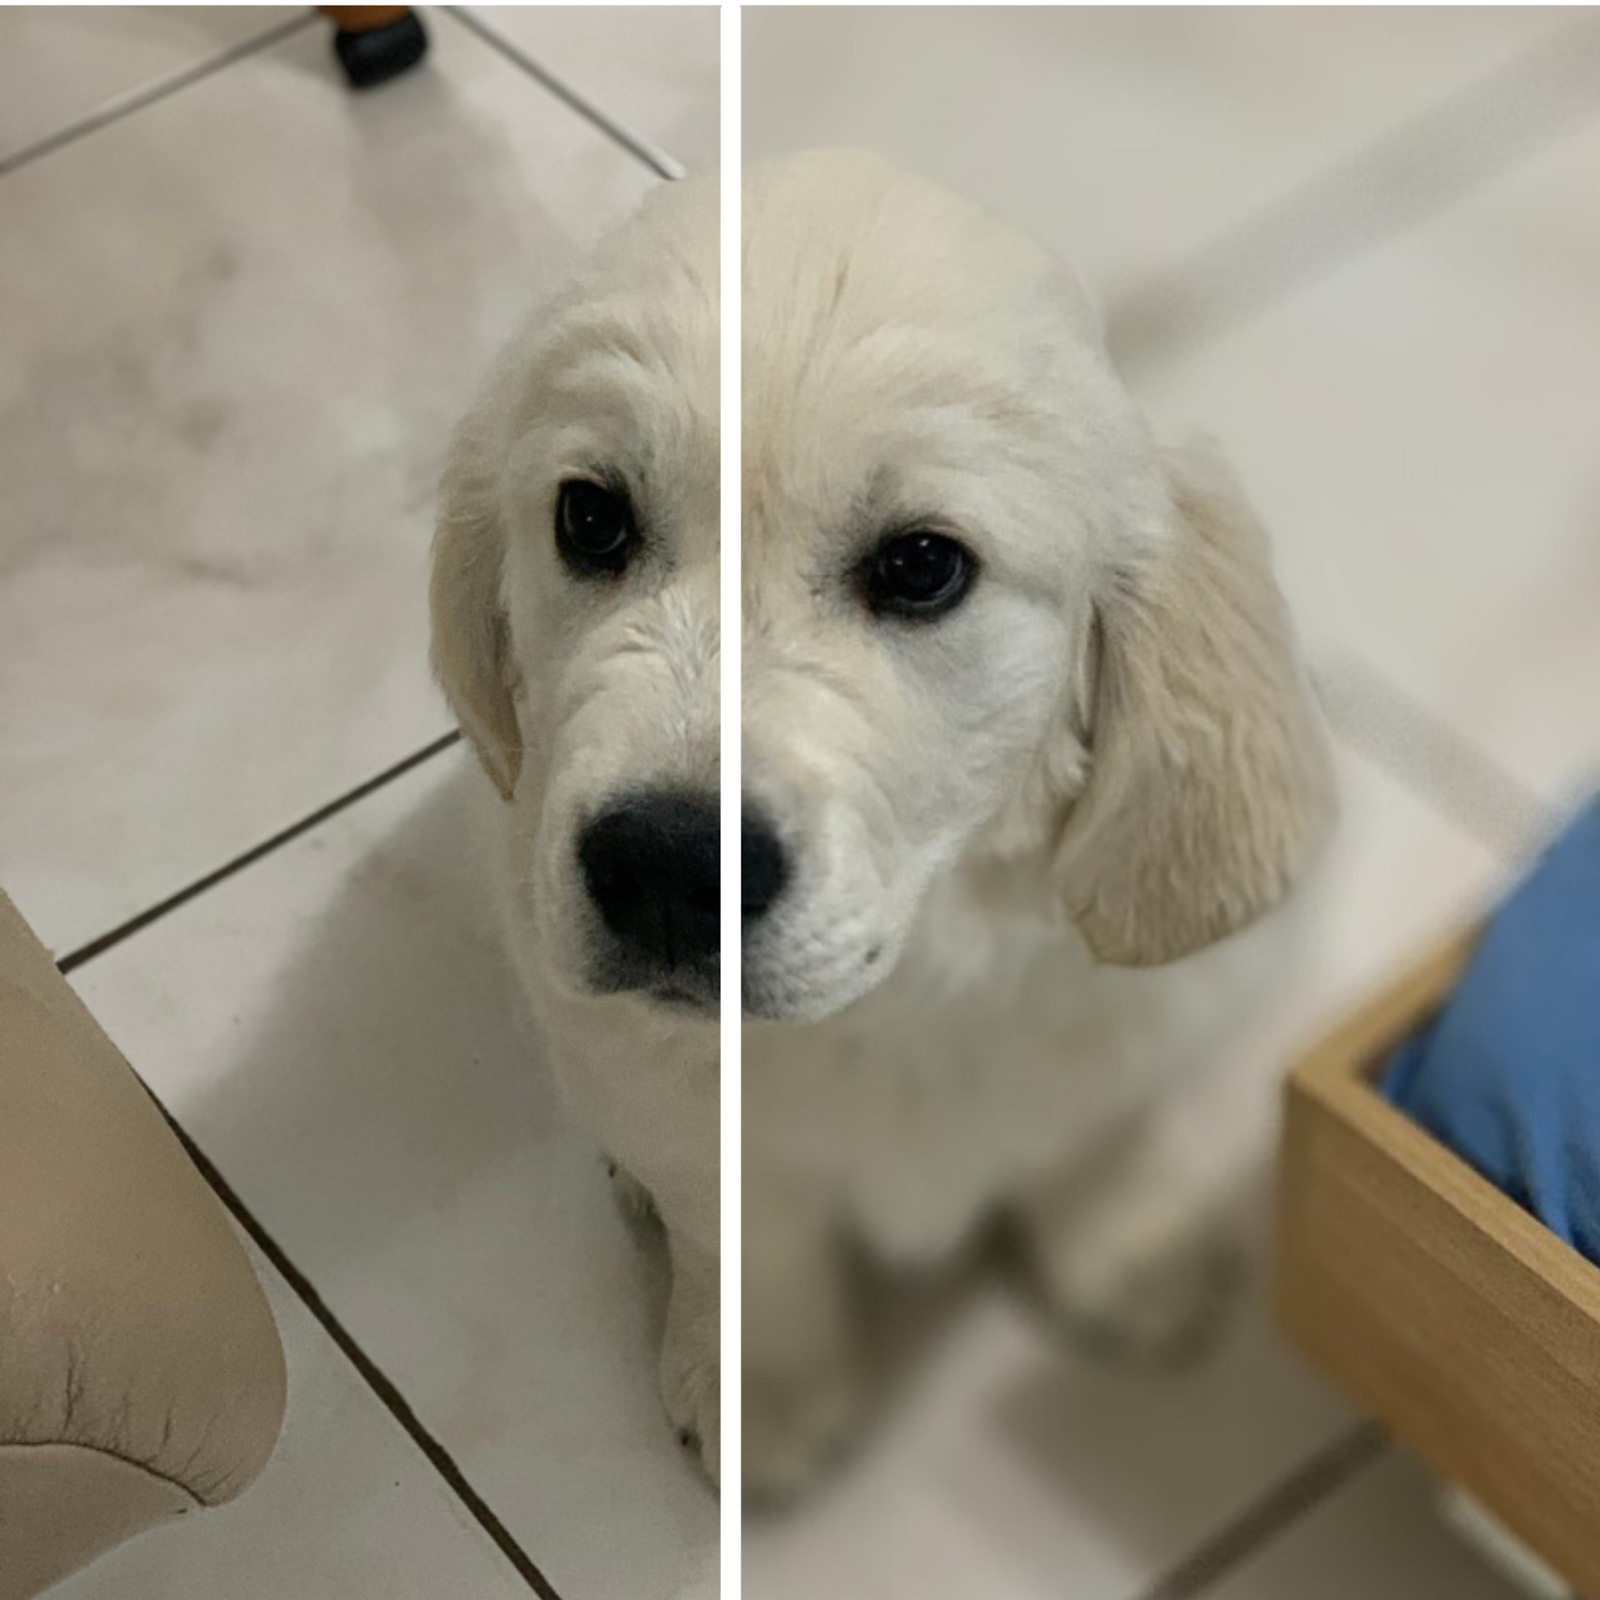
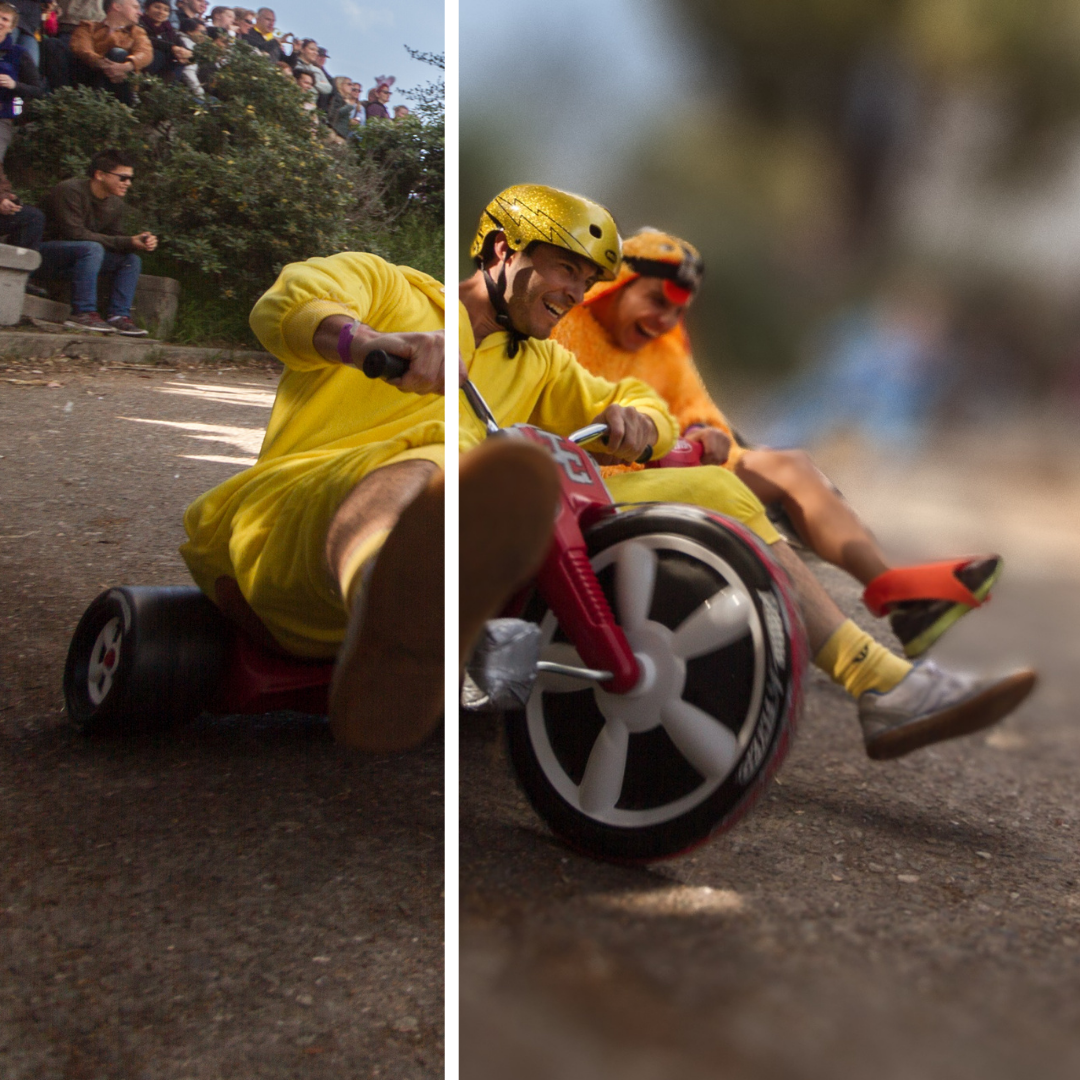
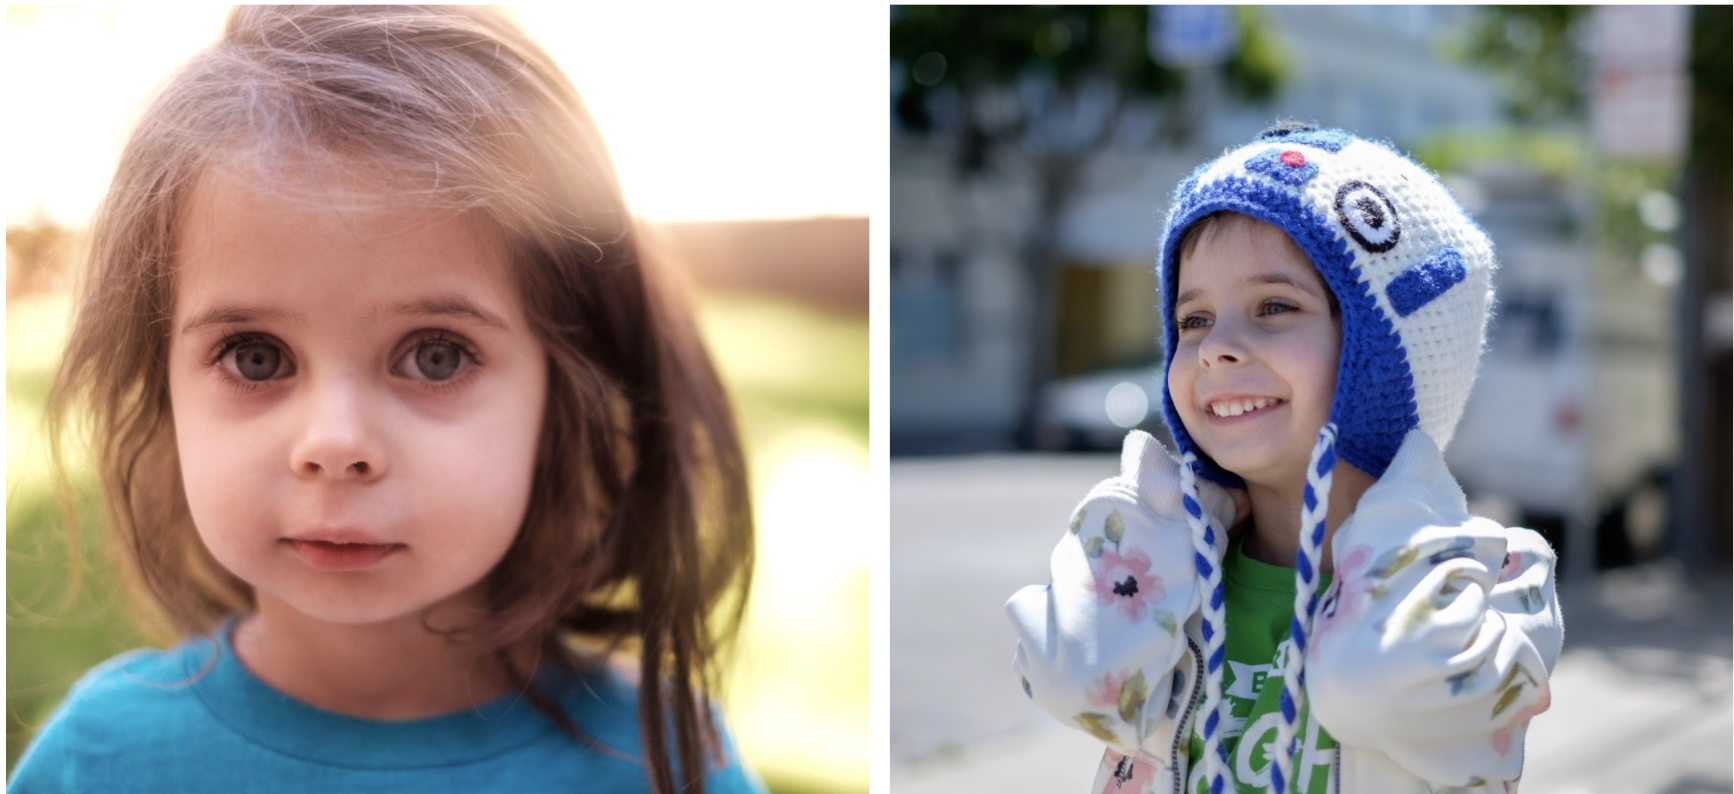
We love the look of high-end portraits — that shallow-depth-of-field look where the subject is in-focus but the background is blurred out. But some cameras, especially those on smartphones, don't quite manage to do this convincingly. Also sometimes, you'd like to be able to adjust the blur after you've taken the photo too.
So here at Canva we've built Auto Focus(opens in a new tab or window), a camera simulation tool that allows you to re-photograph your images with a high-end virtual camera lens to get that distinctive portrait look. To do this, we drew on the classic principles of optics and physics in early cameras to build the most physically-accurate digital effect possible.
Why camera simulation is needed for smartphone photography
The shallow depth-of-field look is typically achieved through a combination of a large imaging surface and classic optical design allows subjects to be isolated and backgrounds to be blurred, turning image distractions into less prominent splashes of color.
This look isn't so easy to achieve with cell phone cameras because the heritage of cell phone optics dates back to the early days of photography. Soon after cameras were developed it became obvious that most people wanted to take photos, without having to do other things like adjust focus dials.
Kodak solved this in 1900 with the Brownie(opens in a new tab or window) which was like the iPhone of the 20th century — simple user interface, no dials. Thanks to clever lens design there was no need to focus because everything is in focus, and this optical design principle has carried forward to modern cellphones today. This naturally comes at the cost of shallow-depth-of-field, which now needs more complex optics (extra lenses!) or camera simulation to achieve.
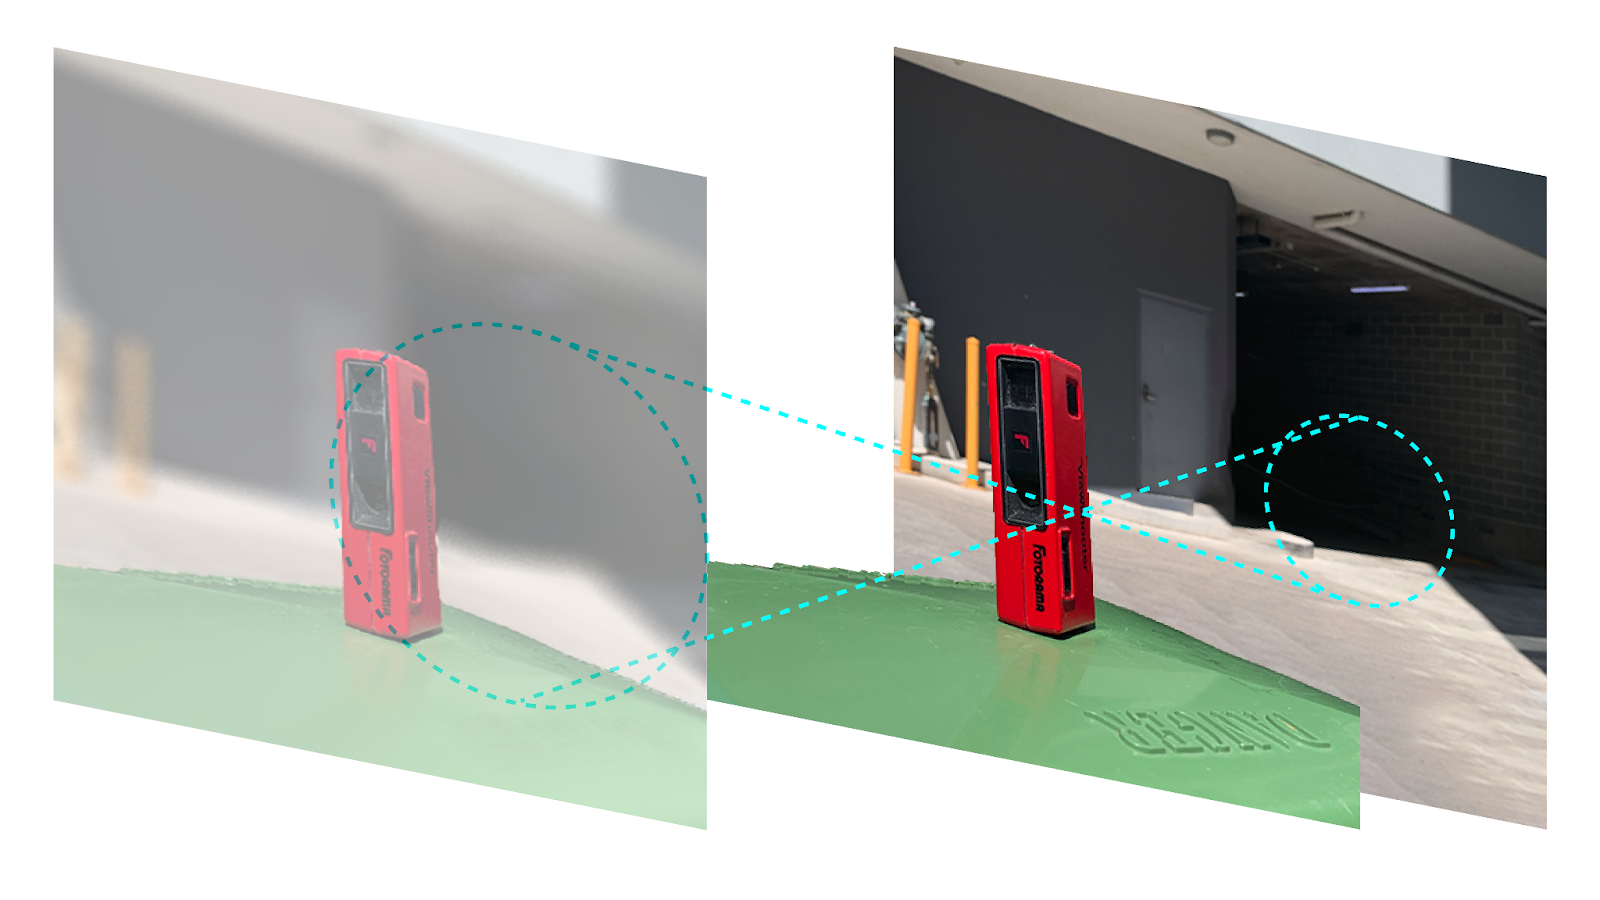
Problems with existing shallow-depth-of-field simulations
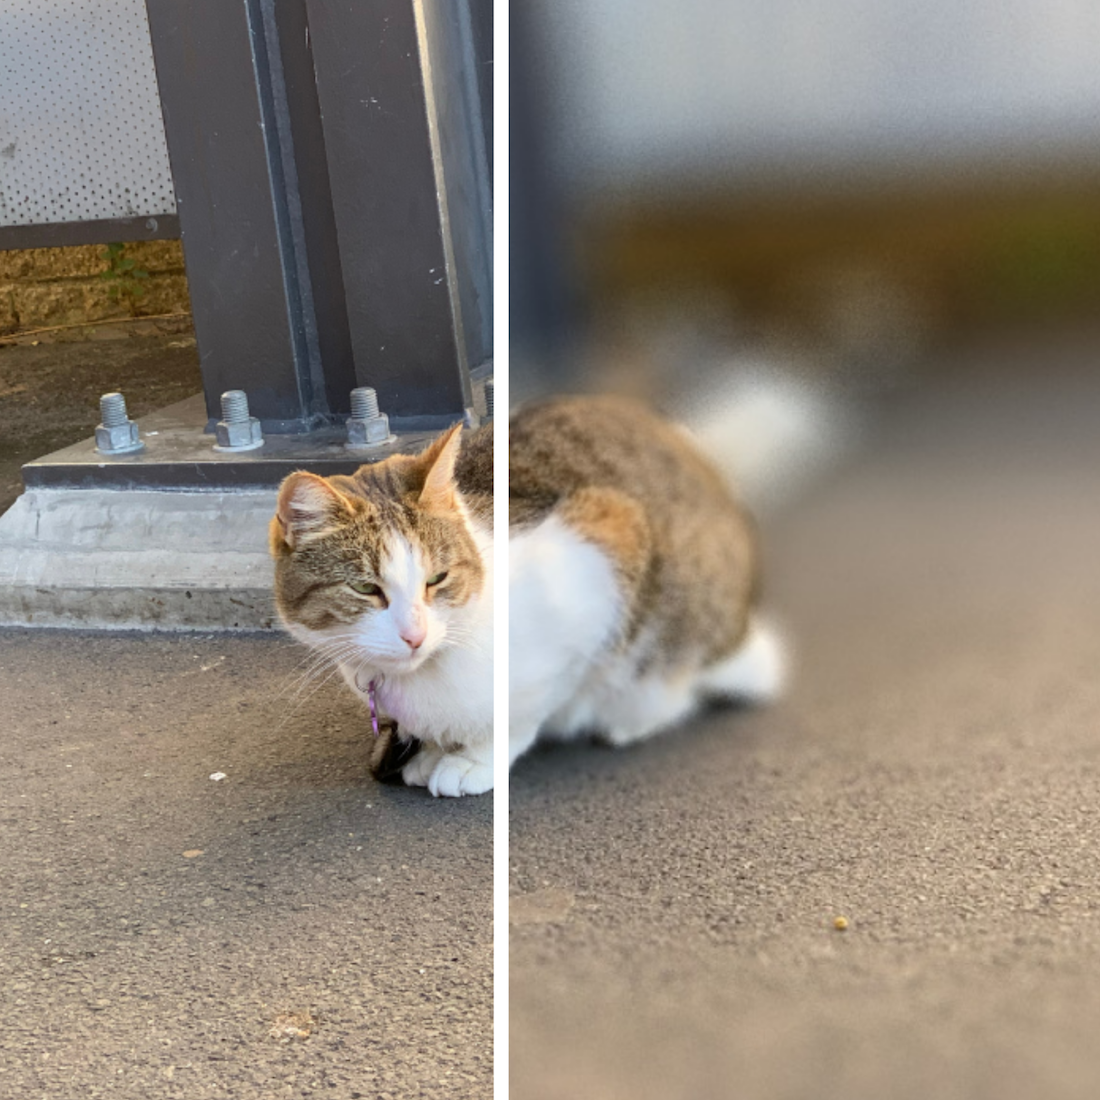
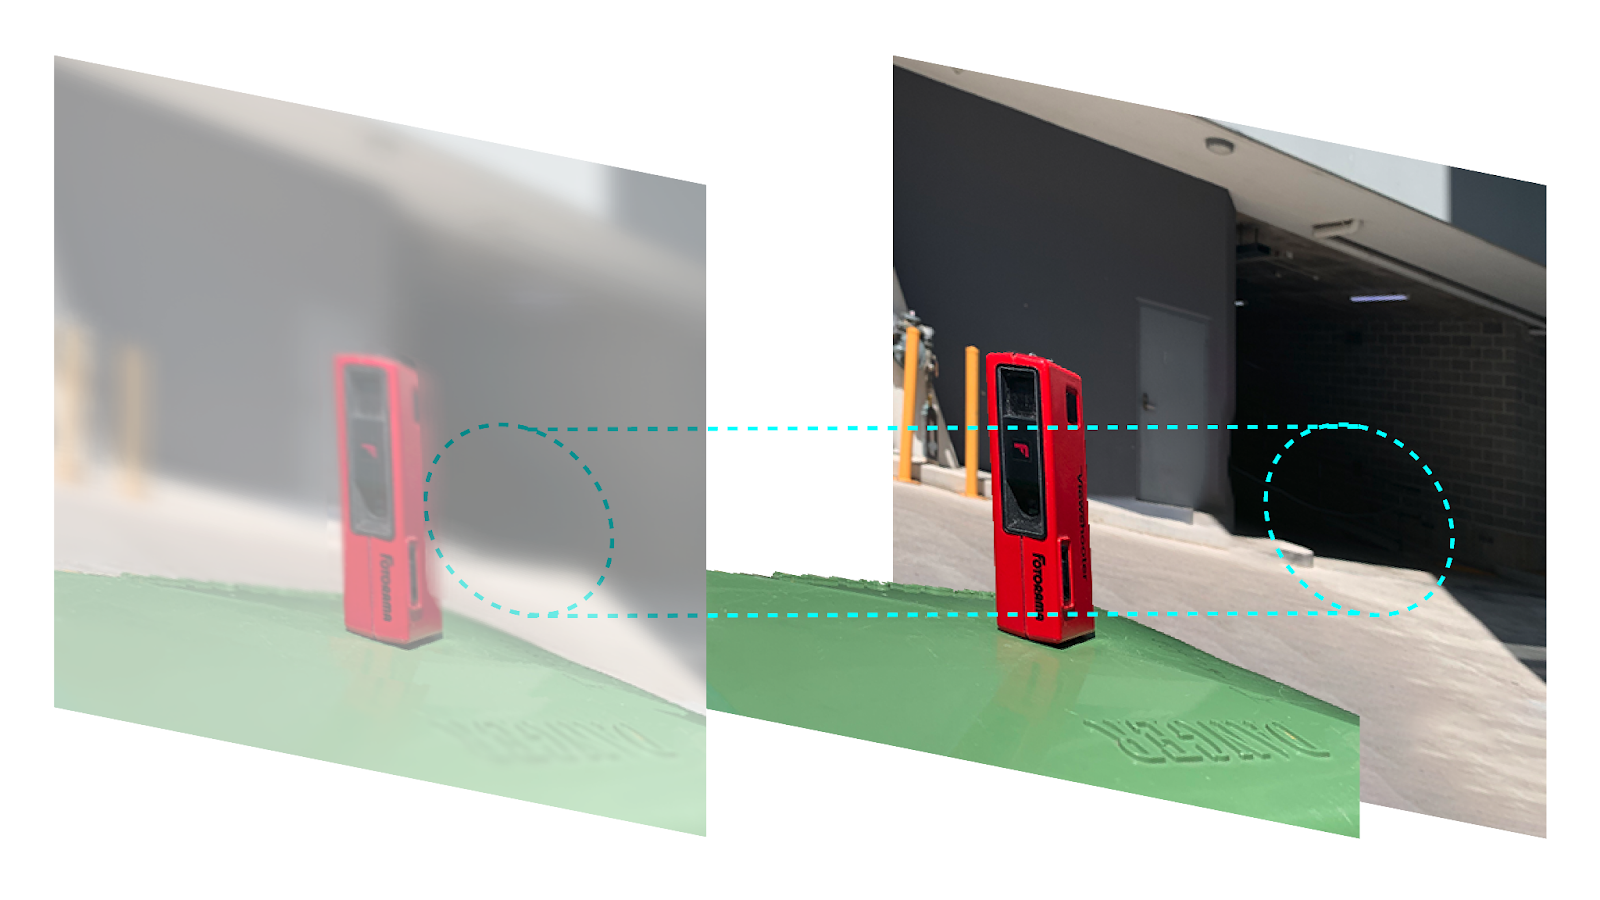
Camera simulation allows us to re-capture images through a simulation of a high-end camera. The classic simulation approach places a given pixel out of focus by processing a circle of its surrounding pixels, before finding the average colour for a new blurred pixel. The more out of focus a pixel is, the larger the circle or kernel needs to be.
Unfortunately, this often results in problems with color leaking between in-focus and out-of-focus areas. It leads to artificial smoothness, in a way that doesn't look natural. This happens because the cylindrical sample for each pixel, (the kernel) includes pixels from both in-focus areas and the foreground, softening the edges of the simulation.
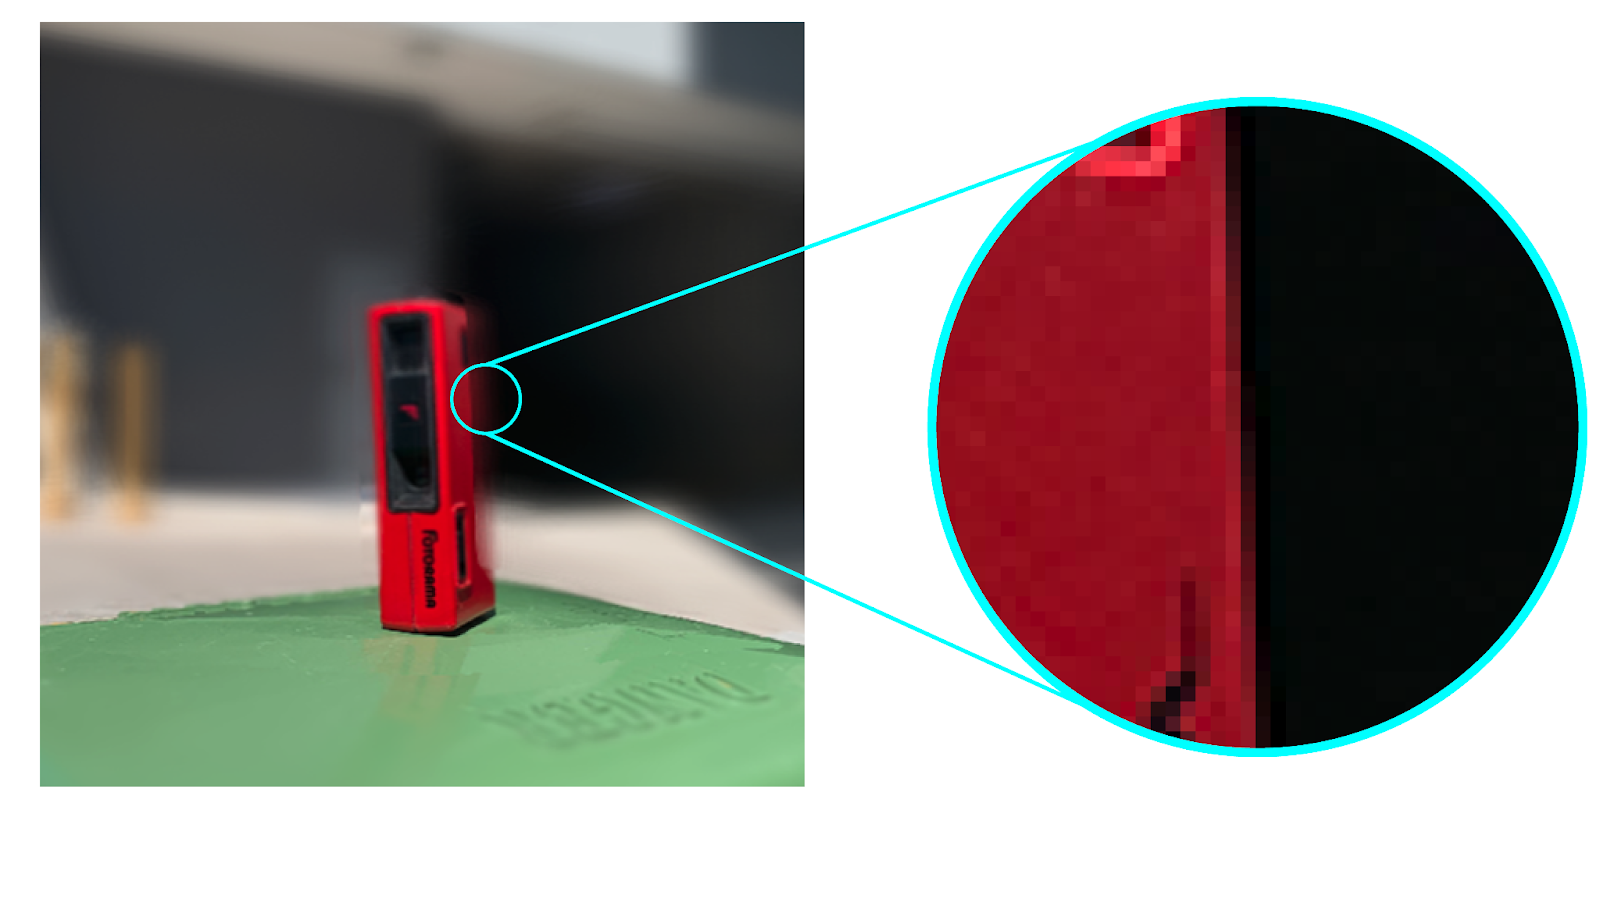
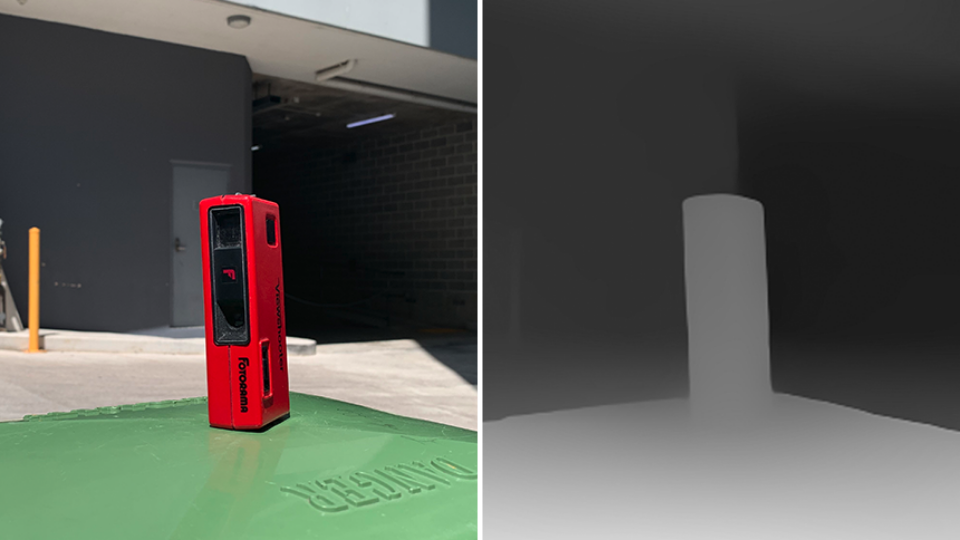
A quick note on depth maps
Underpinning the camera simulation techniques here are depth maps, which were initially used in games and visual effects. Our depth maps are generated by using a machine learning algorithm to determine the depth profile of an image. The depth of each pixel is calculated and stored, to create a 2.5D diorama from the picture. A pixel's level of blur is determined by its position on the depth map, that is, the farther away from the focus point the more out-of-focus it is.
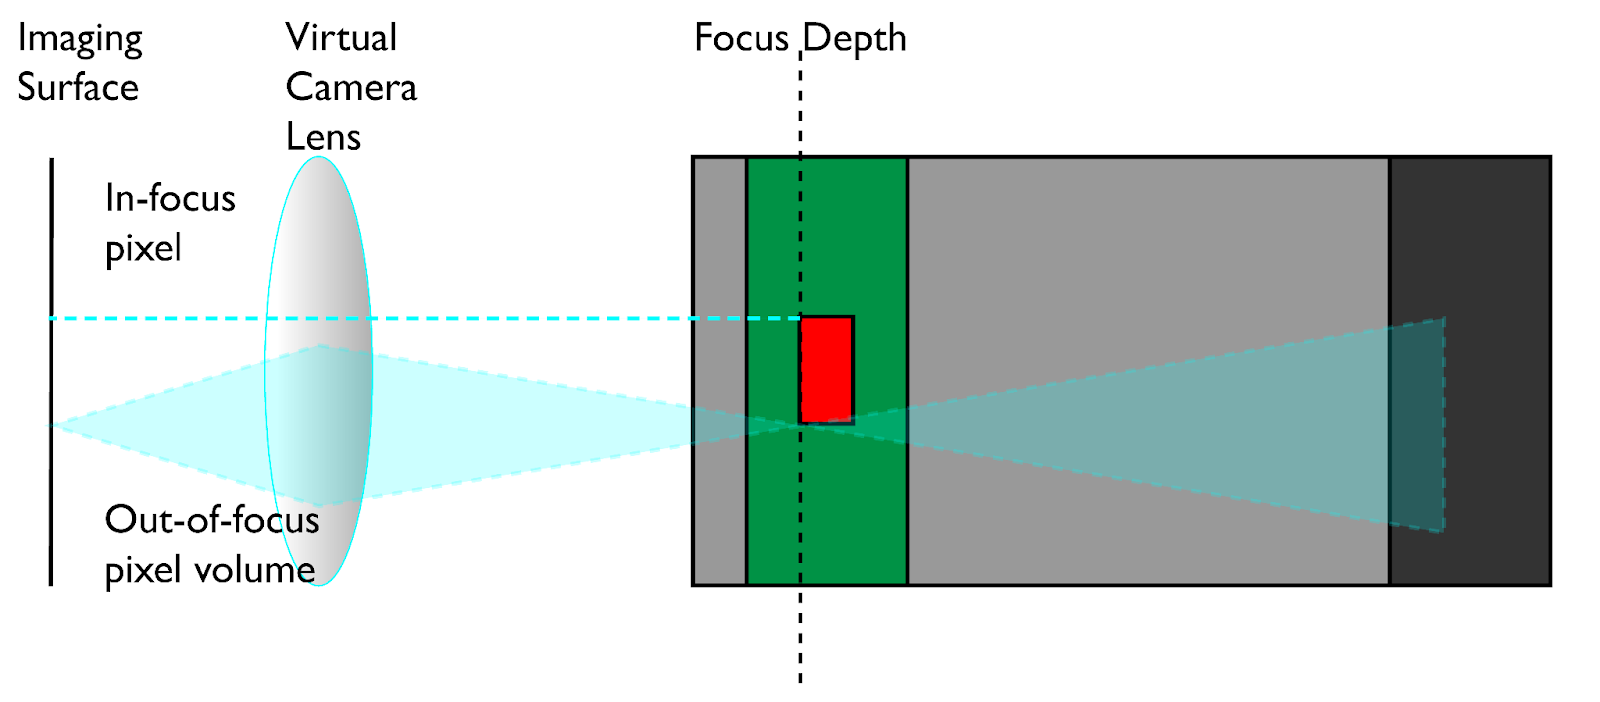
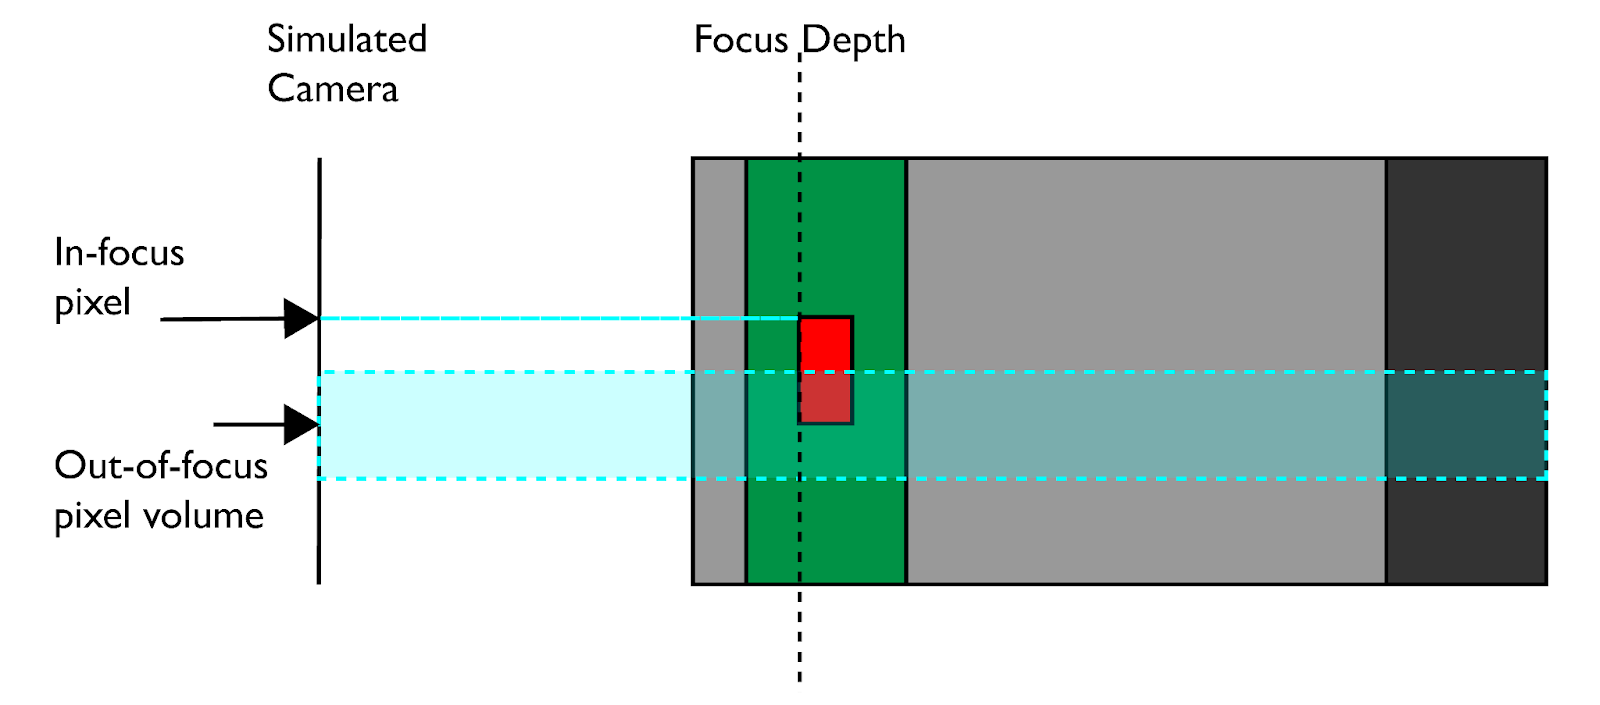
More accurate light transport
To get a more accurate simulation, we aimed to replicate how light moves in the real world. Real cameras don't receive light in a perfectly shaped cylinder, but instead receive light that's projected in a conical pattern via the lens. As such, we aimed camera simulation to replicate this, with a pixel that is out of focus being treated as the focal point between two light cones — as shown in the diagrams below.
Conclusion
We're big camera and photo nerds over here at Canva, and we wanted to bring you the most faithful camera simulation we could. Designers and photographers love attention to detail; while the traditional shallow-depth-of-field simulation works, the oversmooth and leaky look puts it into uncanny valley, occasionally looking artificial.
We've extensively studied film cameras and photos to tune our new technique to bring you the best camera simulation we could make, giving you a true-to-life authentic vintage camera experience.
Try it out!
A special thanks to Kerry(opens in a new tab or window) for the ML magic, and to Harley(opens in a new tab or window) and the photo editor team for getting this out into the world!
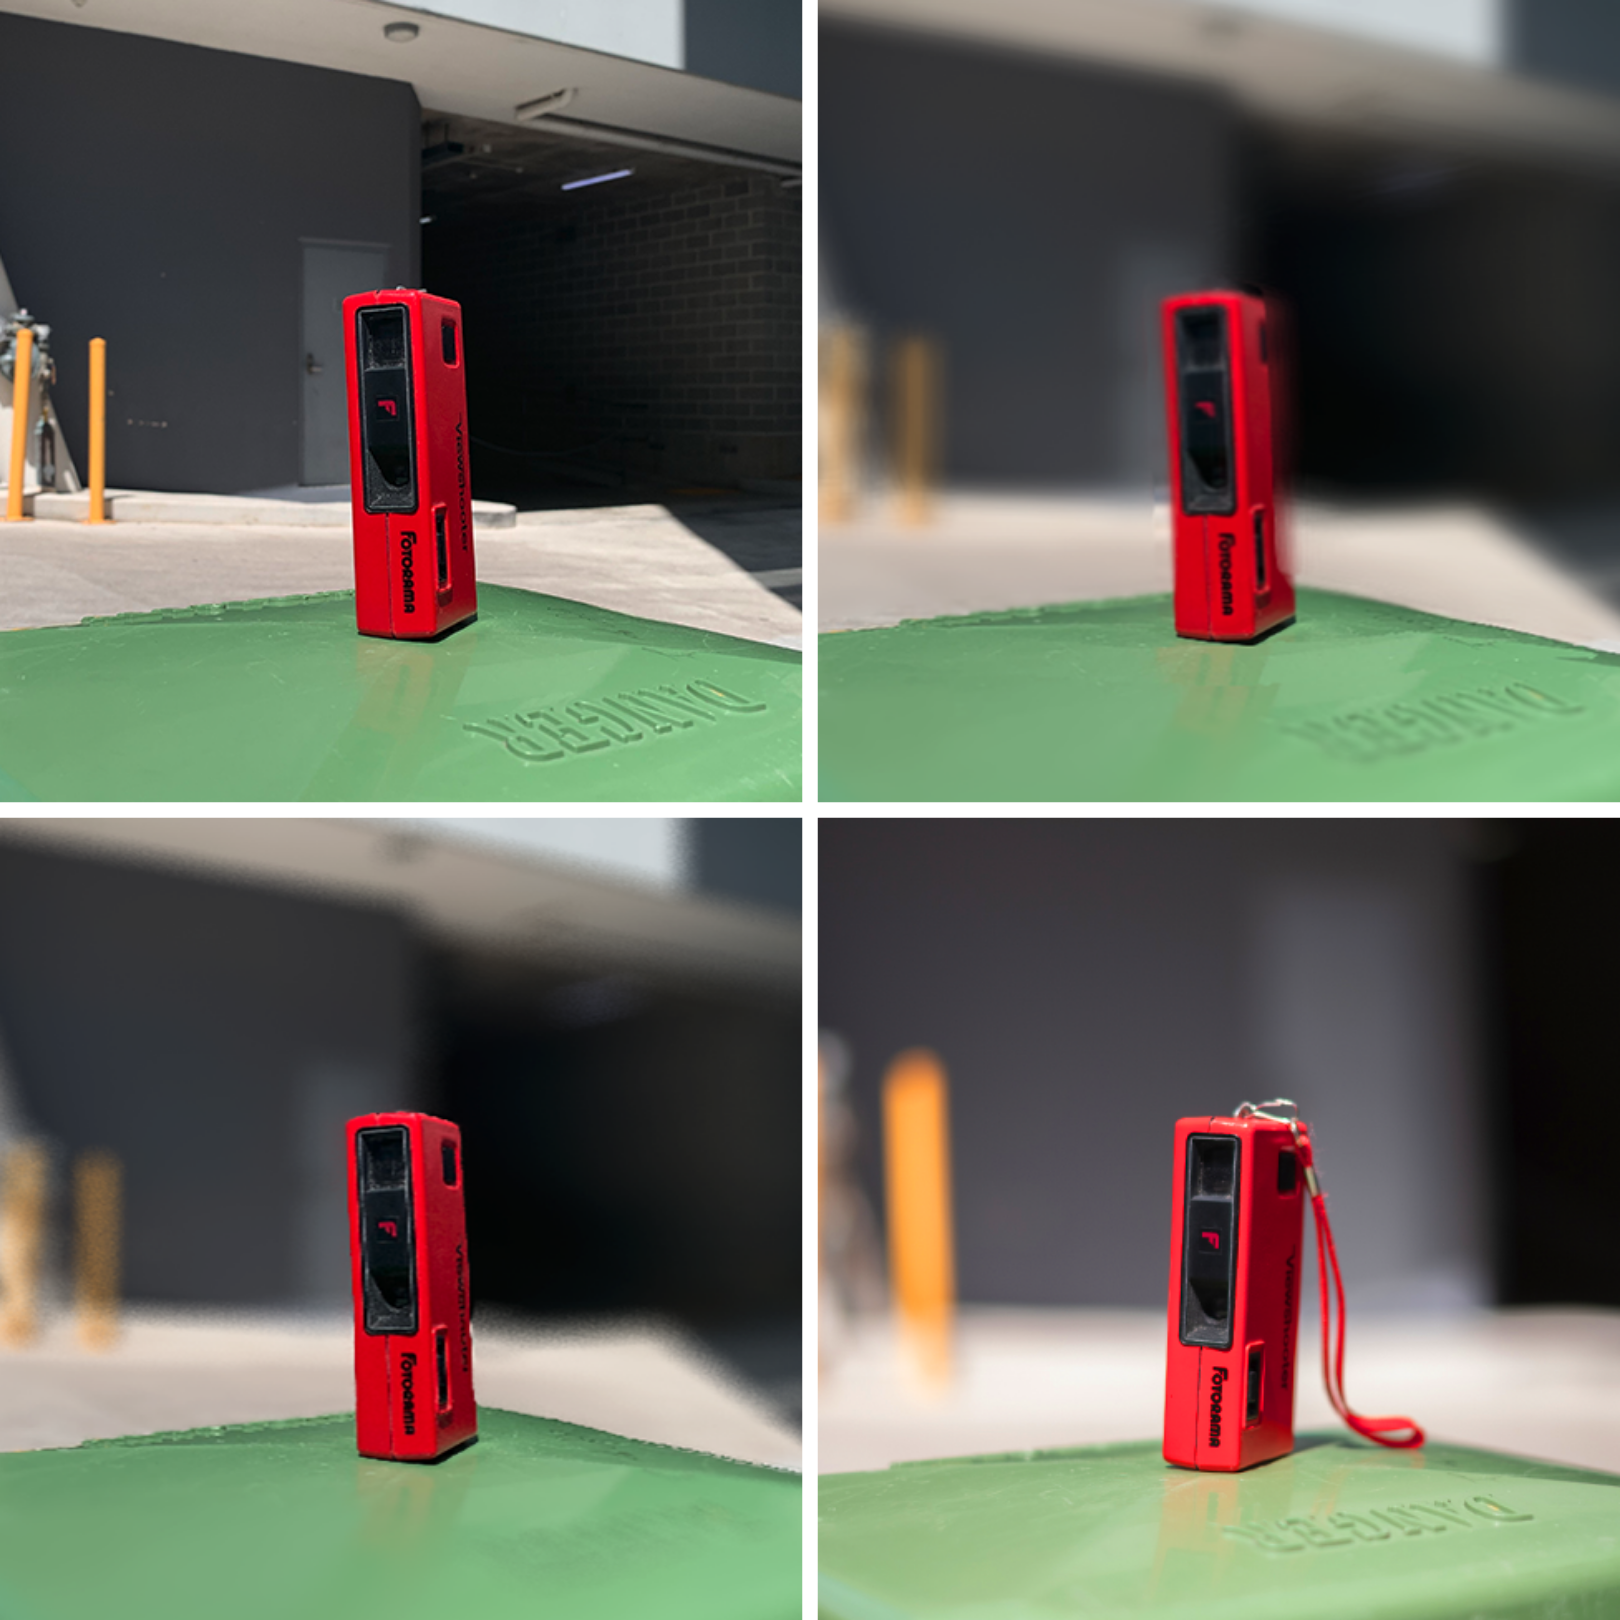
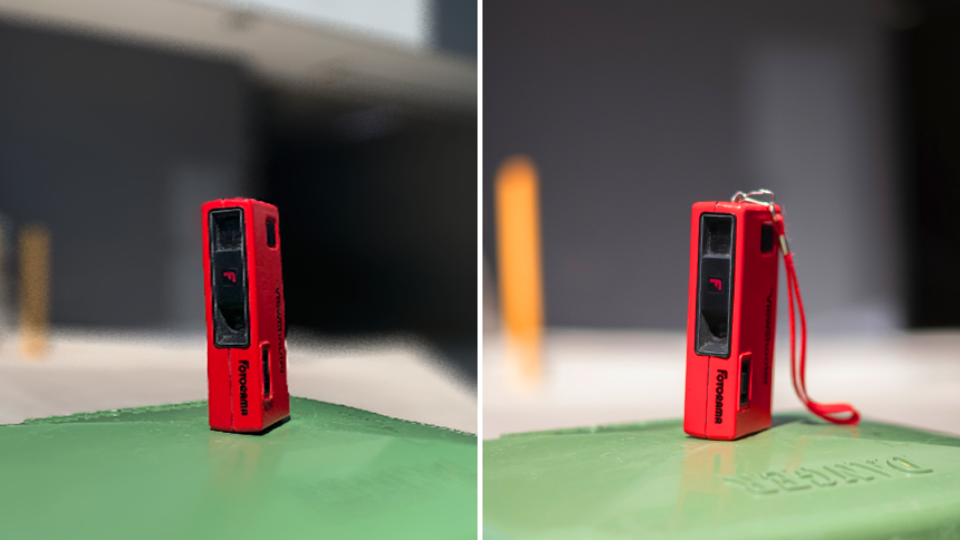
We're really excited to see all the amazing things the Canva community creates with this tool. You can try it out for yourself in Canva right now(opens in a new tab or window)! We hope you like it as much as we do. As a finale, enjoy the images below.
Interested in photography, machine learning and image processing? Join us!(opens in a new tab or window)