lambda
Passing User Input from Canva UI to your Lambda Function
Learn how to pass Canva user inputs with Lambda Functions.

In our previous guide, you learned how to interact with Lambda Functions from your Canva App. Most apps require user input to complete their task, so in this part, we show you how to retrieve a user value and pass it to your third-party service. Then, you can use the new response to display custom content based on the user’s input. Working with services like Lambda Functions to handle user input reduces load on your app’s frontend, keeping it performant. Let’s take a look at how to use user input.
Accept user input
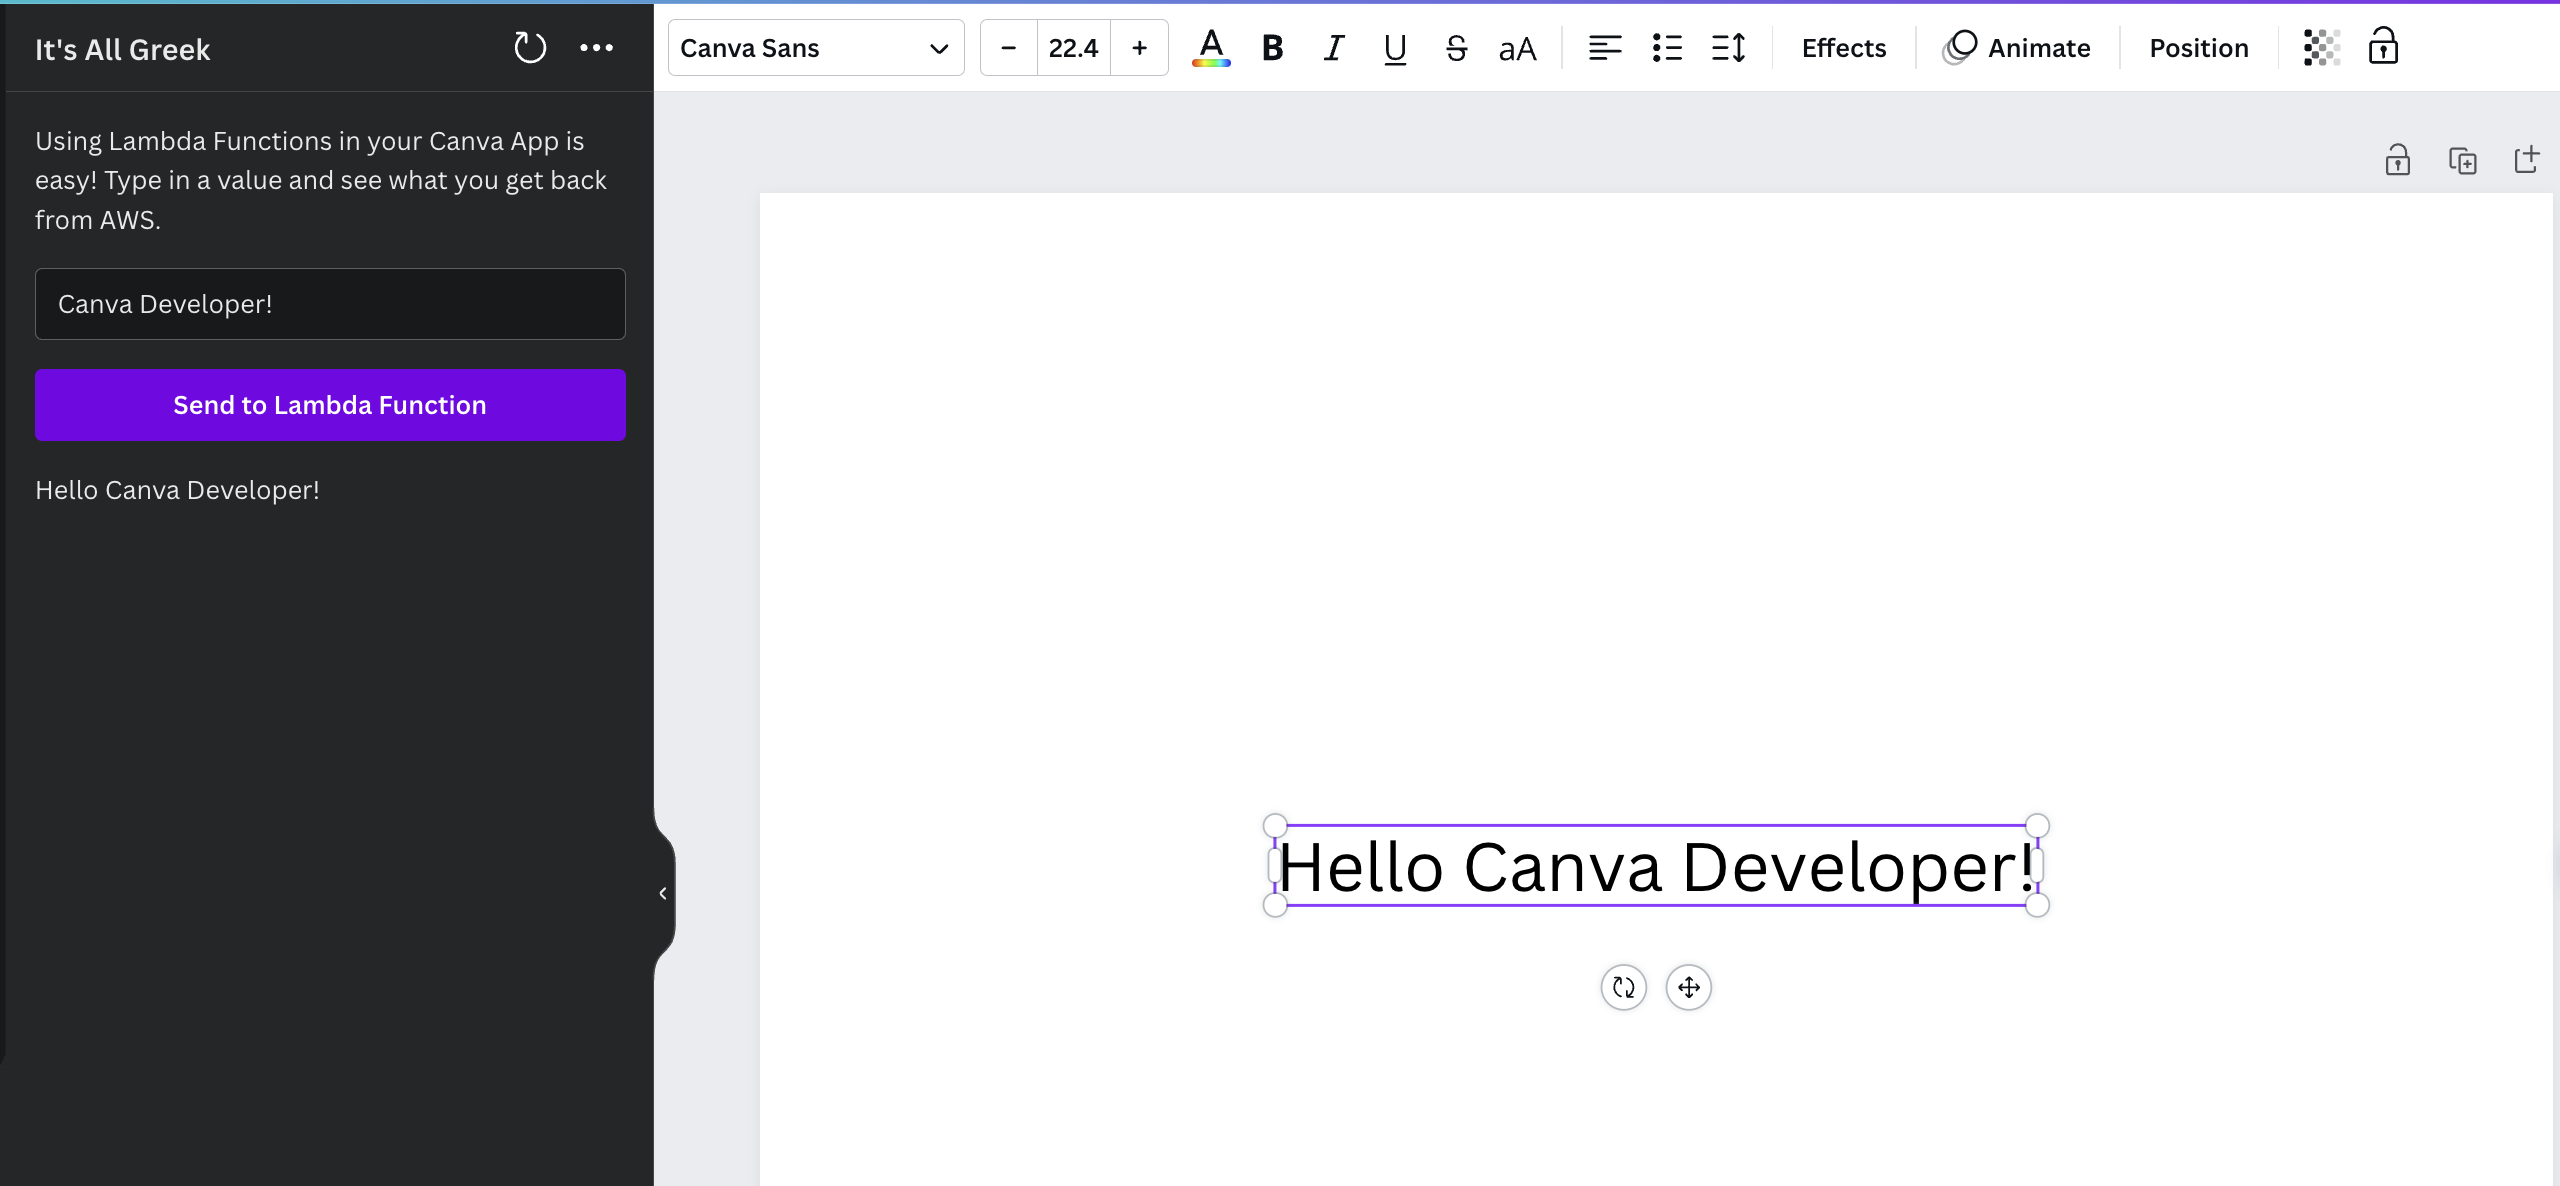
First, let users enter a text value to send to your Lambda Function. The Canva UI Kit provides prebuilt UI components for user input, including text input. To accept user input, you need to create a new field in the App UI and allow your app to be able read and set the value.
-
Edit your
app.tsxfile to make these changes to your app’s frontend. -
Import the TextInput component from the App UI Kit.
import { ..., TextInput } from "@canva/app-ui-kit";JSX -
Using a setter, add a state variable to manage the input value. This needs to be inside your app definition, but outside any methods or the return statement.
const [input, setInput] = React.useState<string>("Canva");JSX -
In your App UI definition, add the new TextInput component above the Send button and inside your return statement.
<TextInput value onChange />JSX -
Set the value of the text input to your input state variable.
<TextInput value={input} onChange />JSX -
Add an
onChangeevent handler that sets the input state to the value the user enters the field.onChange={(value) => {setInput(() => {return value;});}}JSX
Create a POST request
Now that you have access to the user’s input, you can create a request body with the input’s value. Your app sends this to your Lambda Function as a POST request since you're including data. The Fetch method accepts a second parameter allowing you to send a request header with details such as the request method and body data.
-
Create a data object to hold the information sent to the Lambda Function and make sure you stringify the user’s input.
let data = JSON.stringify({passedValue: input,});JSX -
Create a new JSON object to store the headers data.
const headers = {method: "POST",body: data,};JSX -
Pass the headers object into the existing fetch request to your Lambda function’s URL.
const res = await fetch(LAMBDA_URL, headers);JSX
Accept data in Lambda Functions
Accessing data sent to Lambda Functions is straightforward if you have worked with API requests before. Data passed to an endpoint using a POST request is available in the body of the request payload. You can easily retrieve the JSON in your Lambda Function and add the user’s data to a Canva design. This is an example of changing the text value sent and returning the new value.
-
In the Lambda Functions Console, open your function’s code.
-
Parse out the body from the request, or event as it’s called in your lambda skeleton.
let data = JSON.parse(event.body);JSX -
You can then access the user’s input in the data object’s
passedValueproperty.console.log(data.passedValue);JSX -
Now you can do something with the user’s input. For this example, let’s add a Hello message to the text.
let newValue = “Hello “ + data.passedValue;JSX -
Next, you need to return the message with the value to Canva so you can use it in your app’s frontend. To do this, create a response object.
const response = {};JSX -
In the response, add a success HTTP status code.
const response = {statusCode: 200,};JSX -
Return the new value in the response body, and make sure you stringify the body text.
const response = {statusCode: 200,body: JSON.stringify(newValue),};JSX -
Change your return value to the response.
return response;JSX -
Save and deploy your changes!
Use the returned data in your app
Once you get a response back from the Lambda Function, you can share it in your app. For images, you might want to display a few options and let the user select one before uploading the image. With text, consider if your user might want to edit it before adding it to a design, or if you want to add it straight to the design since Native Elements are editable on the canvas.
-
In your code editor, open your Canva app’s frontend found in the app.tsx file.
-
In our previous walkthrough, we already set up the Add Native Element method to handle changes from our response. So, no new changes are needed here 😀
-
A handy tip is to show an element in the UI Side Panel with information about the response. Conditionally rendered elements can display the returned values if you create state variables to handle them.
type State = "idle" | "loading" | "success" | "error";...export const App = () = {...const [state, setState] = React.useState<State>("idle");JSX -
Use these state variables to set the state as idle while doing nothing, loading when the request is sent, and either success or error when the response returns. You can determine the response state from the status code.
setState("loading");JSX -
These state values allow you to conditionally show success or error fields in the UI. In your app’s UI, add a state check for success and wrap it in curly braces.
{state === "success"}JSX -
Next, add a logical AND operator (
&&) to check for a response body.{state === "success" && responseBody}JSX -
Then, add a second AND operator to show a new Text UI component with the response body value, if the first two conditions are true.
{state === "success" && responseBody && <Text>{responseBody}</Text>}JSX -
Finally, you can pass the returned response data to a custom text element on the canvas and display the value in a Text UI component in the app’s side panel.
You’ve successfully passed data provided by a user to your Lambda function and handled the response in your app’s UI. This basic workflow establishes a framework you can apply to any app you build with Canva. We can’t wait to see what you build!