lambda
Getting Started with Lambda Functions for Canva Apps
Learn how to use Lambda functions
With UI Web Apps, it is important to remove heavy load activities and resource intensive operations from the frontend of your application, because not doing so can create a slower user experience. A slow or lagging UI can cause user churn and lead to your app seeing low usage. Offloading these expensive operations to backend resources, like AWS, can help you ensure a great experience for your users. We’ll take a look at how to set up your Lambda functions and Canva app to be able to communicate with each other.
Why Lambda
Lambda Functions are a convenient service available in the AWS landscape. Lambda functions allow you to easily scale up to match demand without having to worry about managing the physical or virtual resources (like servers or containers) yourself. They will scale up and down based on need — saving you time, money, and resources — while allowing you to focus on the core value add, the code only you can write. As you are developing new apps, you can start to understand user needs, patterns, and adoption before investing in developing your own backend. While Lambda functions do have some drawbacks, such as not being able to control your compute resources and having cold start delays, the benefits of seamless scaling and low costs are great for getting started and exploratory development.
Set up your first function
First thing is to get a Lambda function created in your AWS Console. If you are new to creating Lambda functions, their Getting Started template is enough to follow along with this example. If you already have a Lambda function created, go ahead and skip to the Creating the Function URL section.
-
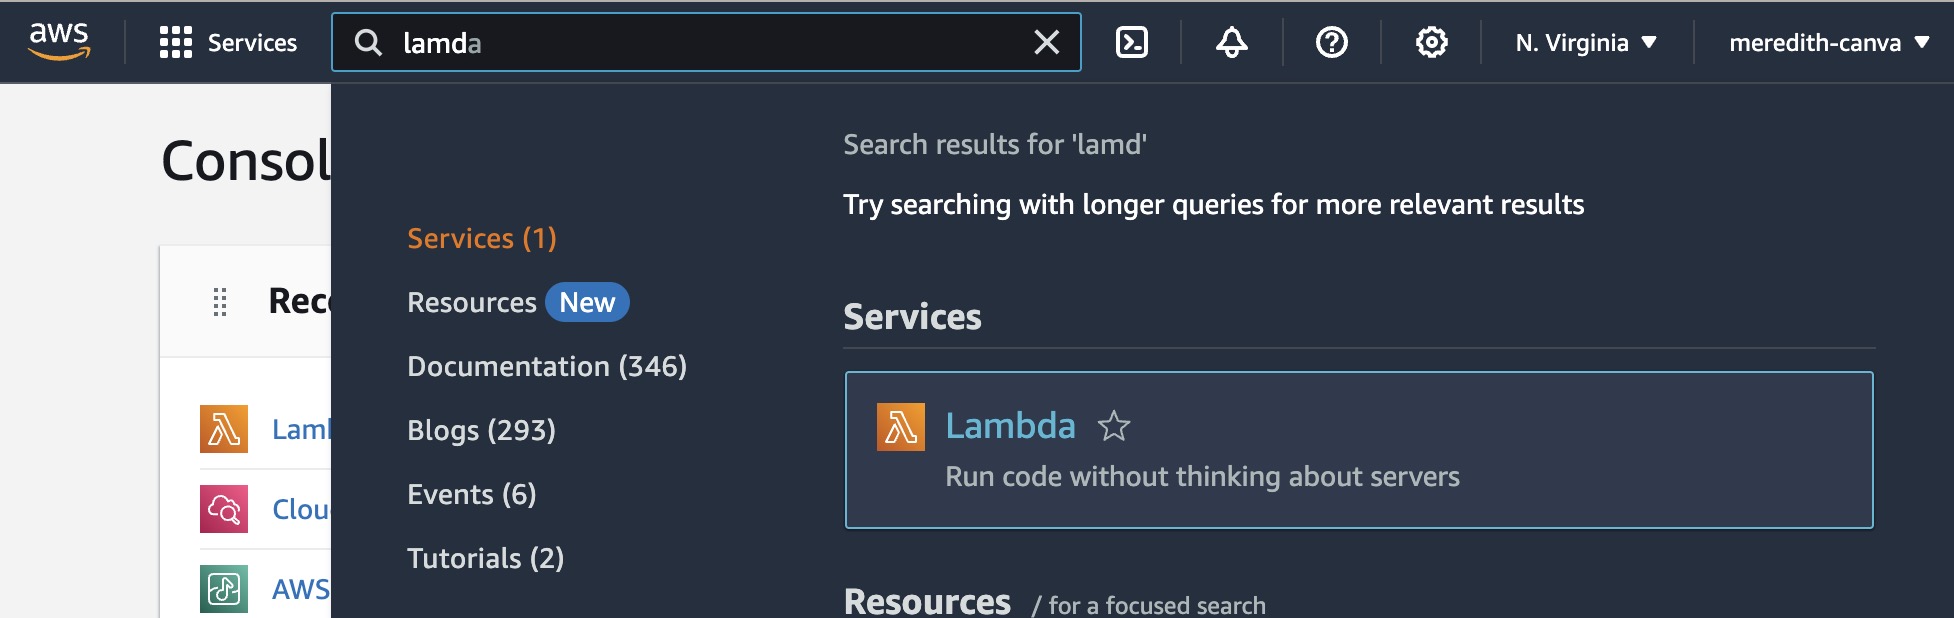
Start by searching for Lambda.
-
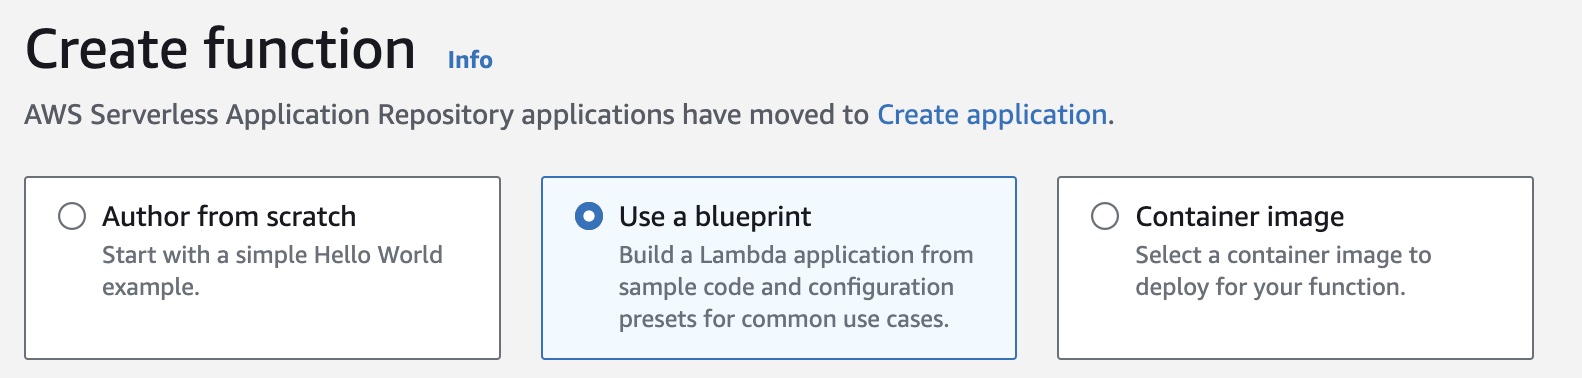
Click Create function.

-
Select Use a Blueprint.
-
Pick a blueprint. The Hello World examples are easiest to follow along with.
-
Give the blueprint a name like
myCanvaFunction.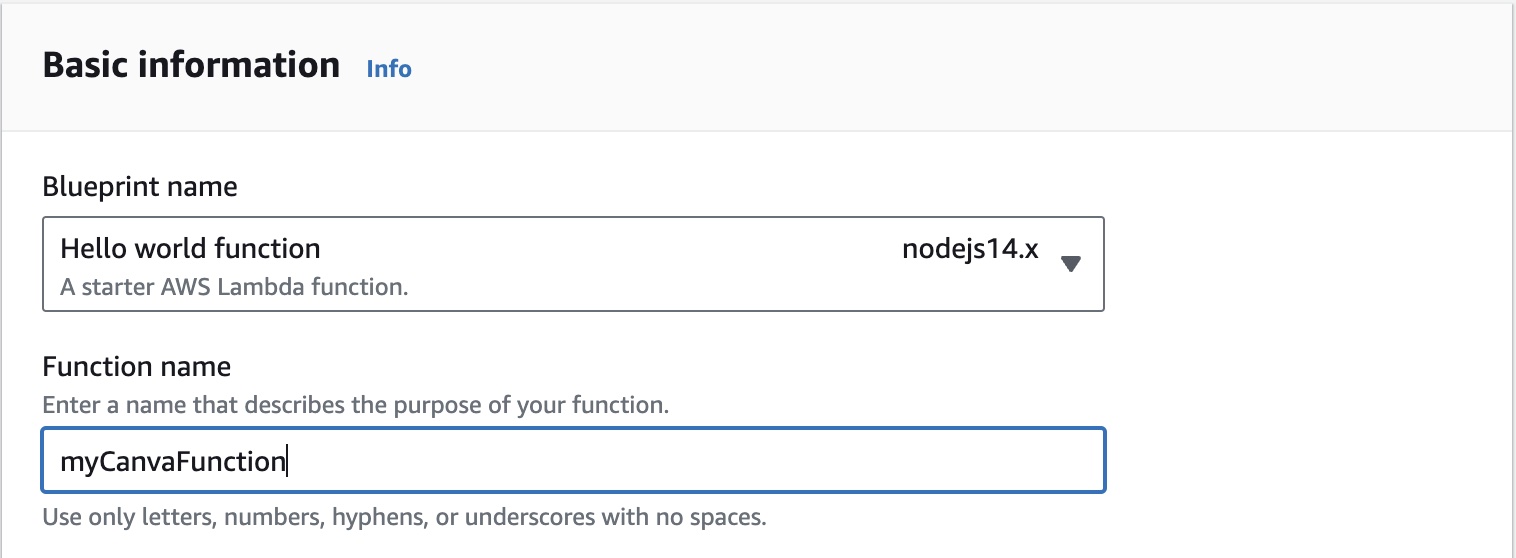
-
For this example, you can leave all the other settings as is, but if this is a production service, you would want to configure roles and permissions.
-
Create the function.

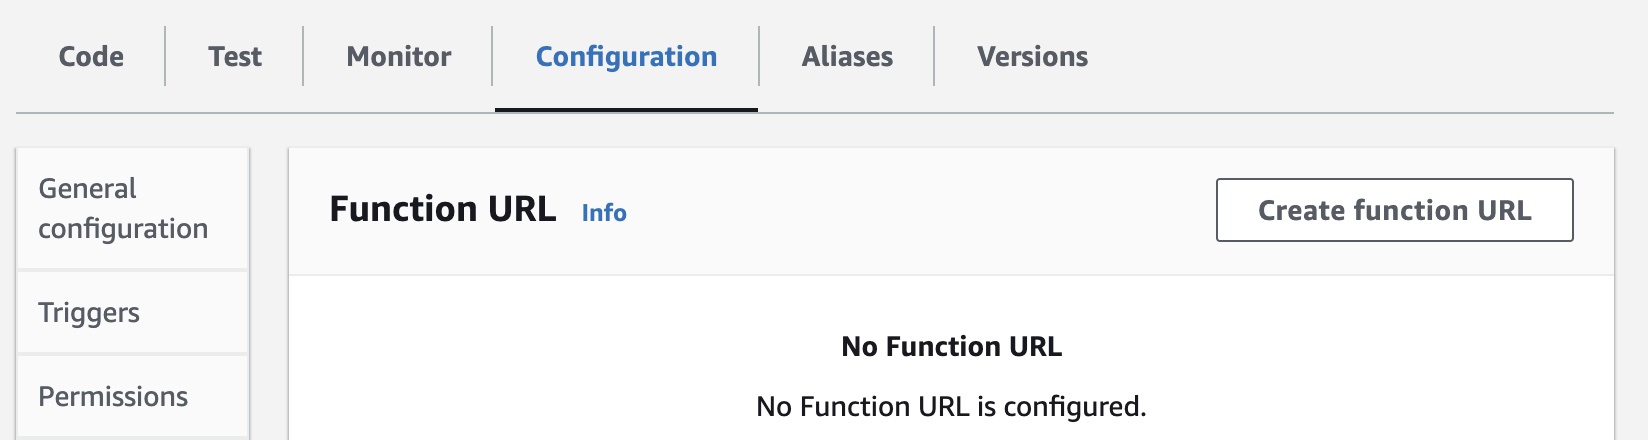
Creating the Function URL
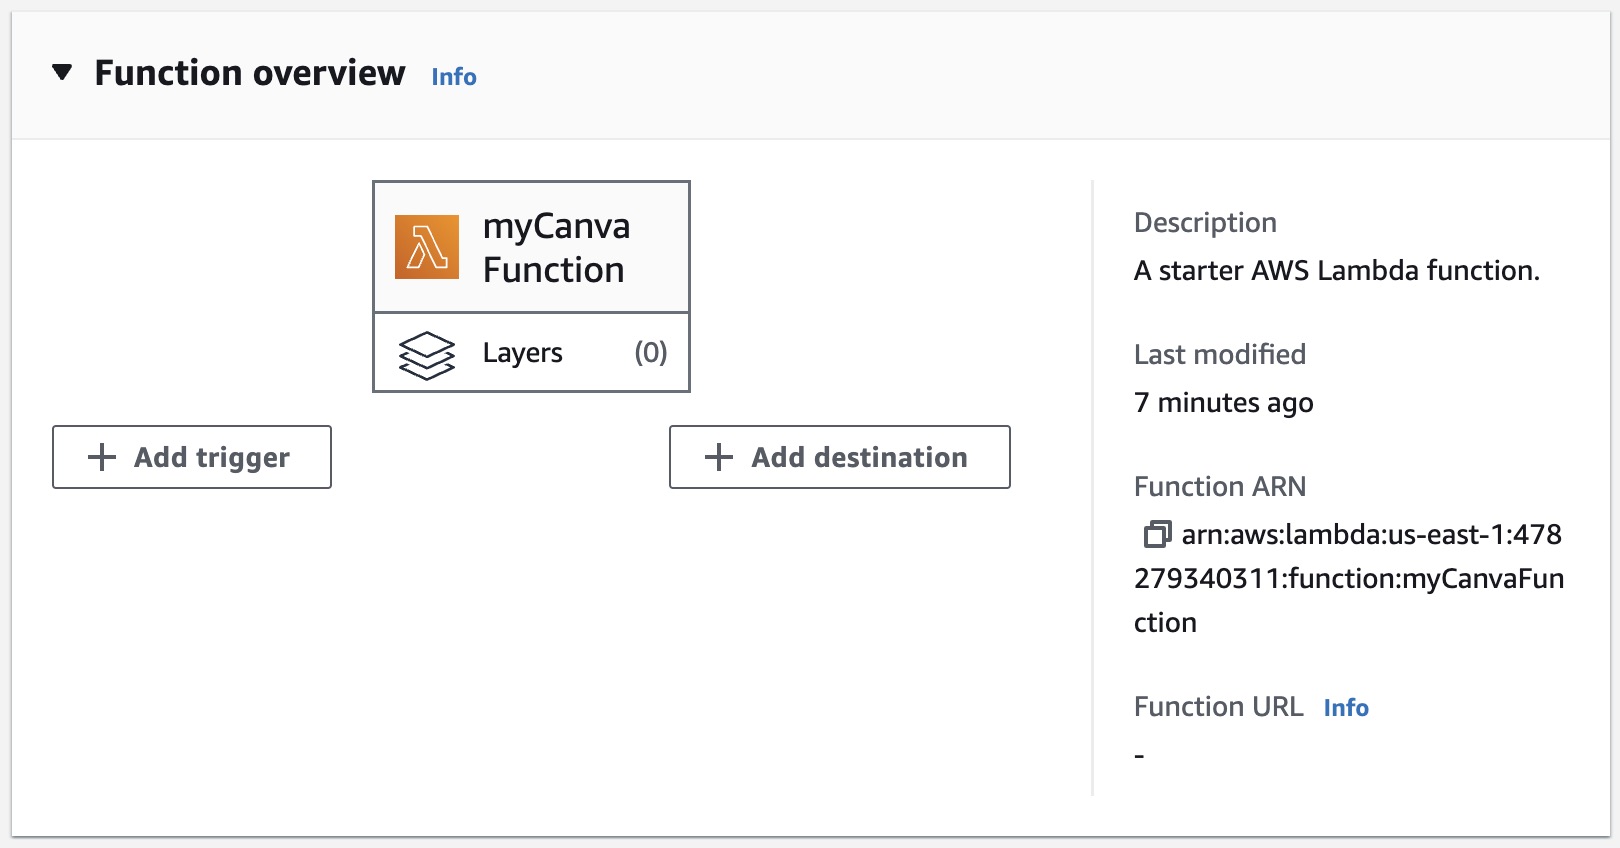
To enable your Lambda function to be called outside of the AWS test environment, you’ll need to create a Function URL. If your function already has a URL, you can see it in the Function overview. If you already have one, go ahead and skip to the section on Configuring CORS.
-
Go to the Configuration tab.
-
Click the Create function URL button.
-
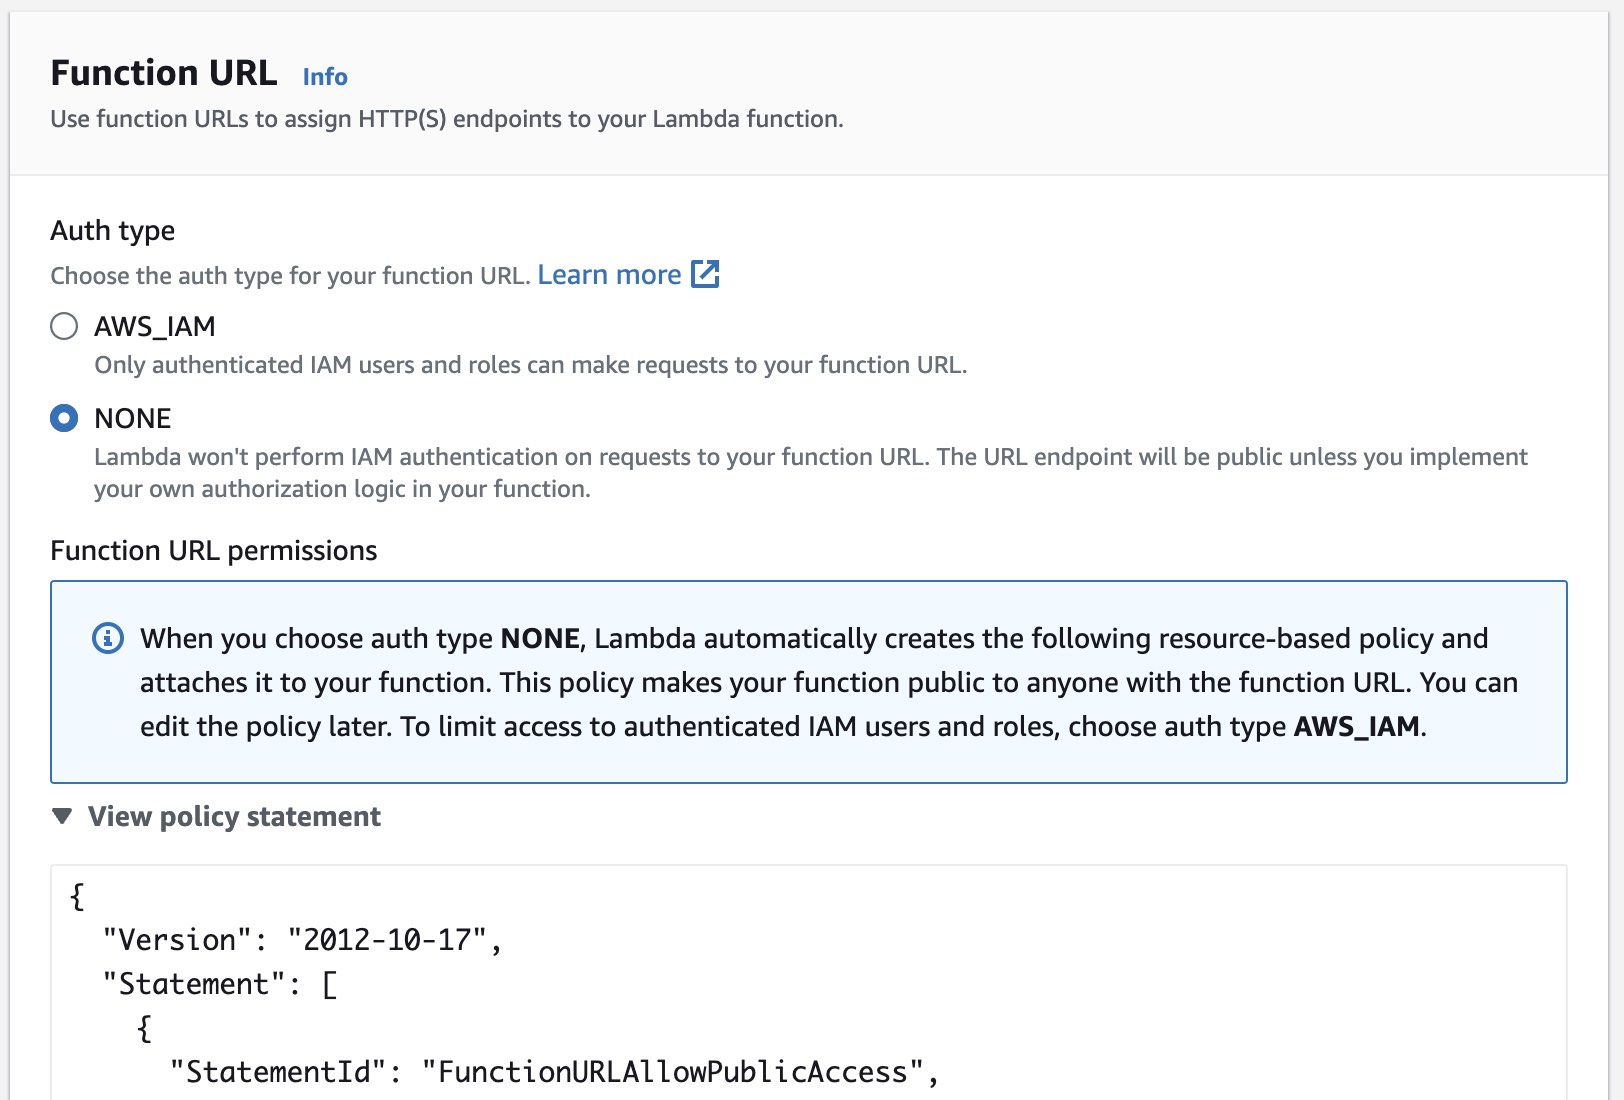
For this example, you’ll want to create a Public URL, so select NONE under Auth type. If this is sensitive data being accessed, you would want to make sure to configure user roles and permissions.
-
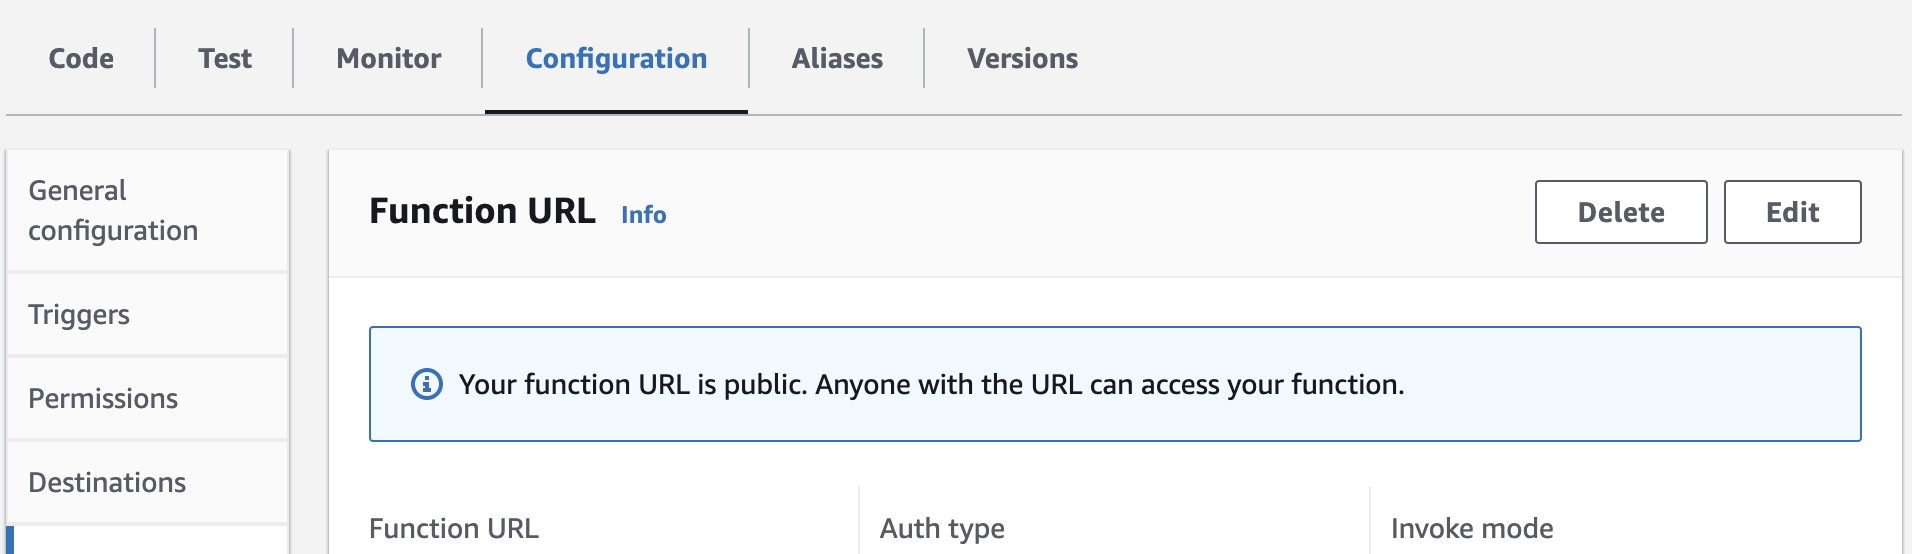
Under Function URL on your Function overview, you should now see a URL. If you click it, it should take you to a new window where you can see the response from your Lambda function. The Hello World function expects an input to be able to output the Key1 value. The result on Node will be “null” and on Python will be a 502 error.

For ease of testing, you may want to update your code to simply return Hello World. To do so, just change the Return statements to “Hello World”.
Configure CORS
In order for your Canva app to be able to communicate with AWS, you’ll need to add it to the allowed list for resource sharing, also known as CORS. This protects against malicious calls to resources by confirming they are from a trusted entity. There are two ways to do CORS.
- The simple way is to just allow everything. You would control access using roles and permissions. This would be
Access-Control-Allow-Origin: *, which would allow any request from any origin though. - A more secure way is to limit access to just your Canva app(s). The Canva App URL is formed in combination with your APP_ID. You would need to add each APP URL to the allow list if this function is used in multiple apps. Alternatively you could set up a static middleware service to forward requests from Canva to your Lambda function.
-
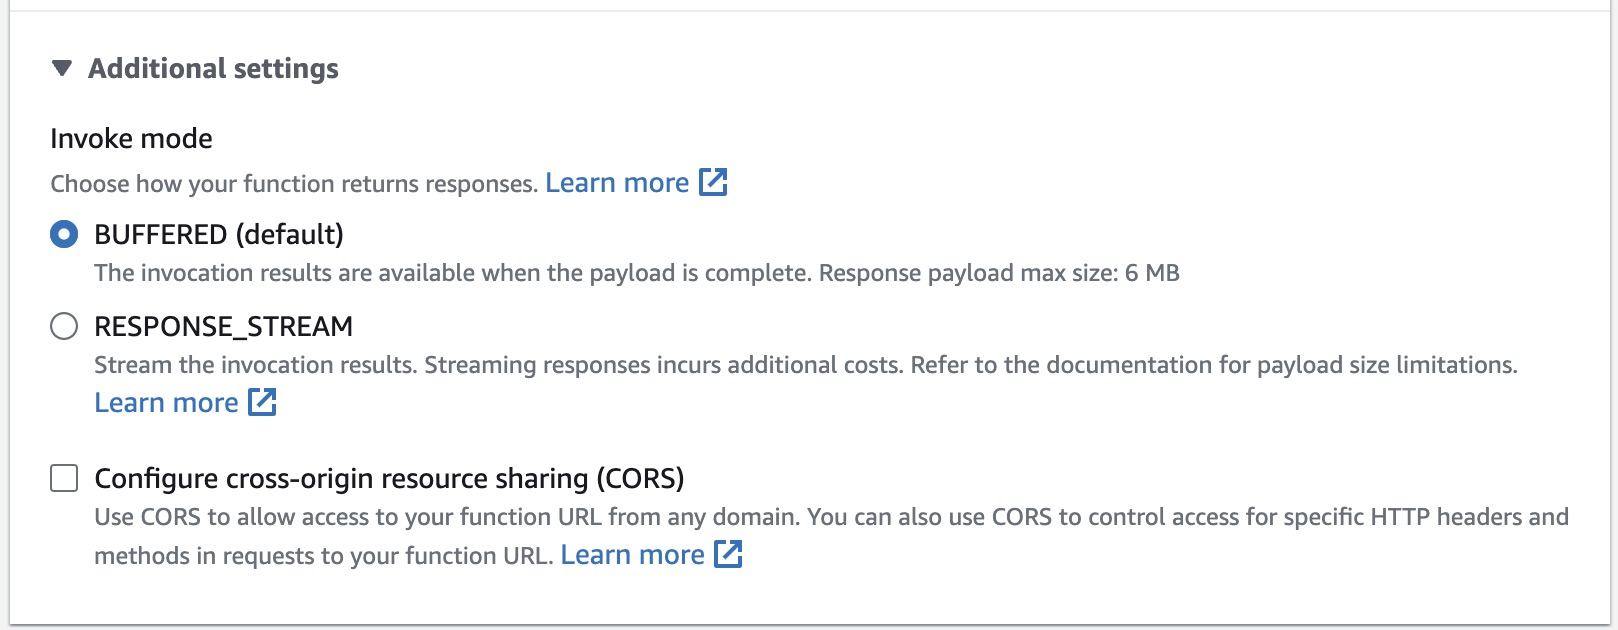
To enable CORS on your Function URL, go to the Configurations tab and click Edit on the Function URL.
-
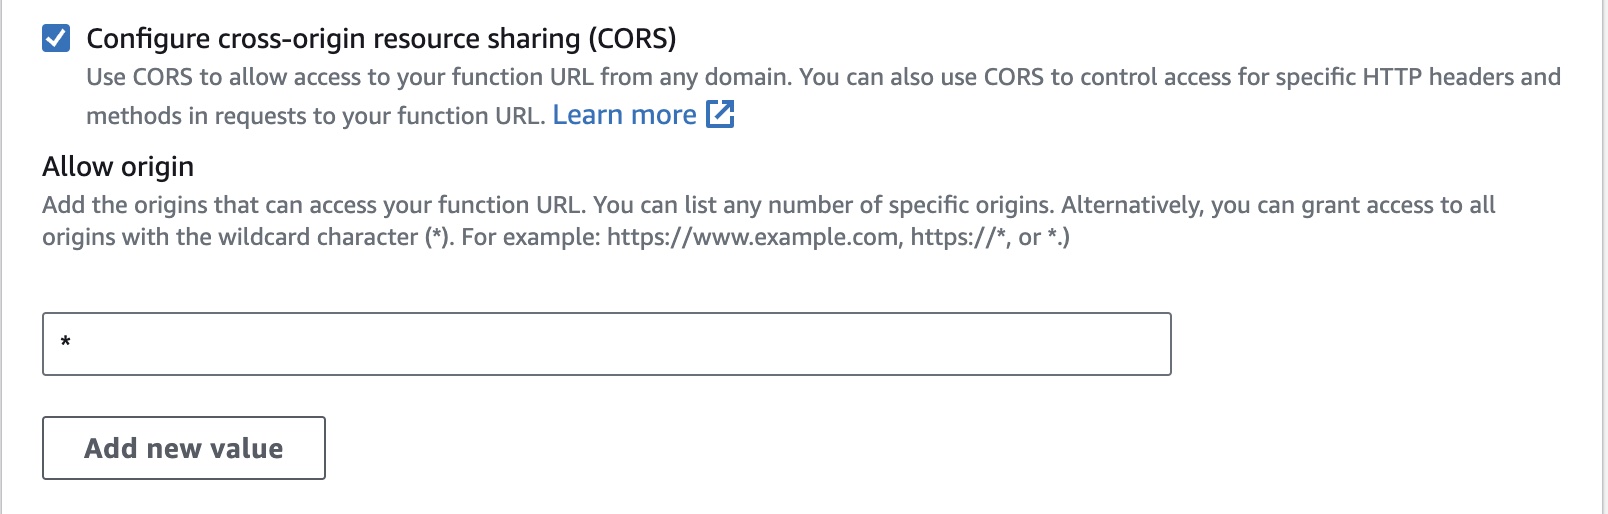
Under Additional Settings, you’ll find a checkbox to Configure cross-origin resource sharing (CORS). Check it.
-
Once it’s checked, you can add Origins to the allow list. For testing purposes, you can leave it as *. Otherwise, add to your Canva App URL or middleware service.
-
Make sure to Save.
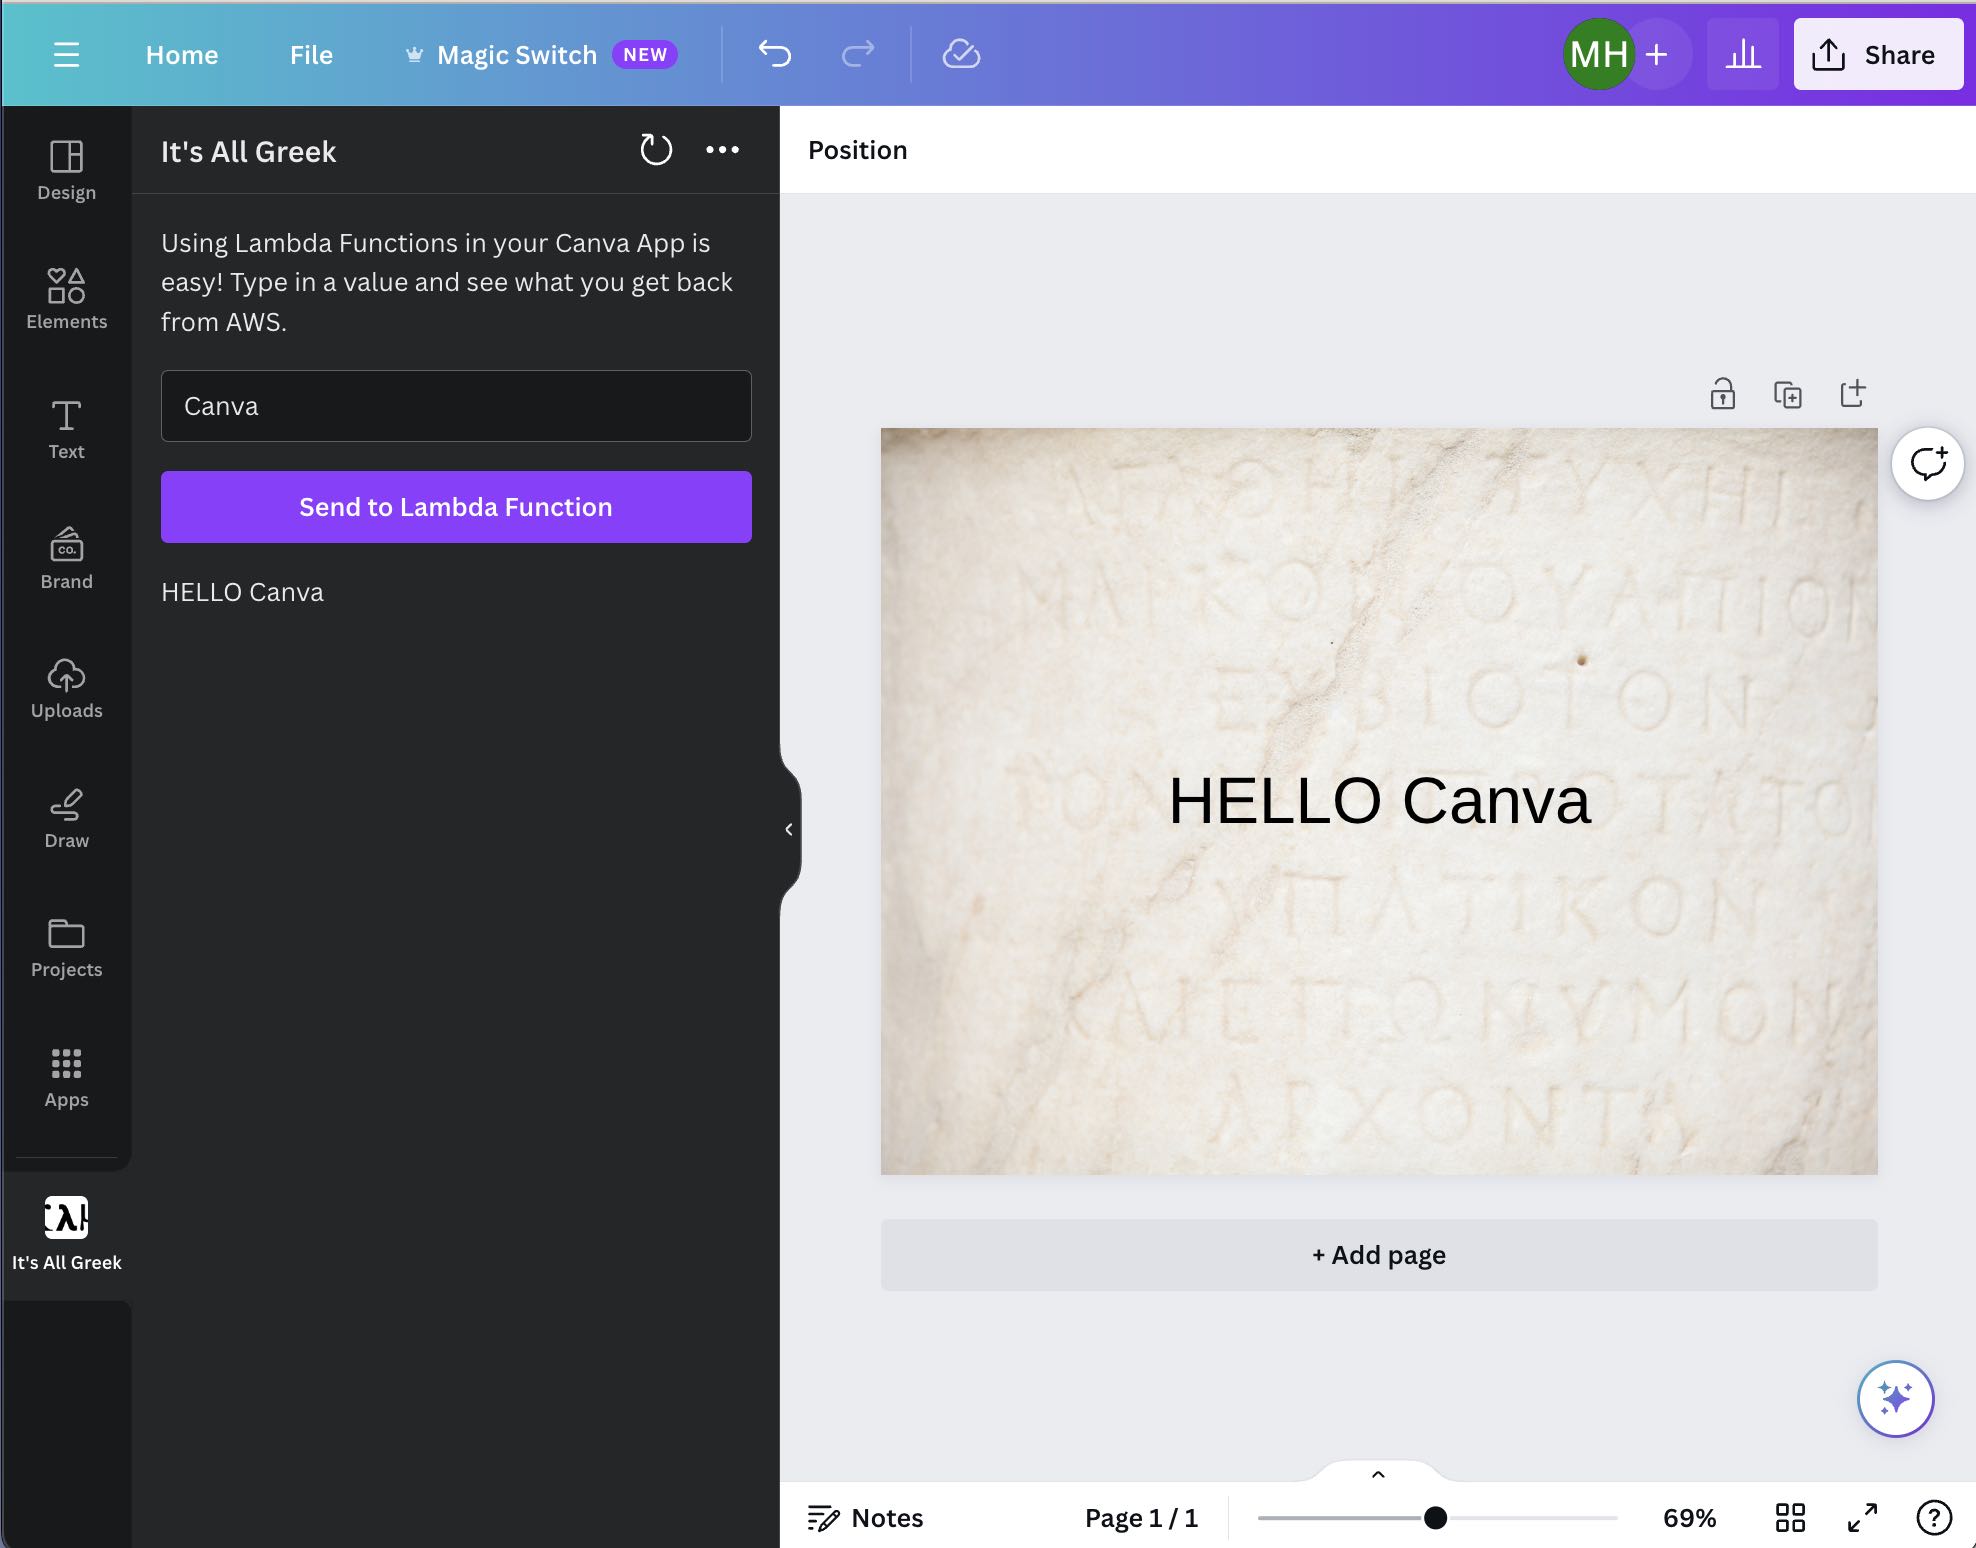
Call your function from Canva
You’re now ready to use your Lambda function in Canva! You’ll need your Canva App code. If you haven’t built a Canva App yet, you can clone the Starter Kit from Github(opens in a new tab or window) to make it easier to jump into building. Once you have it cloned, edit the app.tsx file under src.
You’re going to make a Fetch call to the Function URL. In order to keep your app dynamic, it’s recommended to use state management for any data displayed to the end user.
-
You can start by setting up state management for the response in your App. Inside of your App definition, add in a current state variable and setter function, and use these for the returned values from
React.useState. Since you can’t guarantee the responses format, we recommend usingunknownandundefinedstates. Set the initial state toundefined.const [responseBody, setResponseBody] = React.useState<unknown | undefined>(undefined);JS -
Next, create a function to handle the GET request, named
sendGetRequest. Since in this example you are simply getting data from your Lambda function, you don’t need to worry about passing data. However, Fetch can be a resource hog, so make sure to make it async.const sendGetRequest = async () => {}JS -
Inside your new send function, you can send the fetch request to your Function URL. Make sure to assign the response to a variable.
const res = await fetch(LAMBDA_URL);JS -
Once the fetch request returns, parse out the JSON from the response and assign it to a new variable.
const body = await res.json();JS -
Use the body JSON object to set the state of the response body.
setResponseBody(body);JS -
You’ll use the response to add a new element to the design. Make sure you’ve imported the
addNativeElementmethod from@canva/design.import { addNativeElement } from "@canva/design";JS -
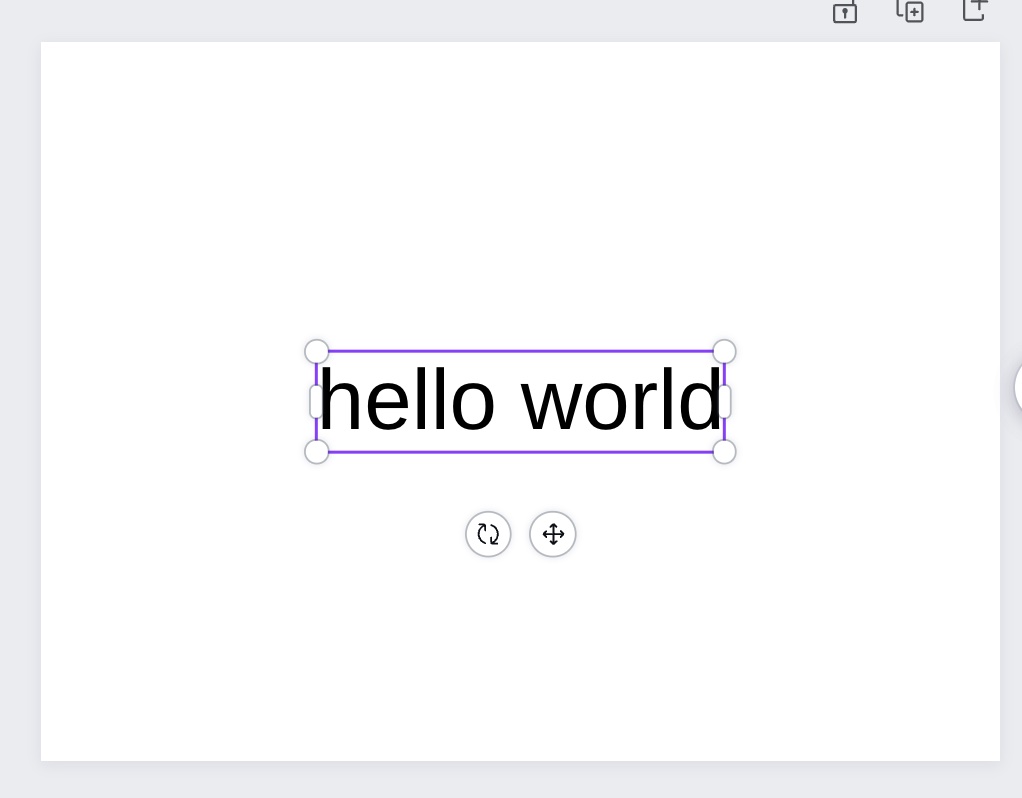
To add a text element, you’ll need to add the props of type as TEXT and children as an array of strings. Since the example function is returning a string of “Hello World”, you can wrap it as an array [ ].
addNativeElement({type: "TEXT",children: [body],});JS -
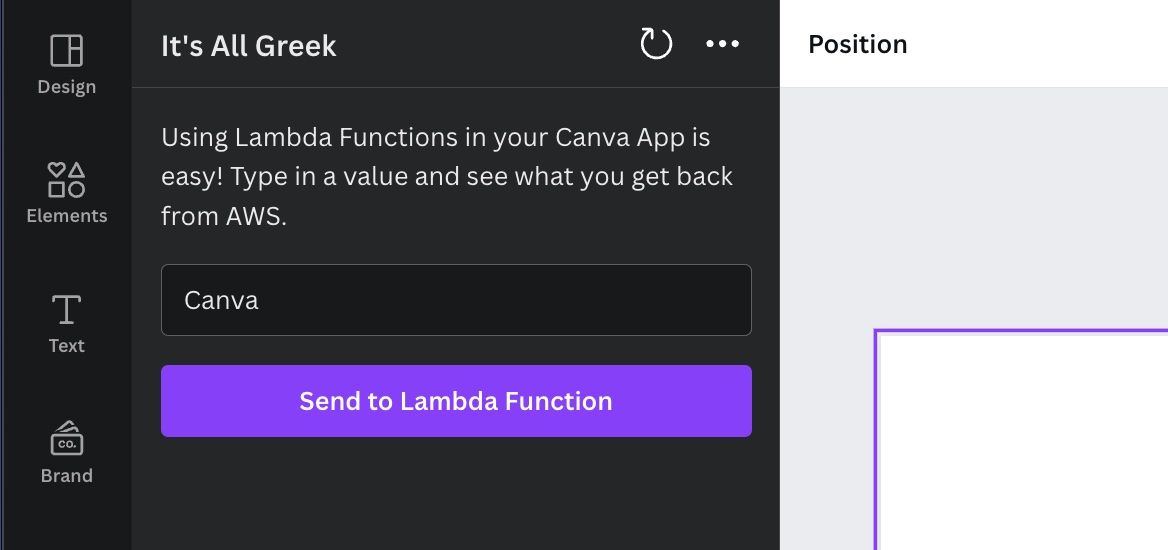
Last thing to do is to actually call your send function. You can do this from an onClick handler for a button. Your App UI can be found in the return statement for your App code. In your app UI, make sure there is a Button UI element. You can use the UI kit Button to keep it aligned to Canva Brand.
<Button variant="primary" onClick={onClick} stretch>Send to Lambda Function</Button>JSX -
Back in your app code, make sure to have the event handler defined. Inside the event handler, call your send request function.
const onClick = () => {sendGetRequest()};JS
Test your App
Now that your app is built and your Lambda function created, you are ready to test your app. You’ll need to get your app running locally and preview it inside the Canva Editor. The following steps are in reference to the Starter Kit, so make sure to adjust depending on your app folder structure.
-
At the top level of the app in your preferred CLI tool — for the Starter Kit, this is the Starter Kit top folder — you need to run an install to make sure you have all your packages.
npm installSH -
Once you have successfully installed your app, you can start your app. In the Starter Kit, the keyword
startis configured to run your app.tsx src file.npm startSH -
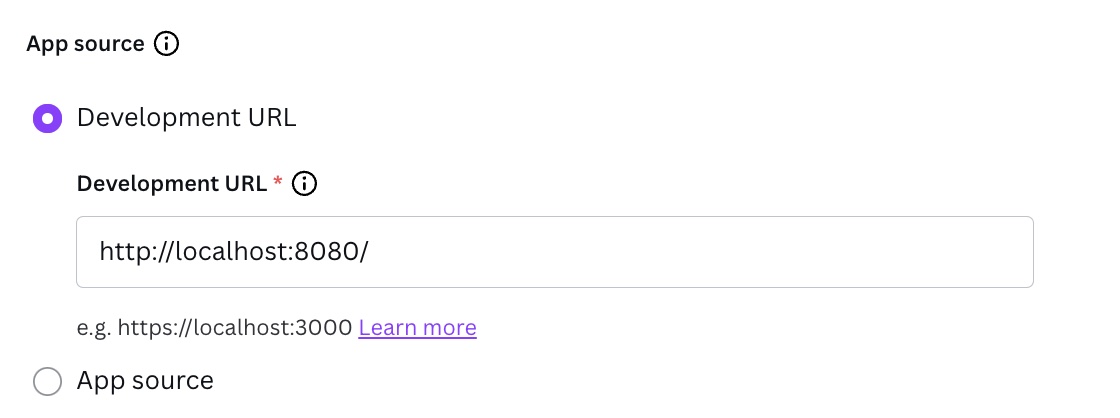
This will provide you with a development URL. You will need this for configuring your app in the Canva Dev Portal. Switch over to the Developer Portal(opens in a new tab or window).

-
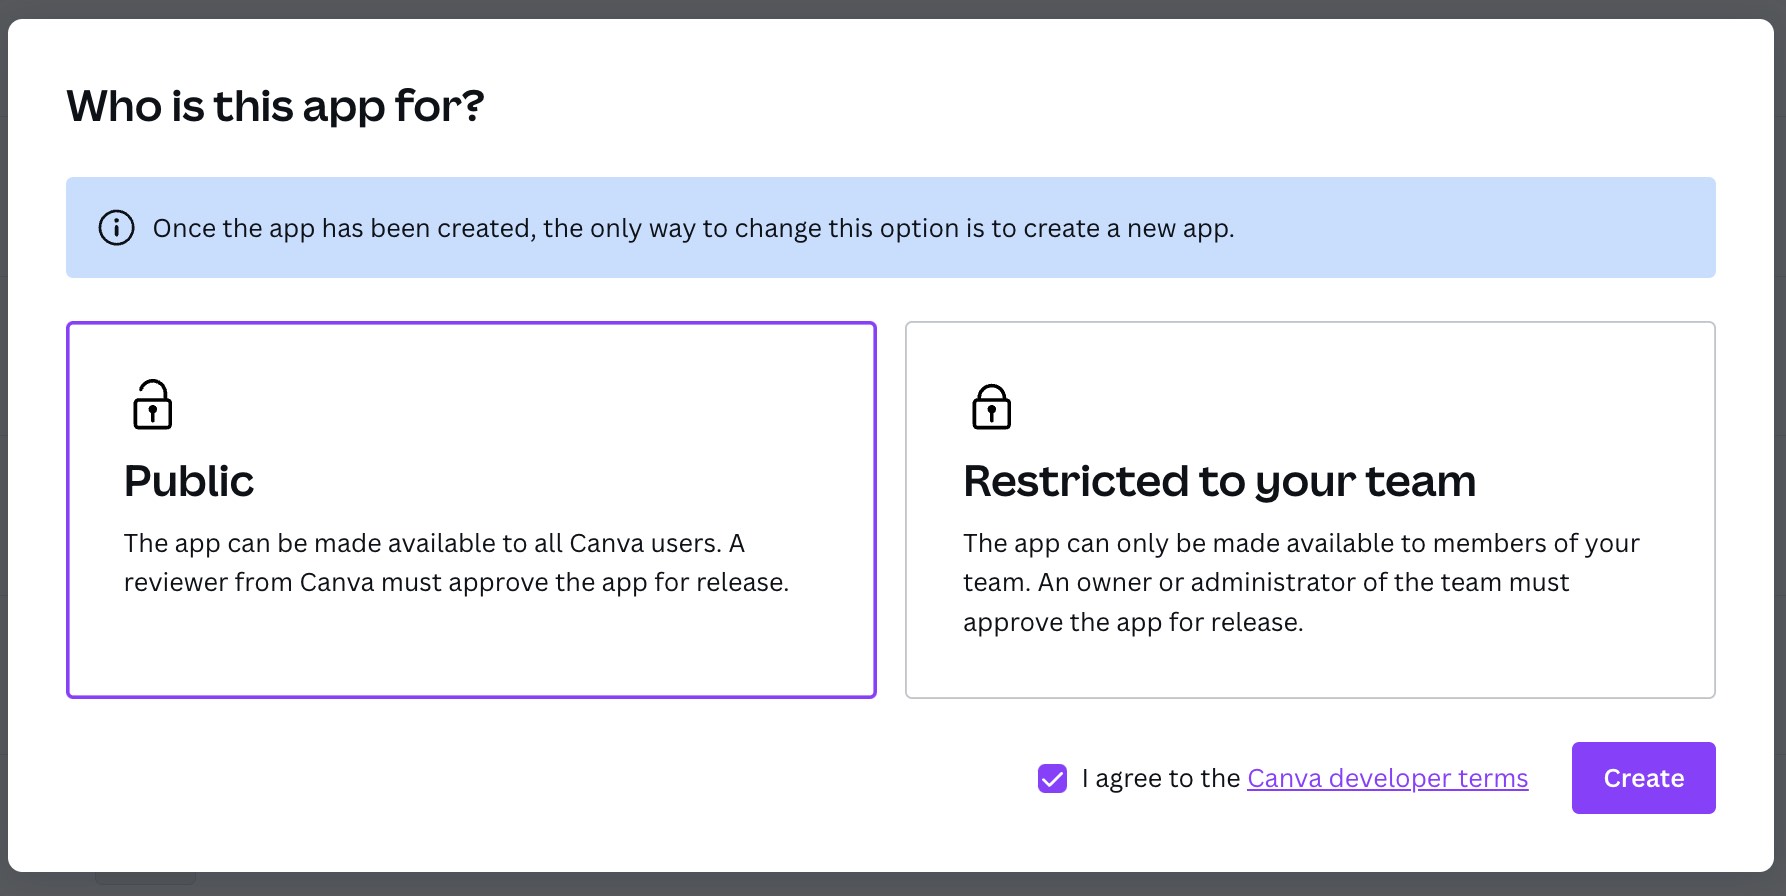
You can either Create an app if you don’t have a test app to use, or use an existing test app. It’s recommended to create a Public app.
-
In the Code upload tab, under App Source, paste in your Development URL from your running app.
-
Click Preview to see your app running in a new blank Canva design.
-
Here we’ll have a button to Send to Lambda Function.
-
When you click it, you should see a Text element added to your design saying Hello World!
And that’s the basics of getting started using Lambda functions in your Canva App. It’s simple to bring in functionality from 3rd-party sources to take your app to the next level.
In our next Blog Post, you can learn about how to pass data from User Inputs in your Canva App to your Lambda Function.