Monetization
External monetization for Canva Apps
A community member's tips and tricks for monetizing your app

This post is community-authored by Sukhpal Saini(opens in a new tab or window), Founder of Carousel Studio(opens in a new tab or window). It reflects his experience with external monetization and is not official Canva documentation.
For official Canva guidance on implementing external payments, see the external payments docs.
With Canva, you can have external payment links to monetize your app. I’ve put this guide together after spending the last 8 months running into monetization, support issues and learning painful lessons. Hopefully this gets you to start making money without many headaches. Feel free to message me on LinkedIn or sukh@engyne.ai(opens in a new tab or window) if you want more advice, have questions.
The simplest way to accept payments with Stripe payment links
Stripe Payment Links are simple links that the user can open and pay for a one-time or a recurring service. It’s the lowest lift way to add monetization to your Canva app.
Here’s how you can do it:
- Register on stripe.com(opens in a new tab or window) and create a new Product
- Add two recurring prices:
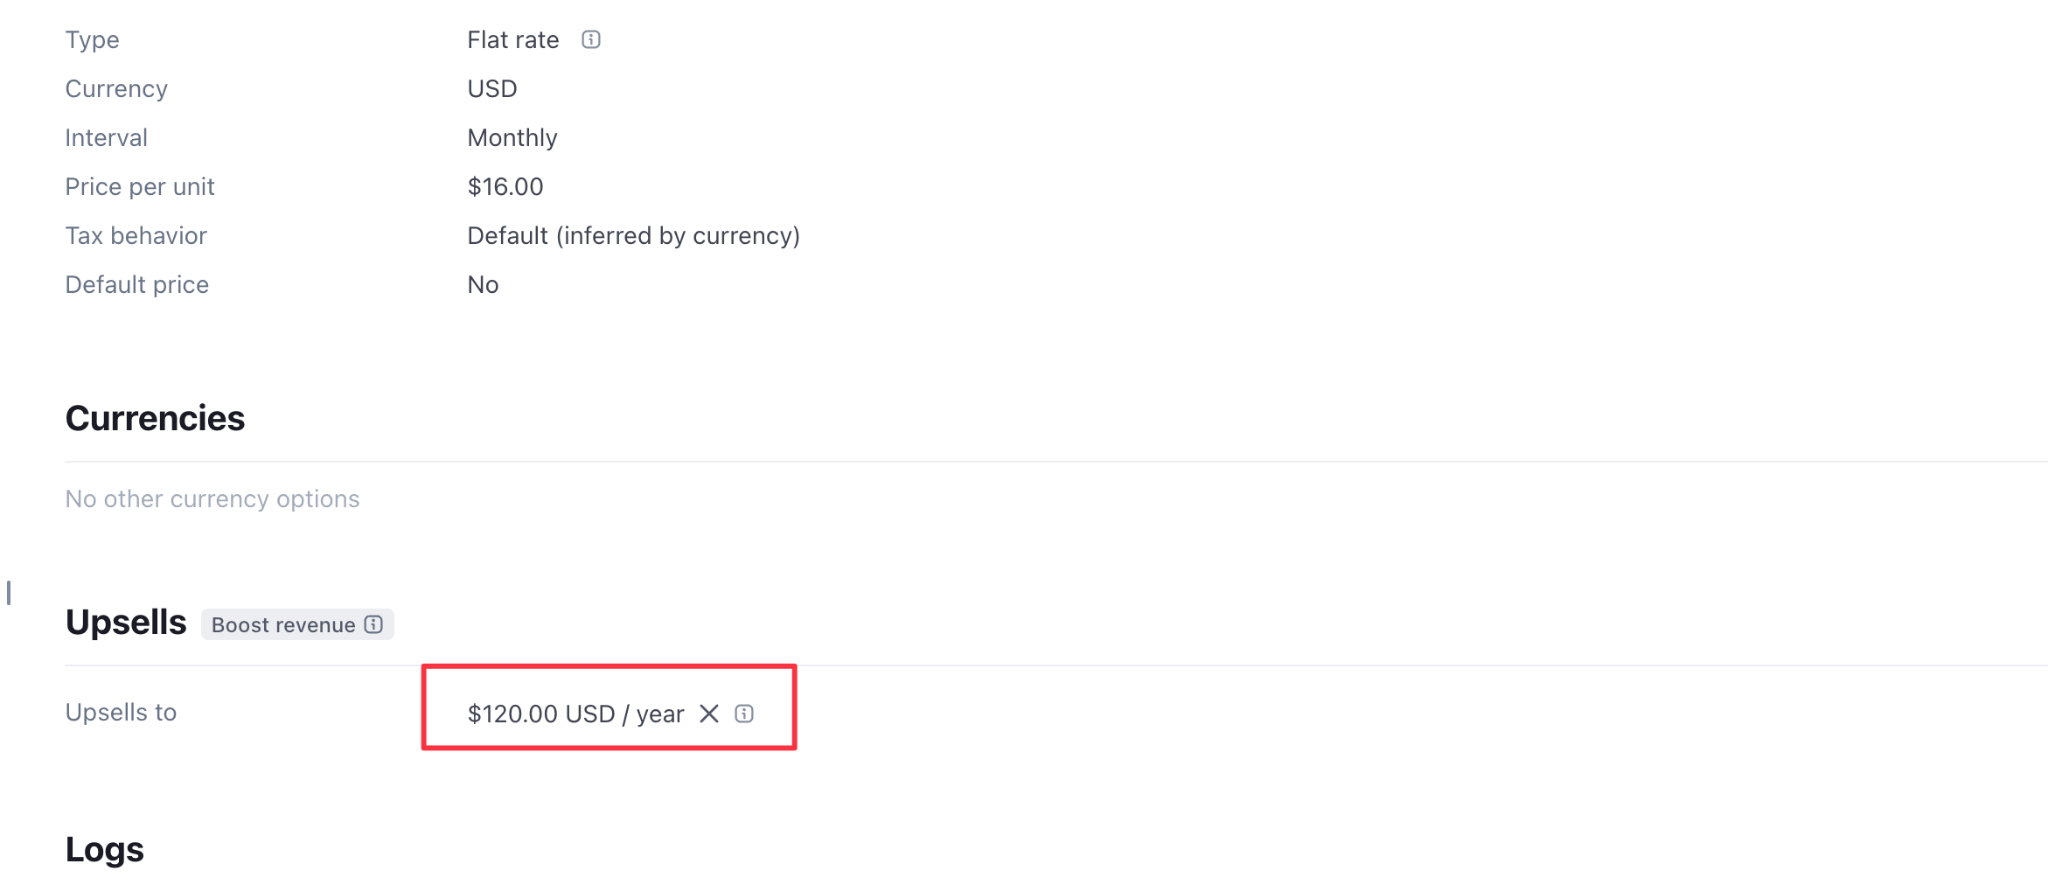
- $16/mo
- $120/year
- I’ve personally tried different lengths for trial days. I recommend doing a 3-day trial.
- Open the price object for $16/mo, scroll down to “Upsells” and add the $120/year in there. This will boost the number of people that pay yearly right away.
Create a payment link
-
Search for “Payment Link” in the top search bar
-
Set the product we created earlier and the $16/mo price point for the Payment page
-
You’ll get a customized link that looks like this: “buy.stripe.com/xyz”. This will let your customers pay.
-
To update your database when a customer pays, send the
userTokenfrom your app to your own backend over a secure POST request, verify it with Canva, and map it to a stable internal user ID. Then generate the Stripe Payment Link on the server side with that stable ID inclient_reference_id. Listen for the Stripecheckout.session.completedwebhook event to confirm the payment and update your database.Don't place the raw Canva user token in the URL. A short-lived JWT should never be exposed in browser history, referrer headers, or third-party analytics. Use your backend to verify the token and pass only an opaque customer identifier to Stripe.
For the token flow, follow the token flow guide.

Adding the payment link to your Canva app
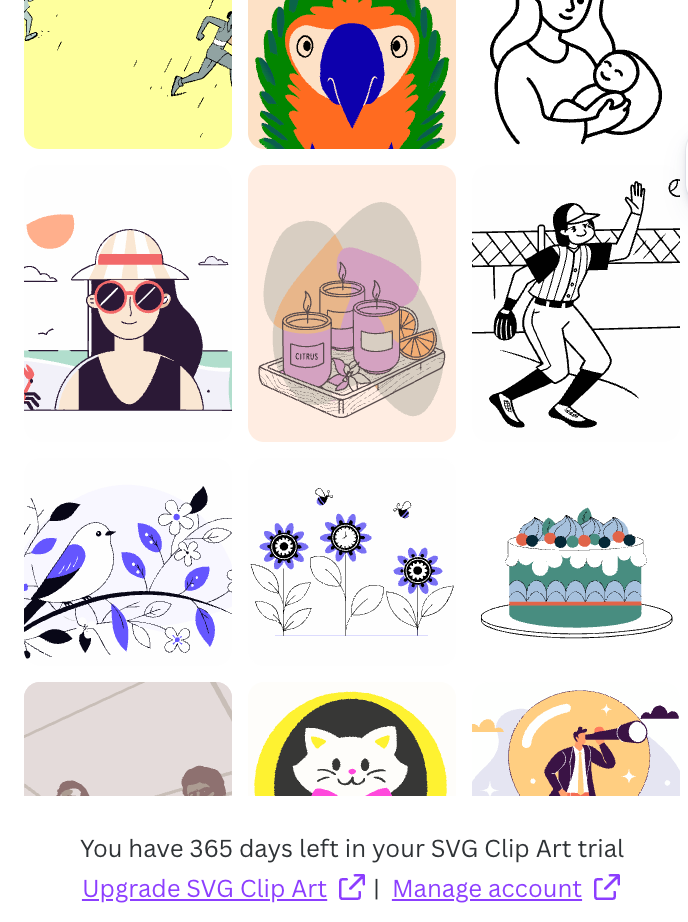
Since the payment is just a link, you can place it at the very bottom of your app so that it’s always visible like below:
Letting customers manage their subscriptions
Once customers pay, they will want to be able to easily cancel or downgrade their plans. Don’t forget to add this in because otherwise customers will think you’re a scam product that doesn’t let them cancel and you run the risk of people ruining your reputation publicly.
Stripe already has a customer portal that you can set up. They go to the link you provide, enter their email, and get a magic link to their subscription so they can manage it, including downgrading, canceling, and viewing invoices.
Here’s how to set it up:
- Go to Stripe > Settings > Customer Portal and turn it on. Copy the link it generates for you.
- In the settings below:
- Enable “Invoice History”.
- In Cancellations > Cancel immediately.
- In Retention coupons, create and add a coupon for 20%. Stripe will automatically offer this to users who are canceling to get them to stay.
It’s important to have the “Manage Subscription” visible at the bottom of the app because users will get very antsy if they can’t find an easy way to cancel their subscription.
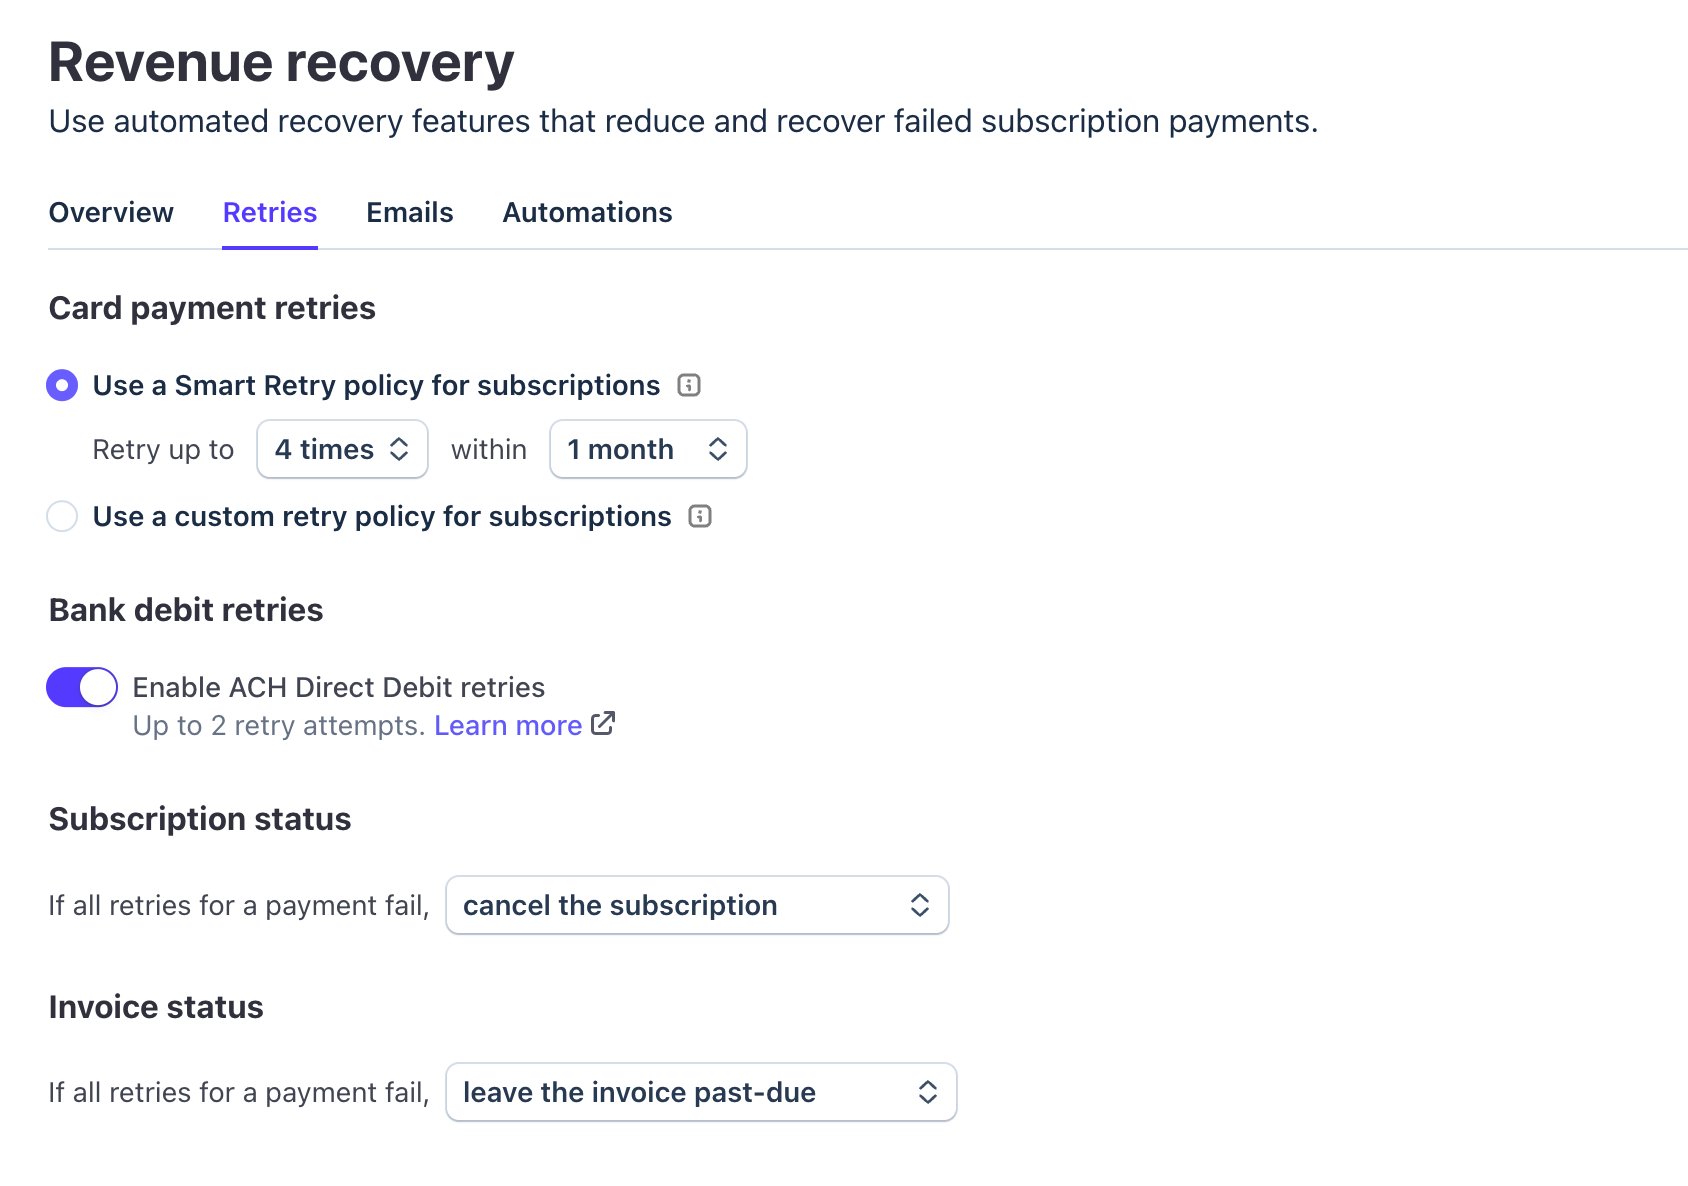
Stripe smart retries
A lot of customers I’ve noticed don’t pay for their invoices - either they have low bank balance or more often they block the payment attempt through their bank app. In either case, it’s a good idea to implement Smart Retries that retries payment attempts every few weeks.
I keep my settings to 4 times a month and change the Subscription Status to “cancel subscription” if all the attempts fail.
Sukh’s pricing advice
No matter what you do, there will always be customers that contact their bank to do a chargeback. If the number of transactions that are charged back go over 0.01%, Stripe will label you as a high risk merchant and charge you more to accept payments - you don't want this.
There are a few things you can do to save your account from suffering from this:
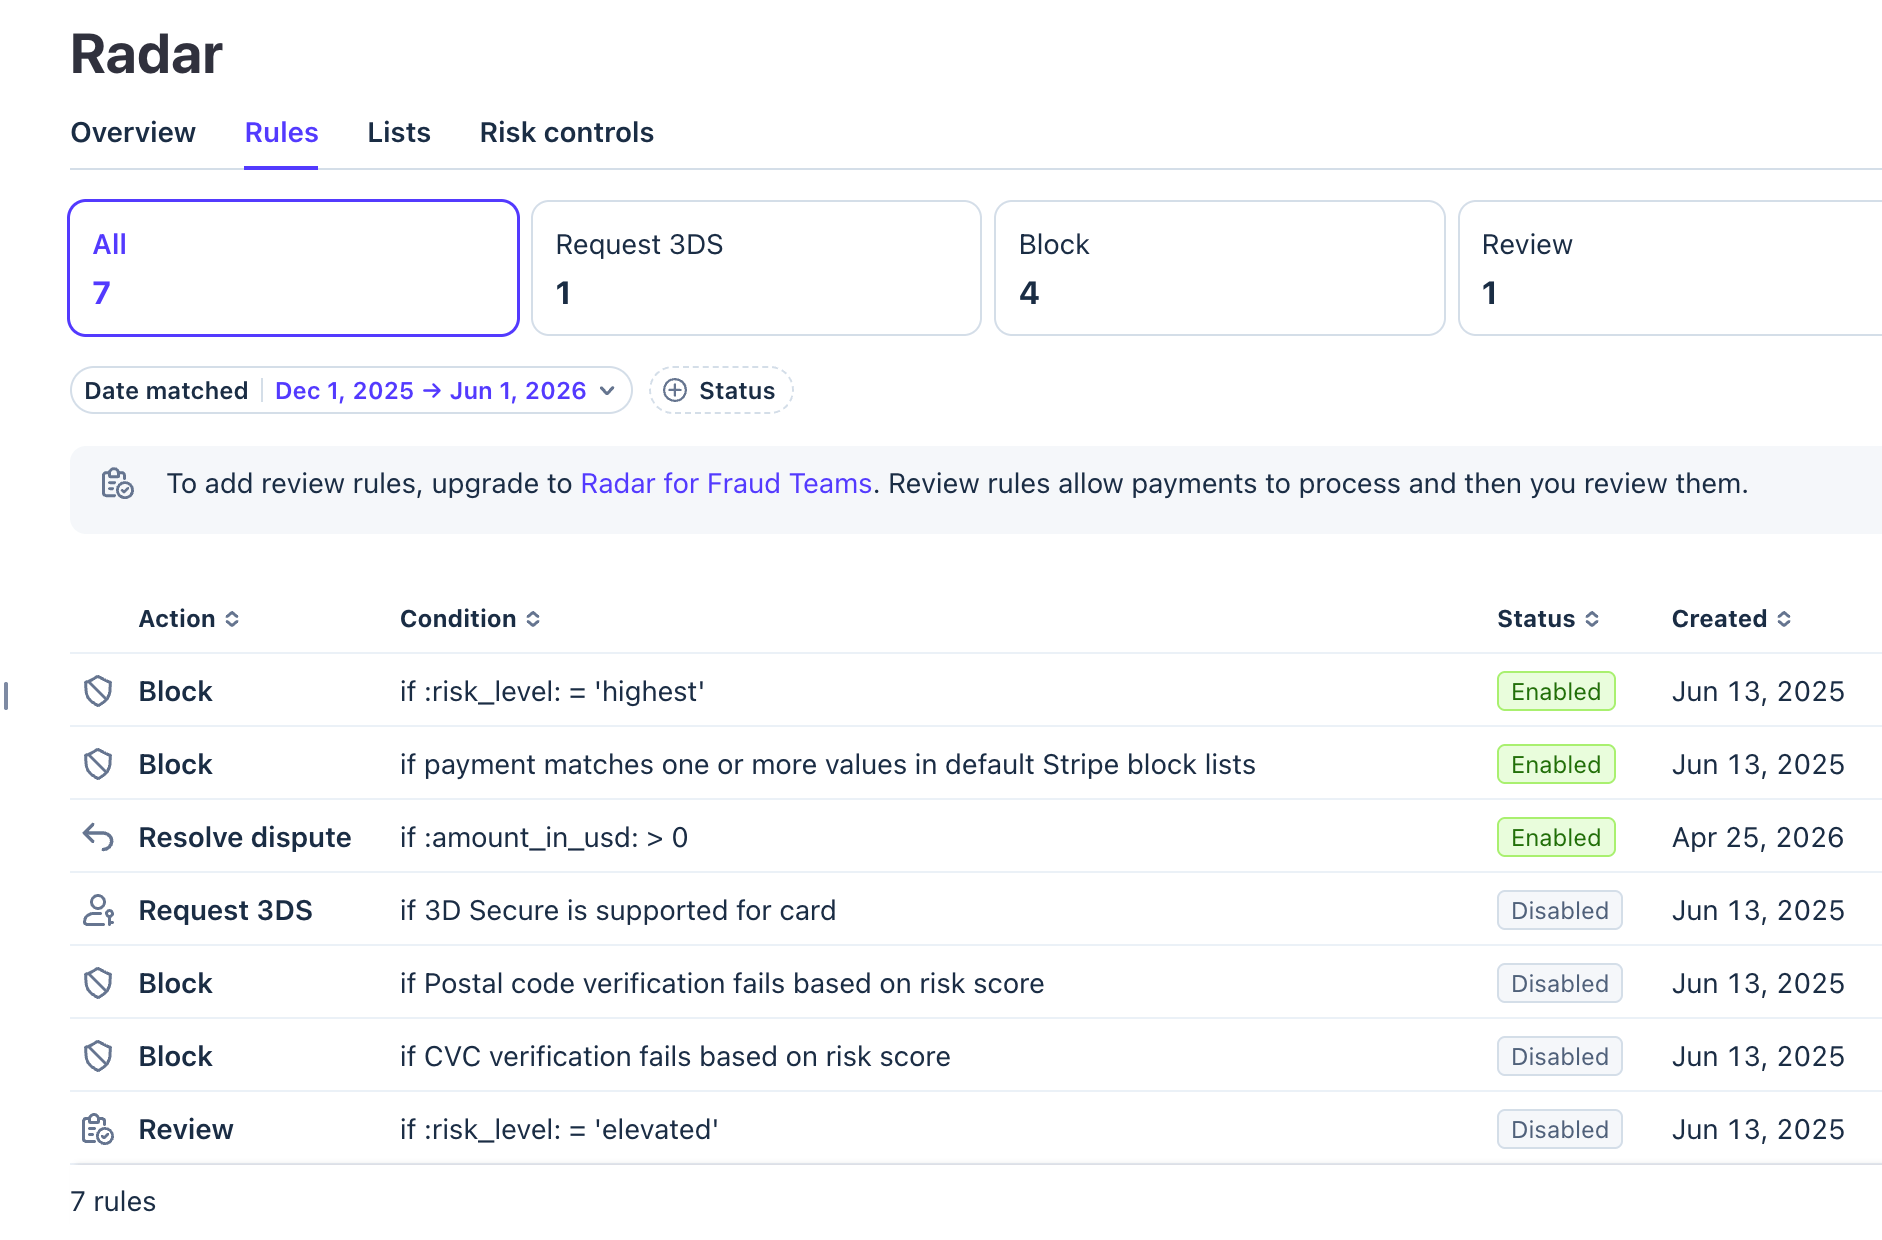
-
Add these Radar rules: Radar is Stripe’s payment interception layer that can catch bad actors before the payment goes through. I’ve set up rules to block high risk customers and automatically resolve disputes.
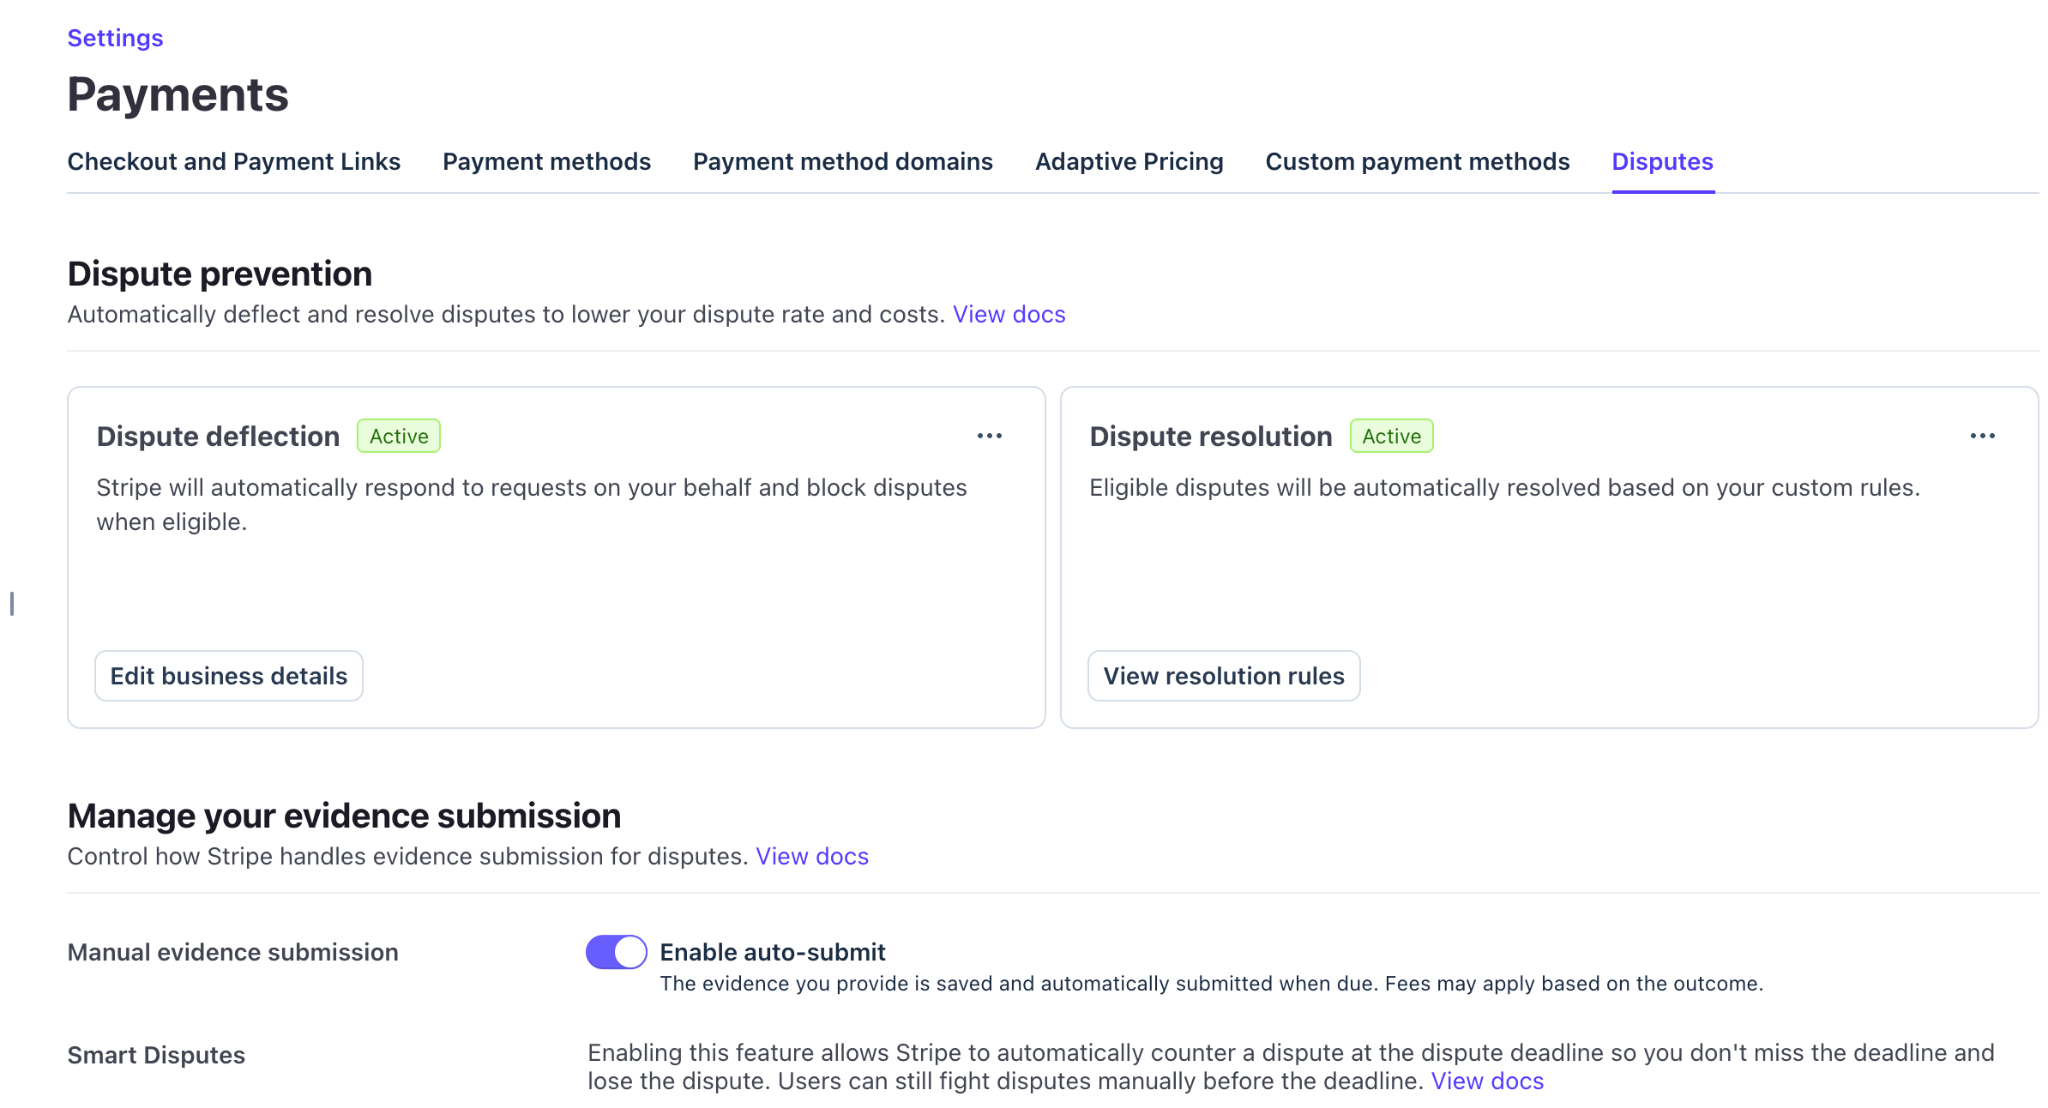
-
Turn on “Dispute Deflection” and “Dispute Resolution”. Stripe can automatically detect when someone has started a chargeback and in most instances, refund the payment ASAP. If there’s a dispute that does go through, it can automatically create evidence and let you one-click counter the dispute (which is VERY handy, trust me).
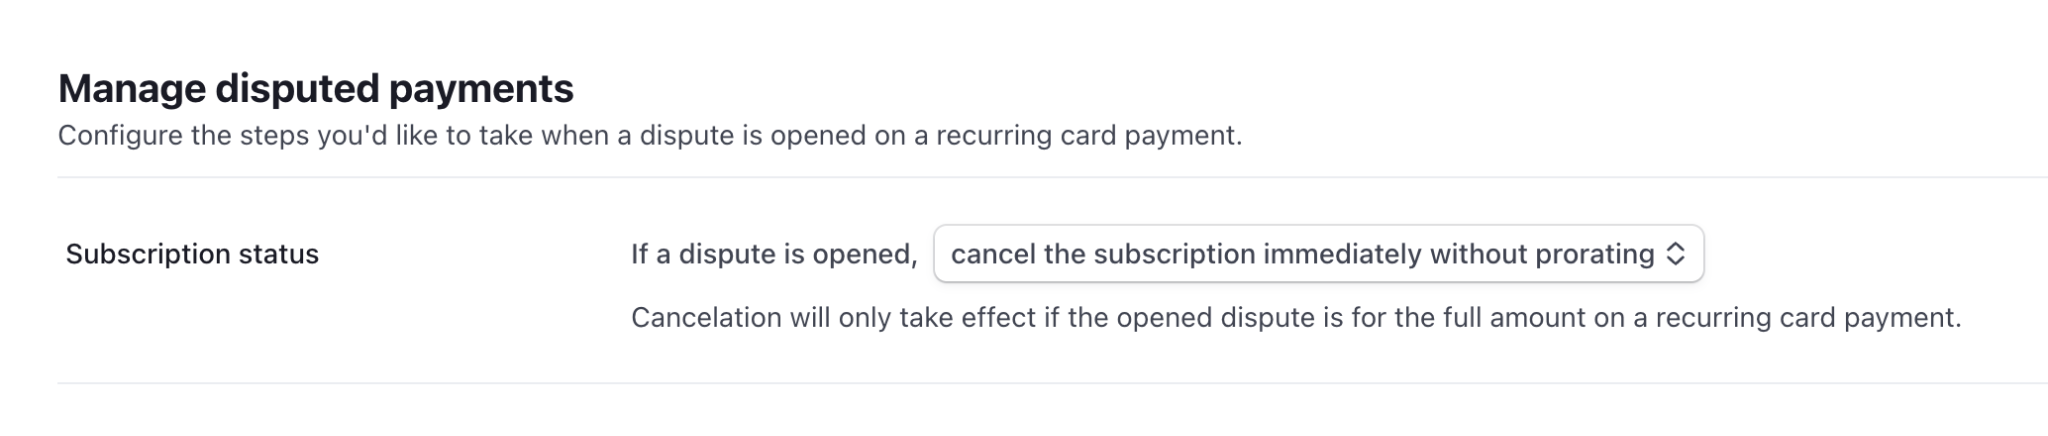
-
When a dispute does happen, turn this rule on so that their subscription is canceled immediately. This is because most people that start a chargeback generally don’t try to cancel their subscription and end up getting charged again next month which causes them to open another dispute. You want to completely avoid this situation. Set the below setting in Settings > Billing > Manage disputed payments
-
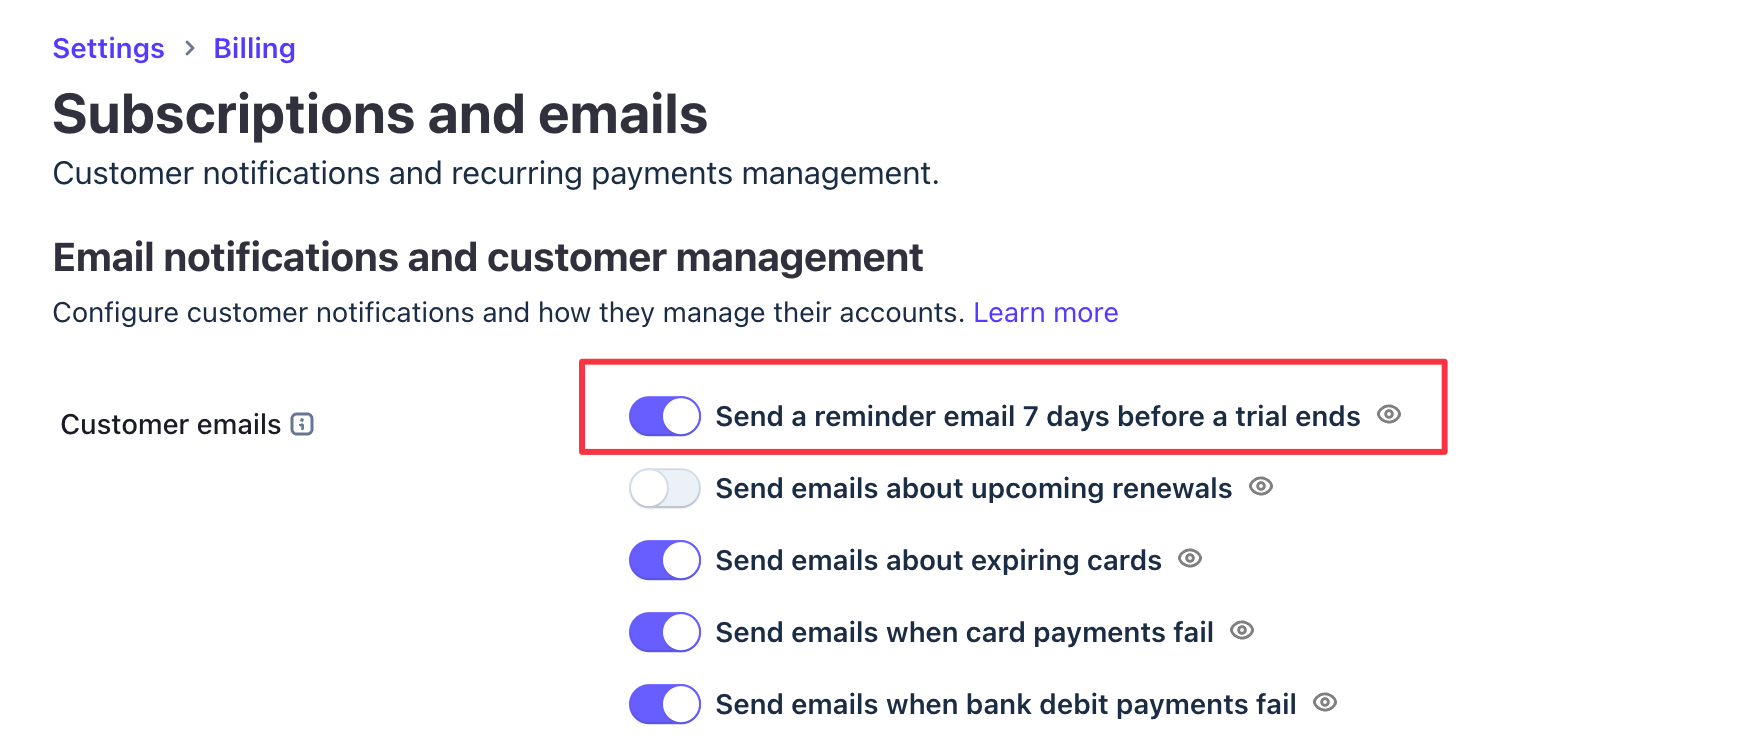
Remind your customers that the trial is converting to paid soon. Many customers will forget that they signed up for a trial product and be angry when the payment hits their bank account. Turn on the automatic email reminder setting in Settings > Billing > Subscriptions and Emails:
-
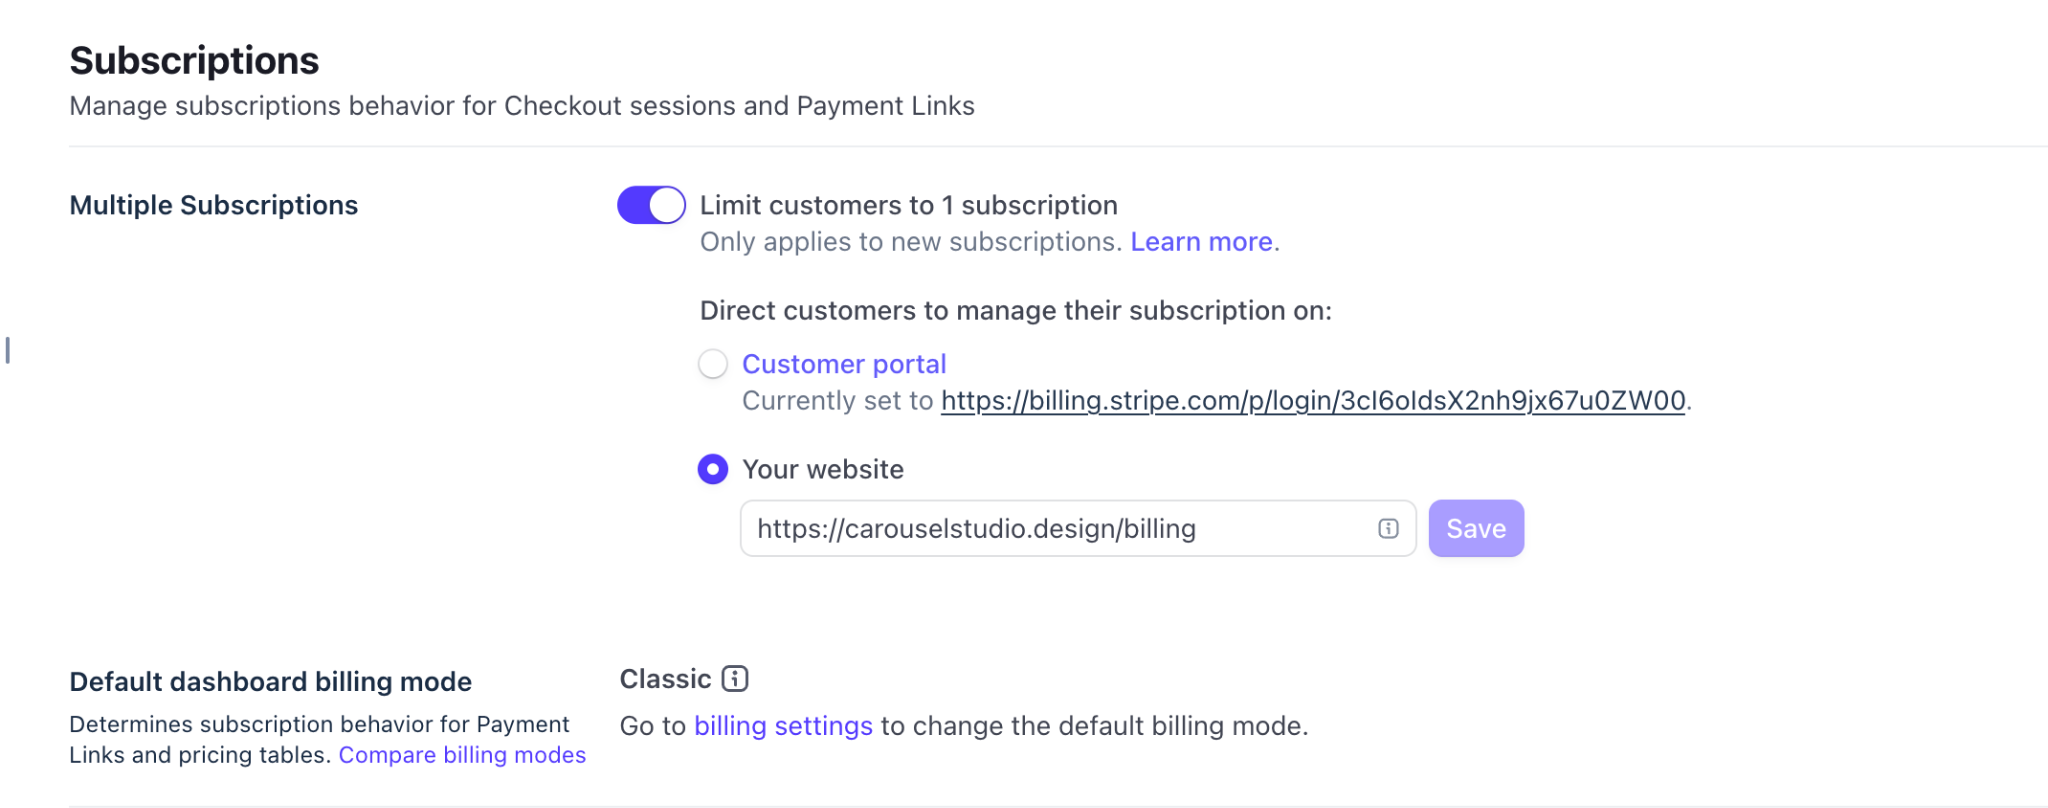
Very often customers will click the Checkout button multiple times and start multiple subscriptions without realizing it. You’ll definitely get emails from disgruntled customers. There’s a setting in Stripe that lets you limit each customer to one subscription to avoid this situation. Enable it in Settings > Payments > Checkout and Payment Links > Subscriptions.
-
Purchasing Parity: Since Canva users are global, you’ll also get global customers for your app that might not be able to pay the subscription price you’ve set for the highest paying region (NA). Setting up purchasing parity where you give users discounts based on the country they’re accessing your app from is a good way to make your app accessible across the world. Set up Parity Deals(opens in a new tab or window), it adds a JS script to your website that detects where the user is visiting from and based on your geo rules applies a Stripe discount coupon to their purchase.
-
Don’t use your personal email address as the Stripe Support email address. Set it to a different email completely otherwise your personal account will keep getting hammered with customer requests faster than you can resolve them. 99% of the requests will be about refunds.