Autofill Platform
Automate Canva with n8n using the official Canva node
Turn structured data into editable Canva designs with Autofill, then review, share, export, and deliver creative work across your stack.
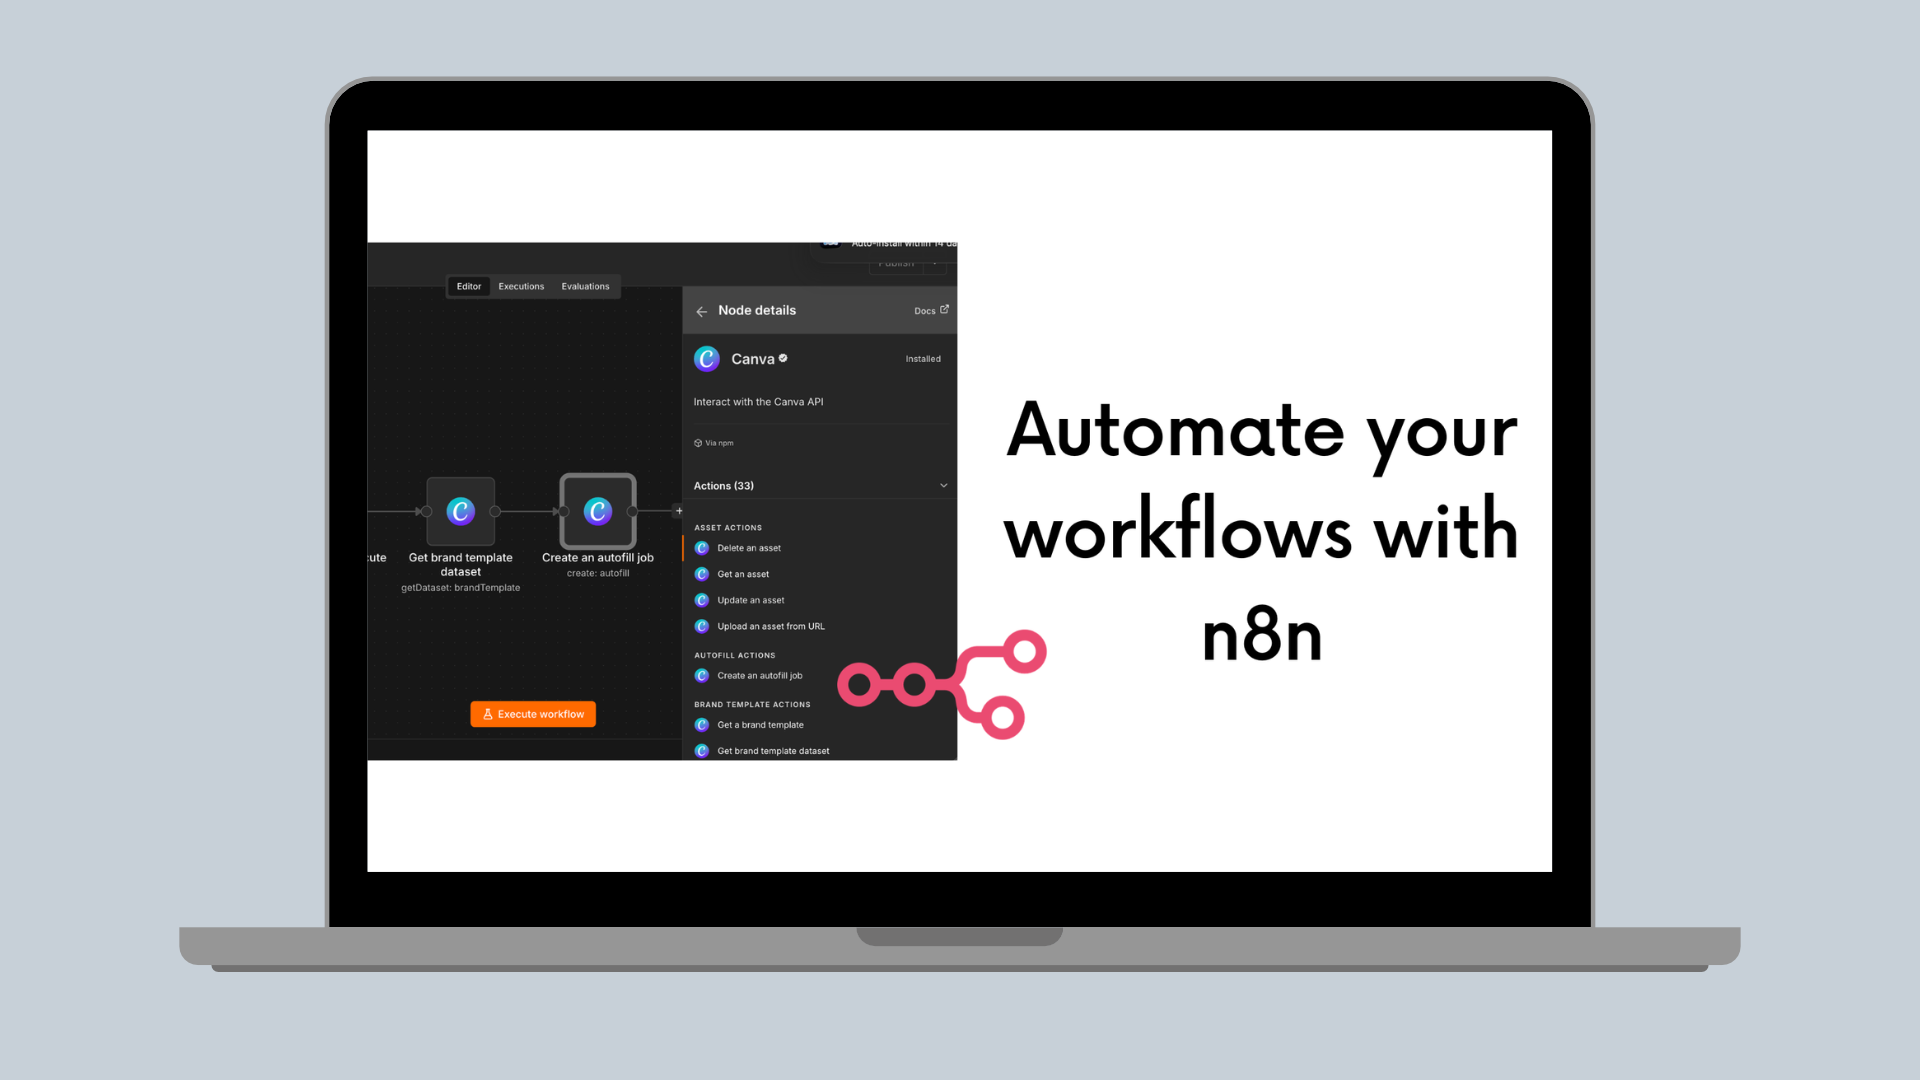
The official Canva node for n8n(opens in a new tab or window) helps teams turn structured data from forms, CRMs, spreadsheets, CMSs, and internal systems into editable, reusable Canva designs. Instead of generating a static file, your workflow can create a design that teams can review, share, customize, and export when it’s ready.
Autofill can populate Canva brand templates with approved text, images, and business data directly from an n8n workflow. That means teams can generate listing flyers, proposals, reports, certificates, social content, and other branded materials without writing HTTP requests.
The same node can also automate common creative operations like uploading assets, importing designs, exporting files, organizing folders, and moving creative through approval or delivery workflows.
Built on the Canva Connect API, the Canva node brings Canva actions into n8n’s visual workflow builder, so you can connect design creation with the systems where your work already starts.
What the Canva node adds to n8n
The Canva node gives n8n workflows a direct way to work with Canva designs, assets, and exports without custom HTTP requests. You can use it to create editable Canva designs from brand templates, move files into and out of Canva, and connect creative work to the rest of your automation stack.
With the Canva node, you can:
- Populate Canva brand templates with Autofill
- Retrieve template fields before running a workflow
- Upload images and other assets to Canva
- Import external files into Canva
- Export Canva designs as PDFs, images, presentations, or other formats
- Organize designs and assets in Canva folders
- Pass Canva design links or exported files to tools like Slack, email, cloud storage, CRMs, CMSs, and approval systems
In agent workflows, the Canva node works best as a bounded action: an AI agent can gather requirements, choose a template, check required fields, ask for missing information, then call Canva to create, export, import, upload, resize, or organize the design.
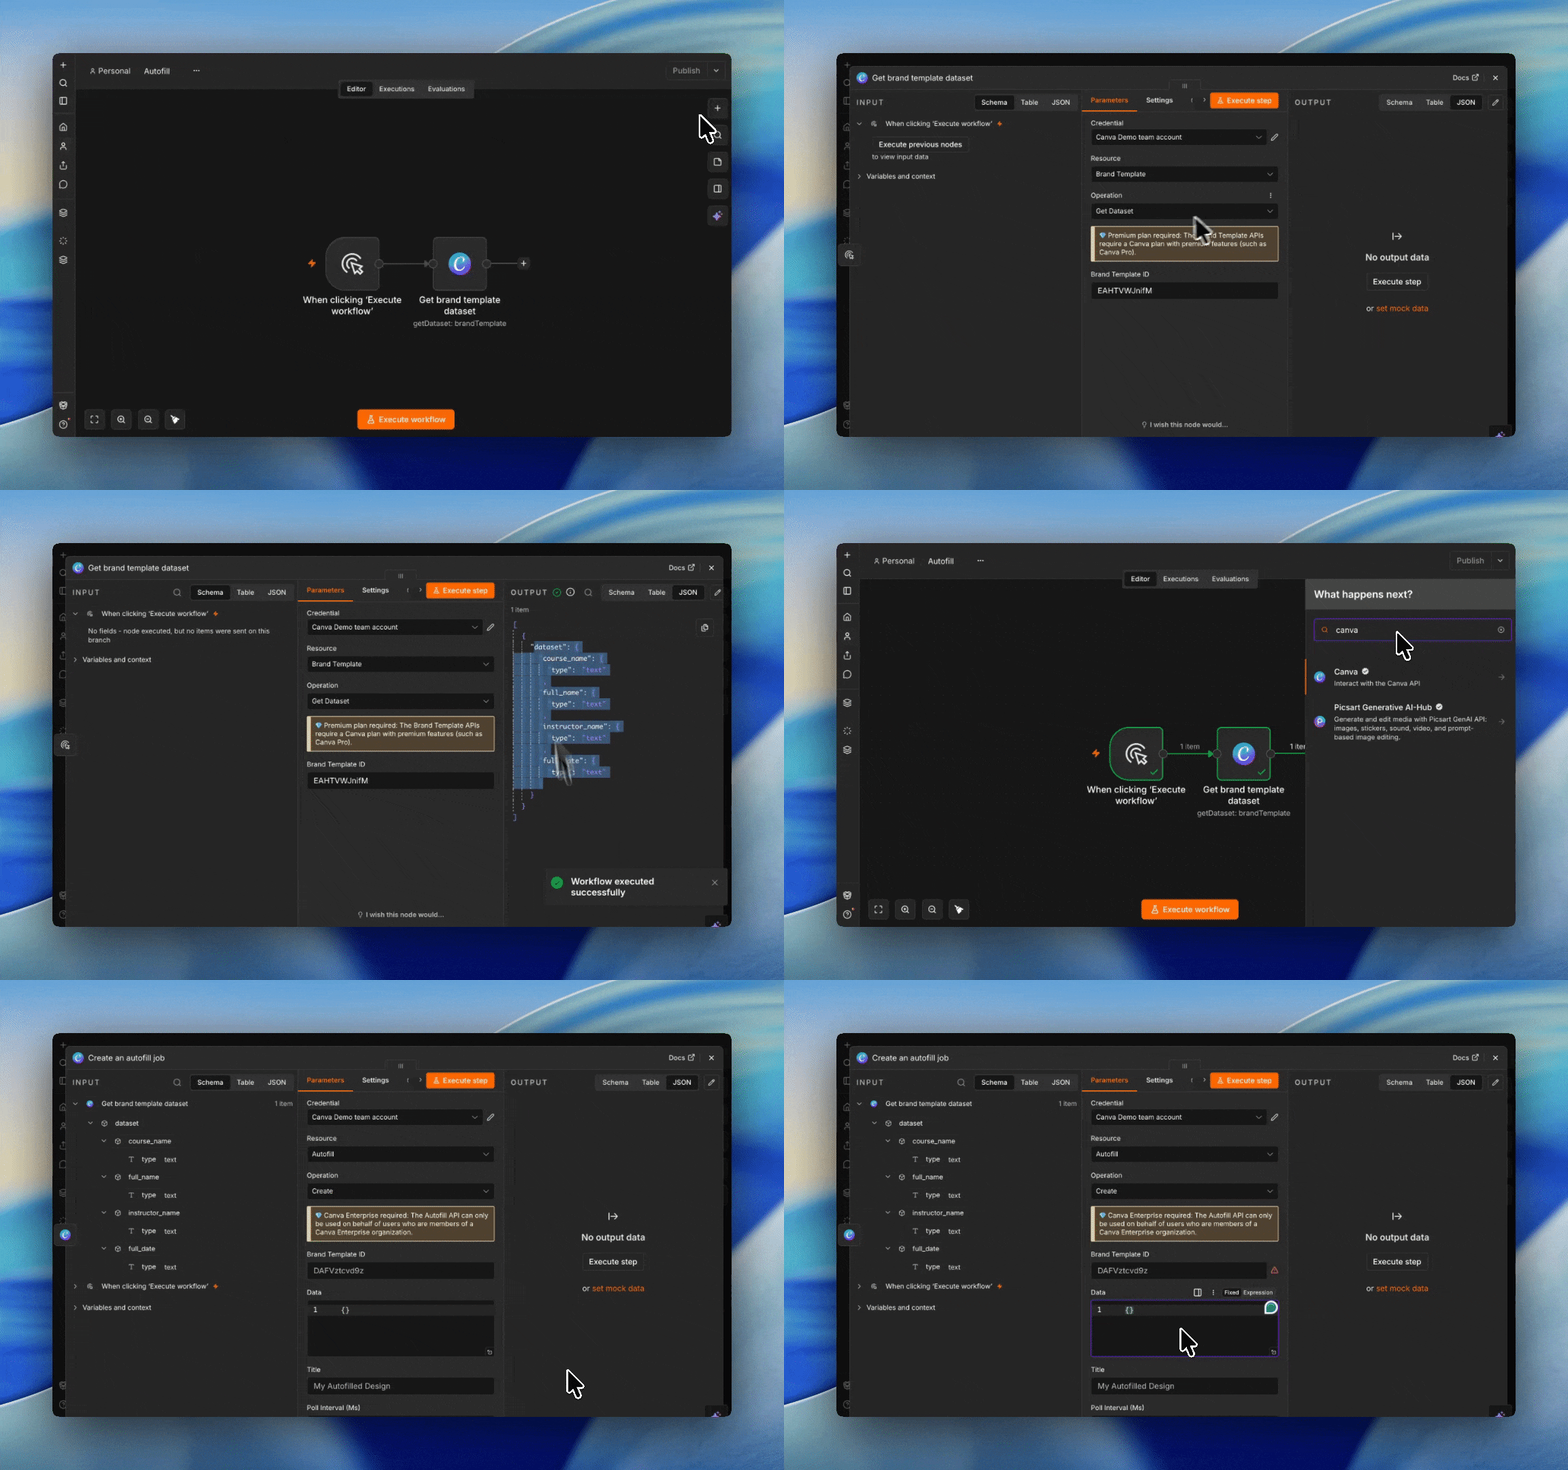
How Autofill works in an n8n workflow
Autofill lets an n8n workflow populate a Canva brand template with structured data. The source can be a form submission, CRM record, spreadsheet row, CMS entry, internal database record, webhook payload, or agent request.
A typical Autofill workflow looks like this:
Trigger → Source data → Field validation → Template selection → Canva Autofill → Editable Canva design → Review → Share or export
Here’s what each step does:
Step | What happens |
|---|---|
Trigger | A form, webhook, CRM update, spreadsheet row, CMS publish event, schedule, or agent request starts the workflow. |
Source data | n8n pulls the text, images, metrics, contact details, product data, or other fields needed for the design. |
Field validation | The workflow checks that required values are present before creating the design. |
Template selection | The workflow chooses the right Canva brand template for the use case, audience, region, campaign, or output type. |
Canva Autofill | The Canva node fills the template with mapped text, images, tables, charts, or other supported data. |
Editable Canva design | The output is a Canva design your team can open, edit, comment on, share, reuse, or export. |
Review | Optional approval steps help teams check brand, legal, compliance, sales, or customer-facing content before delivery. |
Share or export | The workflow can send a Canva design link, export a PDF or image, save the file to cloud storage, attach it to a CRM record, or notify a team in Slack or email. |
Because the result stays editable in Canva, automation doesn't have to be the final step. n8n can create the first version, then your team can keep refining, approving, and distributing the design from Canva.
Autofill and brand templates are available to users on Canva Pro, Canva Teams, or Canva Enterprise. Usage limits will be introduced in the future.
Autofill workflow ideas
The same building blocks can be used to automate many other creative workflows, including:
-
MLS / CRM → Data validation → Canva Autofill → PDF + social exports → Cloud storage / email Generate branded “just listed,” open house, listing flyers, and social media packs from property, agent, and MLS data. Build this now ➜(opens in a new tab or window)
-
CRM → Template selection → Canva Autofill → Approval → Email / sales workspace Create personalized proposals, pitch decks, CMAs, or sales collateral using account, opportunity, pricing, and contact data.
-
Spreadsheet / BI export → Metrics formatting → Canva Autofill → PDF report → Email / Drive Turn employee, team, campaign, or performance data into standardized reports without manually rebuilding decks or PDFs.
-
Approved data source → Compliance checks → Canva Autofill → Review queue → Final export Generate regulated marketing materials while keeping copy, disclaimers, logos, and required fields consistent.
-
Product catalog / CMS → Batch generation → Canva Autofill → Social media scheduler / asset library Create many branded product graphics, ads, or content variants from structured catalog or CMS data.
-
Form submission → Canva Autofill → PDF export → Email / portal upload Generate certificates, invitations, contact sheets, confirmations, onboarding documents, or other templated documents from user-submitted data. Build this now ➜(opens in a new tab or window)
-
Platform database → Canva Autofill → User-ready design link / downloadable asset Reduce self-service friction by pre-populating templates with names, addresses, contact details, photos, or organization-specific information.
Whether you're creating social media graphics, marketing collateral, personalized documents, or AI-powered content, the Canva node makes it simple to bring Canva into your existing automation workflows.
Other workflows with the Canva node
If your workflow doesn't need to populate a brand template with structured data, the Canva node can still automate repetitive creative operations around Canva designs, assets, imports, exports, and folders.
For example:
-
Canva design → Export PDF/PNG → Email / Drive / Slack
Export an approved Canva design and send it to the right people or systems. -
Product image URL → Upload asset to Canva → Organize in folder
Bring campaign, product, or content assets into Canva and keep them organized. -
External PDF / PPTX → Import into Canva → Share design link
Turn existing documents or presentations into editable Canva designs. -
Approved Canva design → Export → DAM / campaign folder
Move final creative into an asset library, campaign folder, or review system. -
Canva design → Resize → Social variants
Create channel-specific versions of a design for social, ads, or campaign distribution.
These workflows don't replace Autofill, but they help teams connect Canva to the systems where creative work starts, gets reviewed, and gets delivered.
Get started
The Canva node is available now as an n8n Community Node(opens in a new tab or window).
Visit the GitHub repository for installation instructions, supported operations, and example workflows:
https://github.com/canva-sdks/n8n-nodes-canva(opens in a new tab or window)
Need help getting started? Try our examples:
- Course certificate generation(opens in a new tab or window)
- Real-estate flyer creation(opens in a new tab or window)
Install the Canva node, import the example workflow, and start automating your creative workflows today.
If you have feedback or encounter any issues, we'd love to hear from you by opening an issue on the GitHub repository.
We can't wait to see what you build with Canva and n8n.